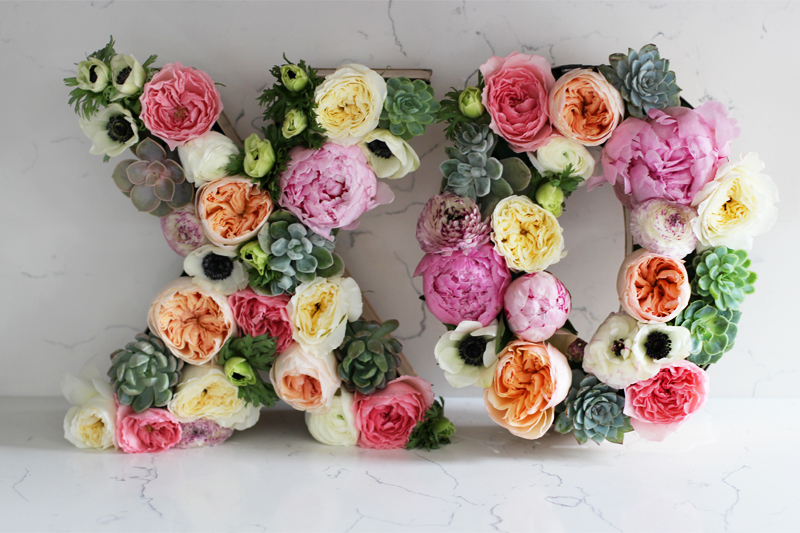
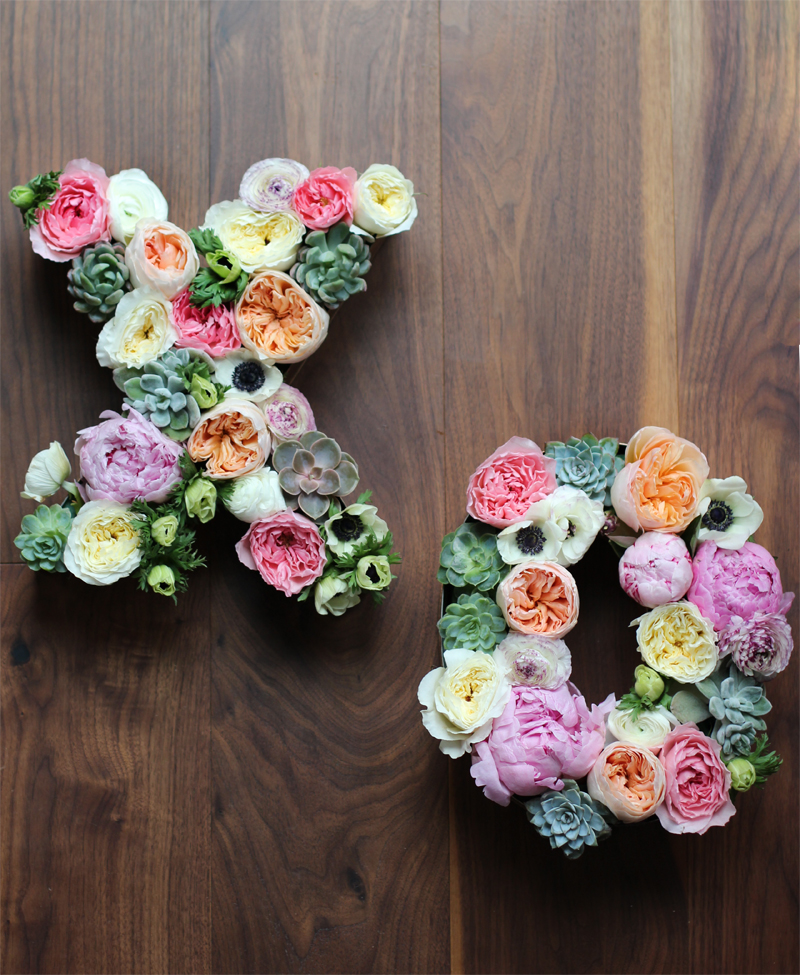
Nothing embodies Valentine’s Day more than flowers. Ok, chocolate too. And maybe even a pretty cocktail. More on those next week. But honestly, have you ever seen a flower you didn’t LOVE? They are sumptuous, fragrant, and breathtakingly beautiful. When I spotted an assortment of metal letters at boutique a few months ago, I thought they’d make the perfect vessel for a floral arrangement. And when I happened to score on an X and an O, well, it was just destined to be the inspiration behind this Valentine’s Day DIY!
You need:
- flowers (I used succulents, garden roses, peonies, anemones and ranunculus)
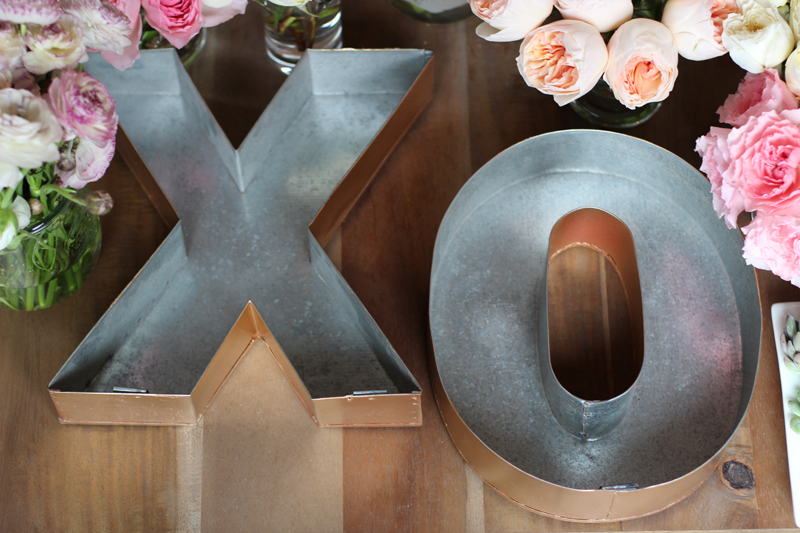
- metal marquee letters
- garden clippers
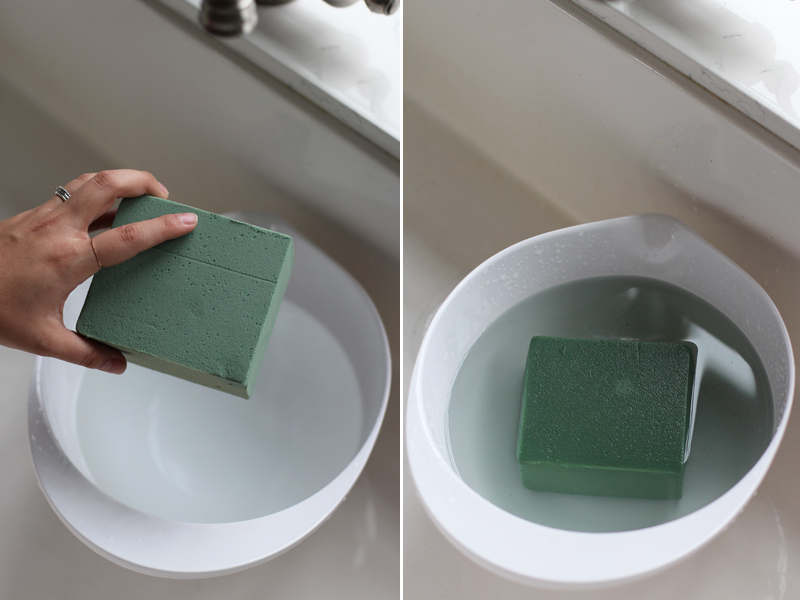
- wet floral foam
- large bowl
- toothpicks
Flower Muse was kind enough to send a selection of my favorite flowers for this project. They are a farm direct floral company that has exceptional quality flowers at very reasonable prices. And they are kind enough to offer our readers 15% off orders for the entire month of February with code: HWTF15.
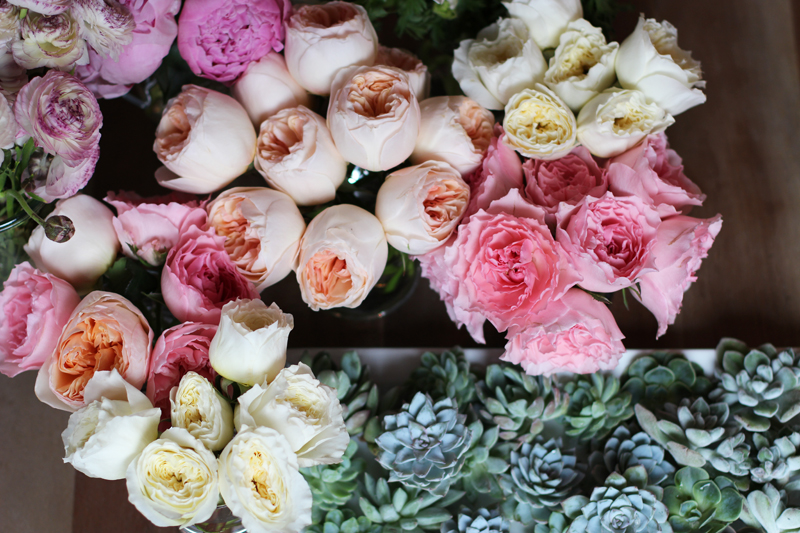
When you receive your flowers, always trim off at least an inch off the ends before placing them in water. It is recommended to snip them underwater to prolong the freshness. I like to do this inside a large bowl filled with lukewarm water. To help the roses bloom, you can give them a safe little head start by plucking away some of the outer petals and gently spreading the petals out from the center. Place them in a warm place or under light sunlight. And of course, all flowers should be drinking clean, fresh H2O!

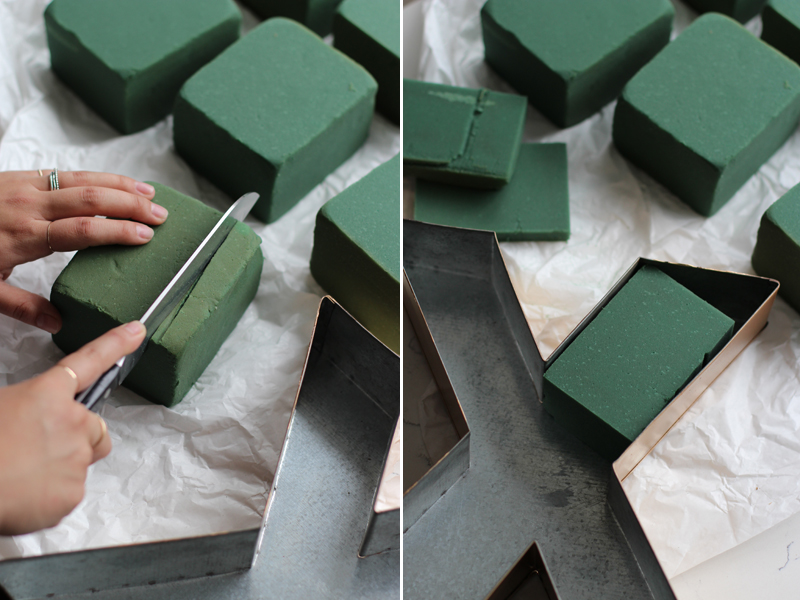
To start, fill a large bowl with lukewarm water. Submerge the floral foam blocks until it has soaked up lots of water and sinks to the bottom.
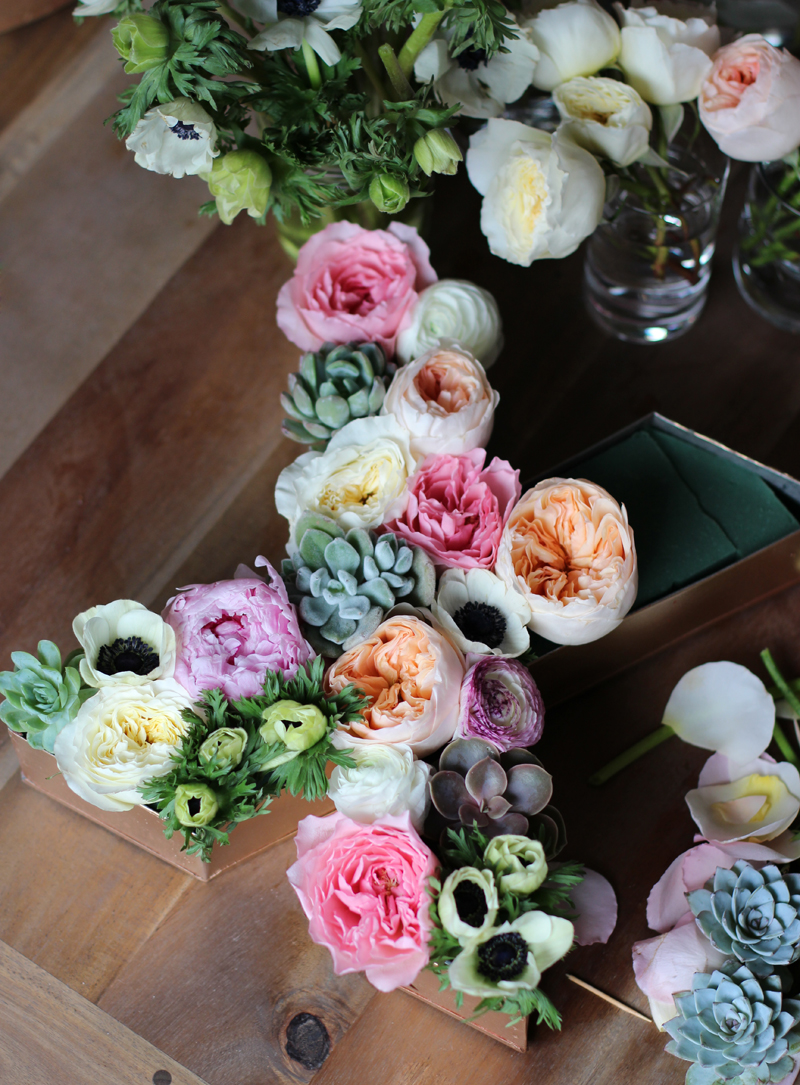
After all the floral foam blocks have been soaked, use a knife to trim the pieces to fit inside the metal letters. You can always use cardboard craft letters if you can’t find metal ones. All you would need to do is use an exacto knife to cut the top off and line the inside with plastic wrap. Be sure to fill all of the empty spots with foam. It’s like playing Tetris!
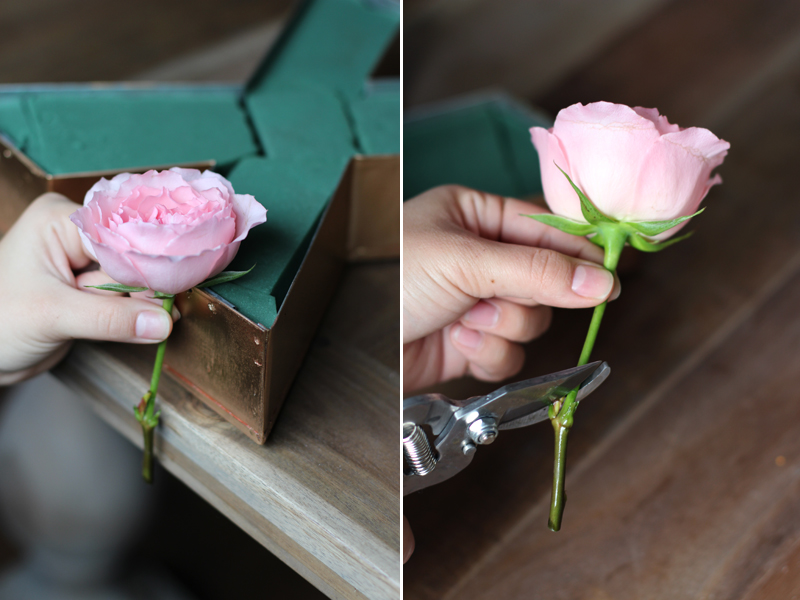
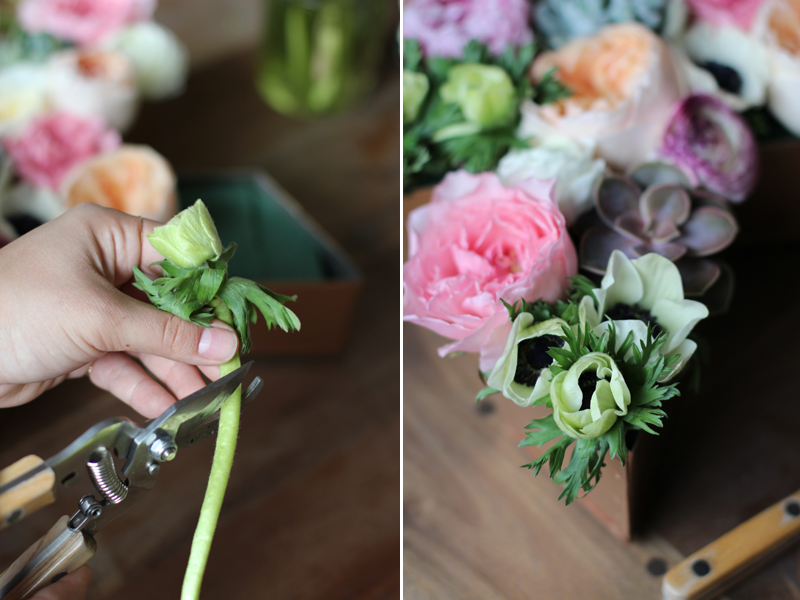
To begin your arrangement, measure a floral stem against the side of the letter. Trim the stem at clean angle and insert into the foam. I like to start one corner and work my towards the center.
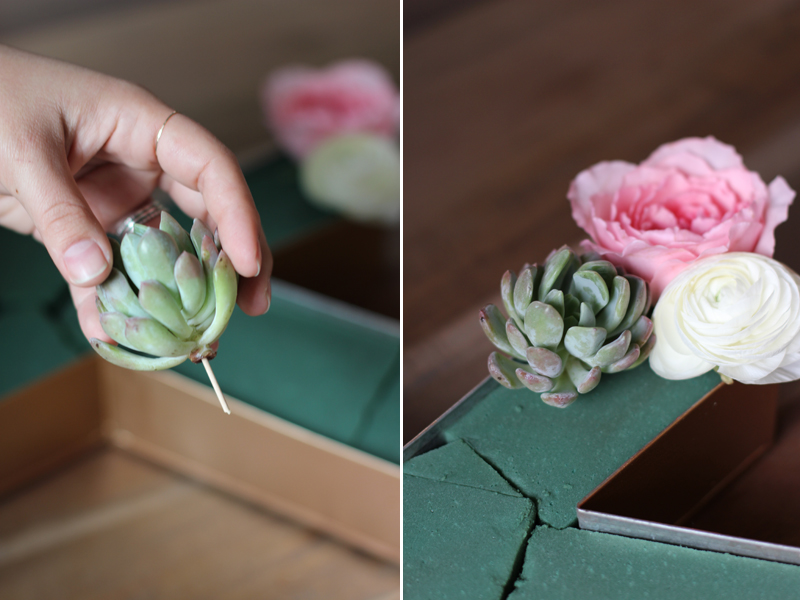
Since succulents don’t have stems, you can pierce the bottom with a toothpick.
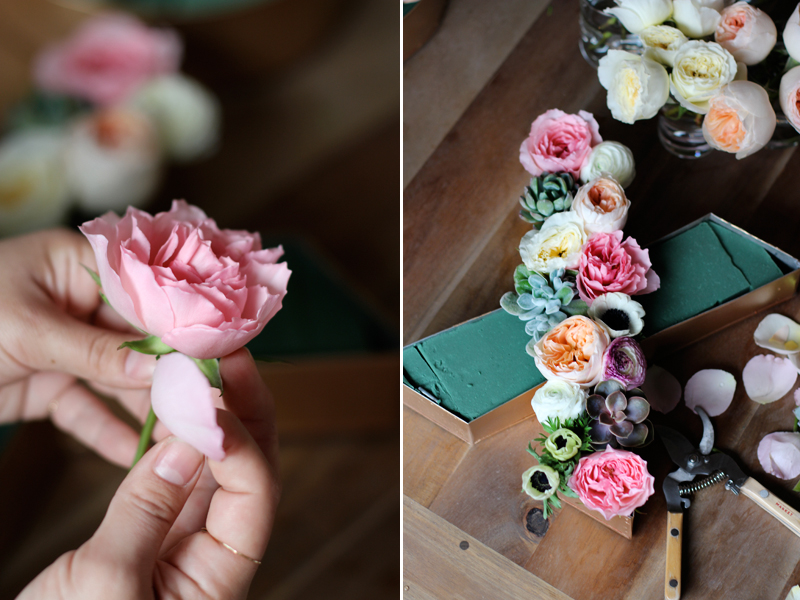
And if some of the flowers are too wide for the space you are trying to fill, you can easily remove some of the petals to get it down to the appropriate size.
Little buds are a great way to fill tiny, empty corners and cracks.
Can we talk about how utterly gorgeous these garden roses are for a second? This was the first time I had the chance to experiment with them and I was just mesmerized by them. And in this They are now an absolute favorite of mine! Anyway, continue adding flowers . . .
Spray occasionally with water and enjoy! XOXO
(images by HonestlyYUM; 15% off flowers at Flower Muse with code HWTF15)
I have been (semi) obsessed with flowers this past year when I moved into my own home alone. I wanted to keep the beautiful fresh flowers I would find, so I started to dry them. Do you think this project would work using dried flowers? If so, how would you go about preserving them? Just curious if you had any experience or tips on crafts using dried flowers and petals. Thanks! I love this idea and think I may just go ahead and try it but use cardboard to make my own letters and the collection of dried flowers I currently have covering my kitchen counters.
I LOVE the idea of using dried florals. If you end up creating this idea, can you update us on how it turned out? I love this tutorial but I would want to try something that lasts longer than a couple days and dried florals sounds like the way to go! Thanks in advance.
Do you think I could use a marquee letter with the lights in it? I have dried flowers. Could I glue them onto foam I put around the lights, what do you think? Or could I do it your way and weave in fairy lights? I have so many questions lol. Thanks for your help!!
Hello where I can get the metal letters? I click the link in the supply list but is not working anymore
Should the foam boxes be glued down with a hot glue gun if I want the letters to stand up?
These letters are such a great idea for a place card table for a wedding. i love the colors, and it would be great with the Bride and Groom initials.
XoXo,
Bubbling Brides
http://www.bubblingbrides.com
Hello! Tried out your diy project and it turned out beautiful. Just a quick question. Did you try standing these letters up and if u did, did you have any problems with water leaking out from the bottom of the letters?
Hi There!! i love the XO!! I can not find the hollow metal letters any where. Do you have any suggestions as to where I could find those metal letters? (XO)
Thank you!
Mimi
Hi Mimi – the source for the metal letters is linked in the supply list directly underneath the 1st image of the post. Thanks for checking out the site!
hello there! i love the XO flowers! I have been looking everywhere for metal, hollow XO letters and I cannot find them any where! Do you have any suggestions where I could find them?
Thanks so much!
Amazing post! Love how you mixed English roses with succulents:)
I normally use ready made oasis shapes, as I am a bit lazy.
♡ http://www.thesmellofroses.com – blog about flowers ♡
This is a beautiful gift idea as well. I love the use of succulents too!
Where can I find those metal letters?
This is absolutely gorgeous!!!!! What a beautiful idea!
This is so incredible! Genius idea and the flowers look so pretty. I also adore that you used succulents. So creative! I can’t wait to try this sometime.
Thanks for sharing.
Happy weekend & a new follower on Bloglovin,
xx. Jillian
http://www.roadtohereblog.com
This has to be the most stunning flower arrangement I’ve ever seen! Really beautiful tutorial Erica.
Oh, I love this!
What a brilliantly simple idea and beautiful result!
I always used to read paragraph in news papers but now as
I am a user of internet thus from now I am using net for articles
or reviews, thanks to web.
Wow, how beautiful! I am so impressed, what a fun way to mix it up instead of classic roses for Valentine’s Day!
You make this look so easy! It’s just gorgeous!!
This is just beautiful! I am not much of a DIY-er but I’m tempted to give this a try…
amazing and easy to do!!! i love this DIY
http://www.stelstyle.com