This coming weekend is very special for a couple reasons. First, Clay and I are celebrating our one year wedding anniversary! This past year has flown by and it felt like just a few months ago that we said our vows in Palm Springs with all our loved ones and jetted off to Sri Lanka and the Maldives on a trip of a lifetime for our honeymoon. Second, this weekend is also Mother’s Day and will be a particularly special one for us since I’m 23 weeks pregnant and will be a mommy soon!! Clay and I will be welcoming our little son September 2nd (or some day around then) and we cannot wait to kiss his cheeks and squeeze his little feet. Pregnancy has been such an incredible journey and every week that goes by we get more and more excited to meet our little baby.
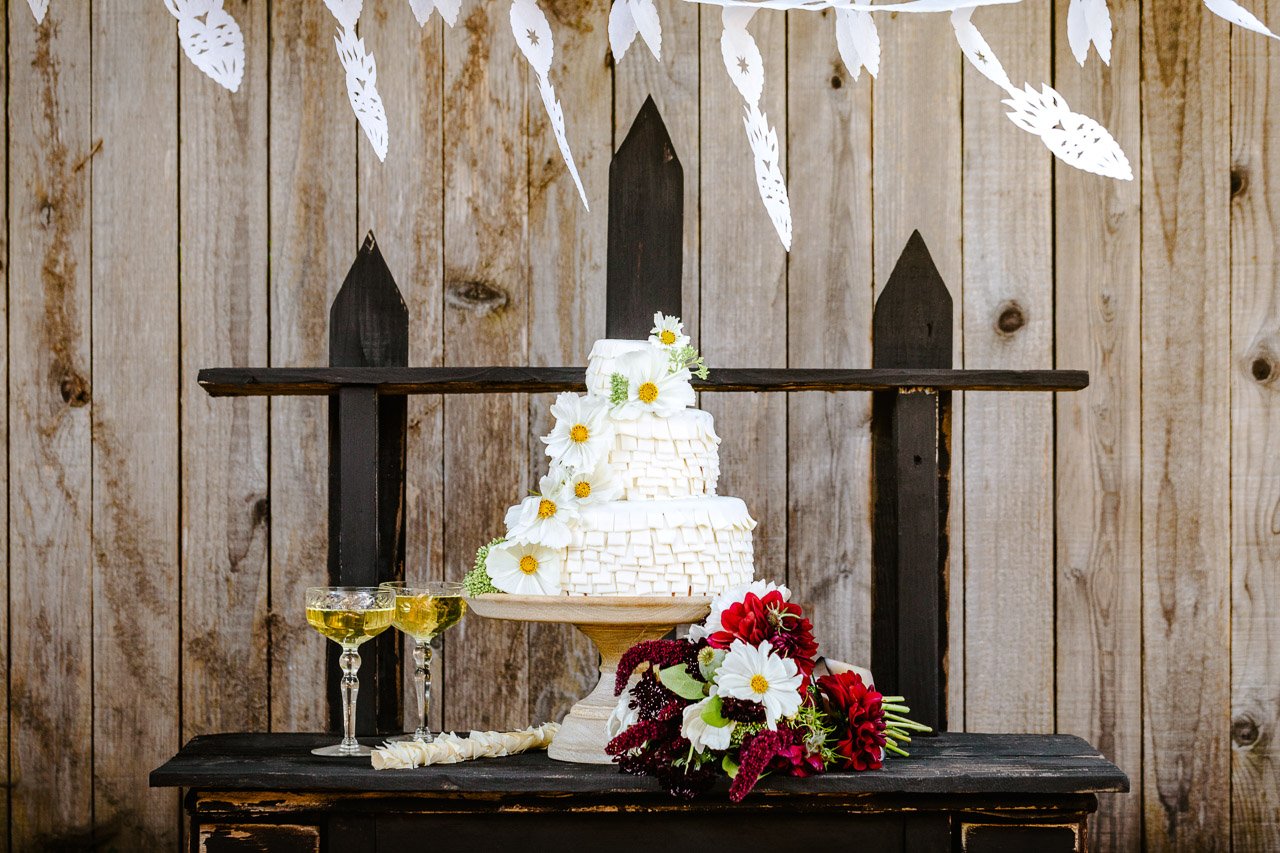
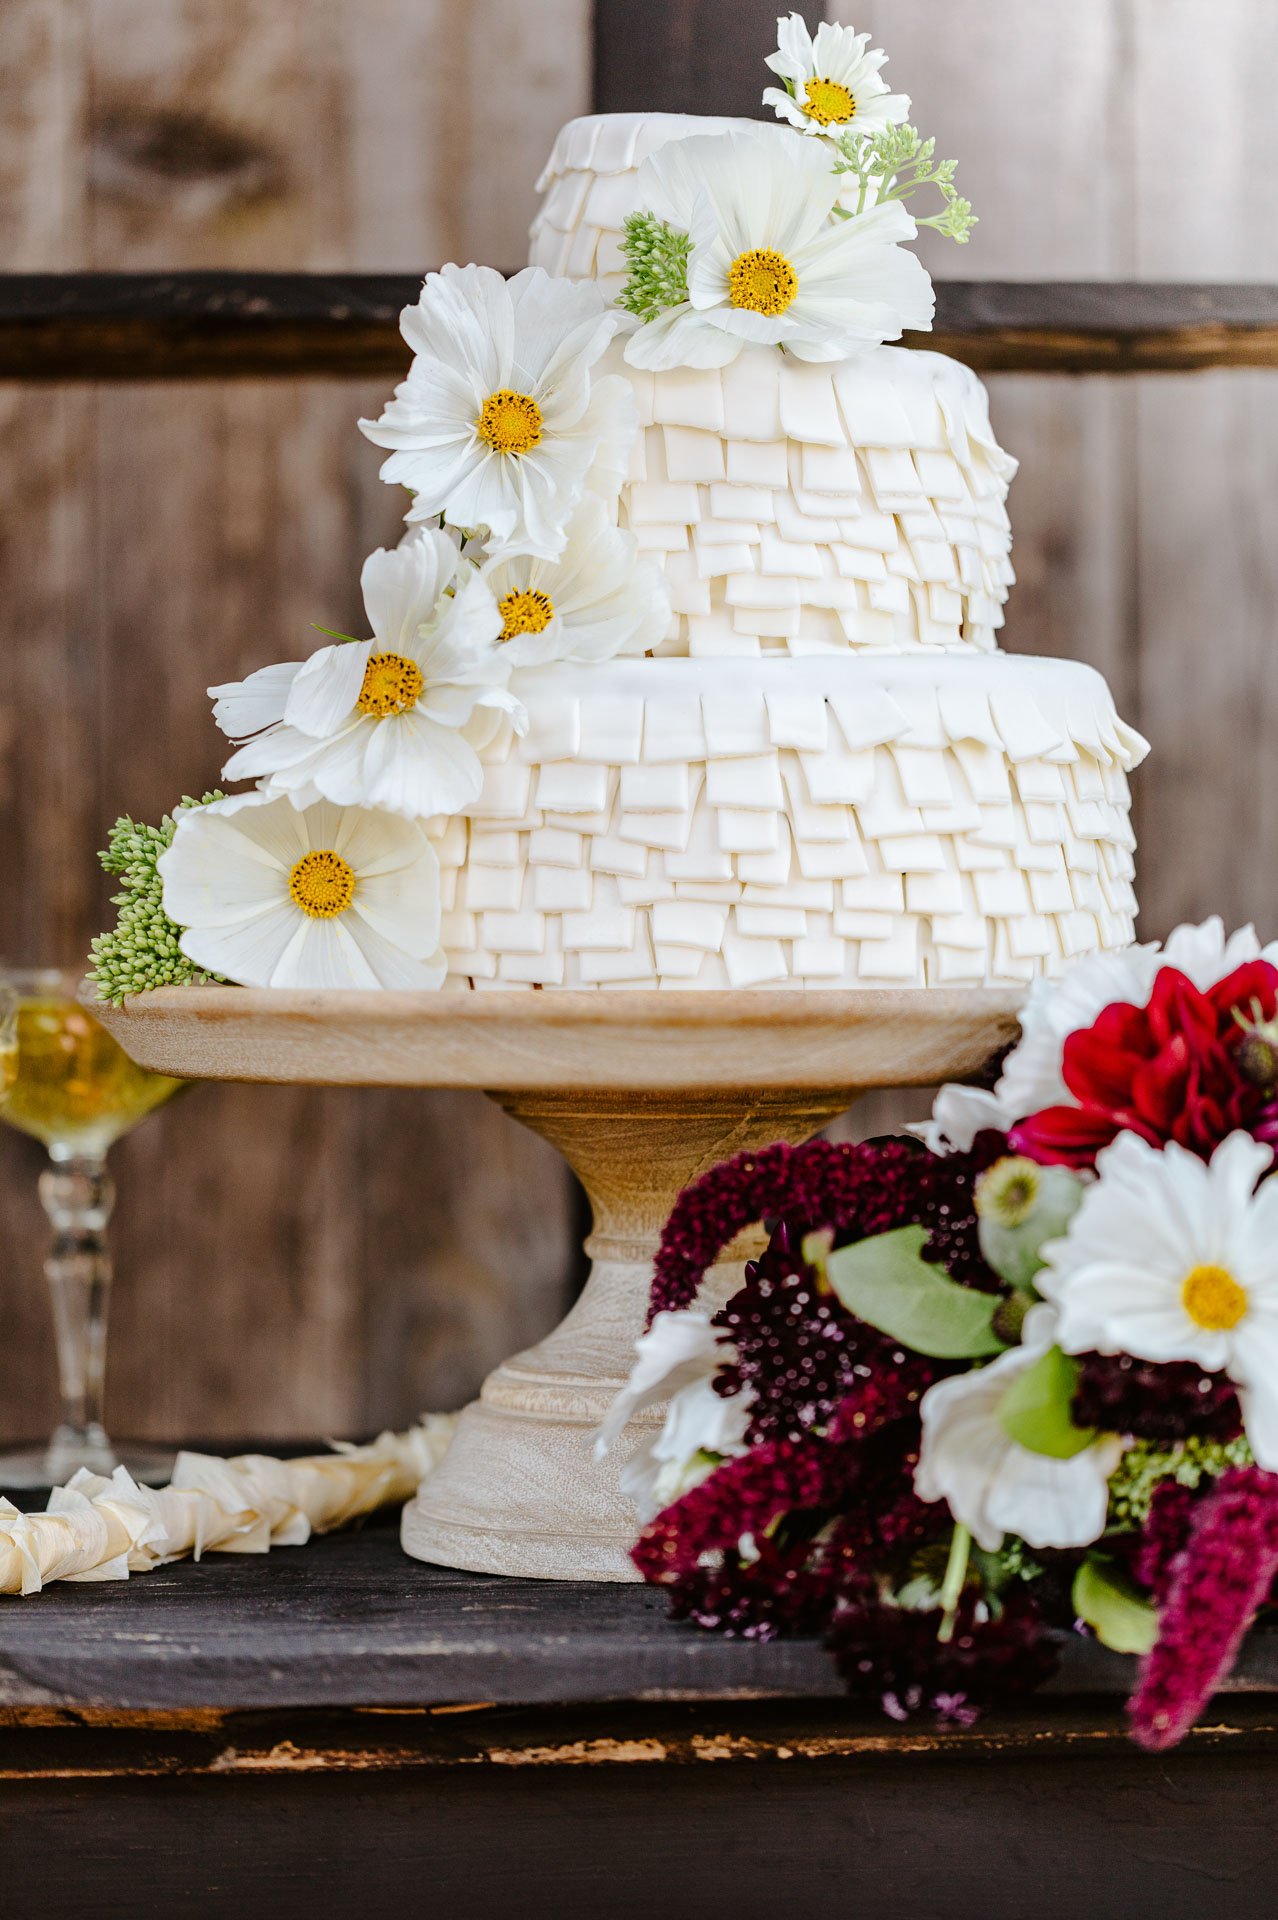
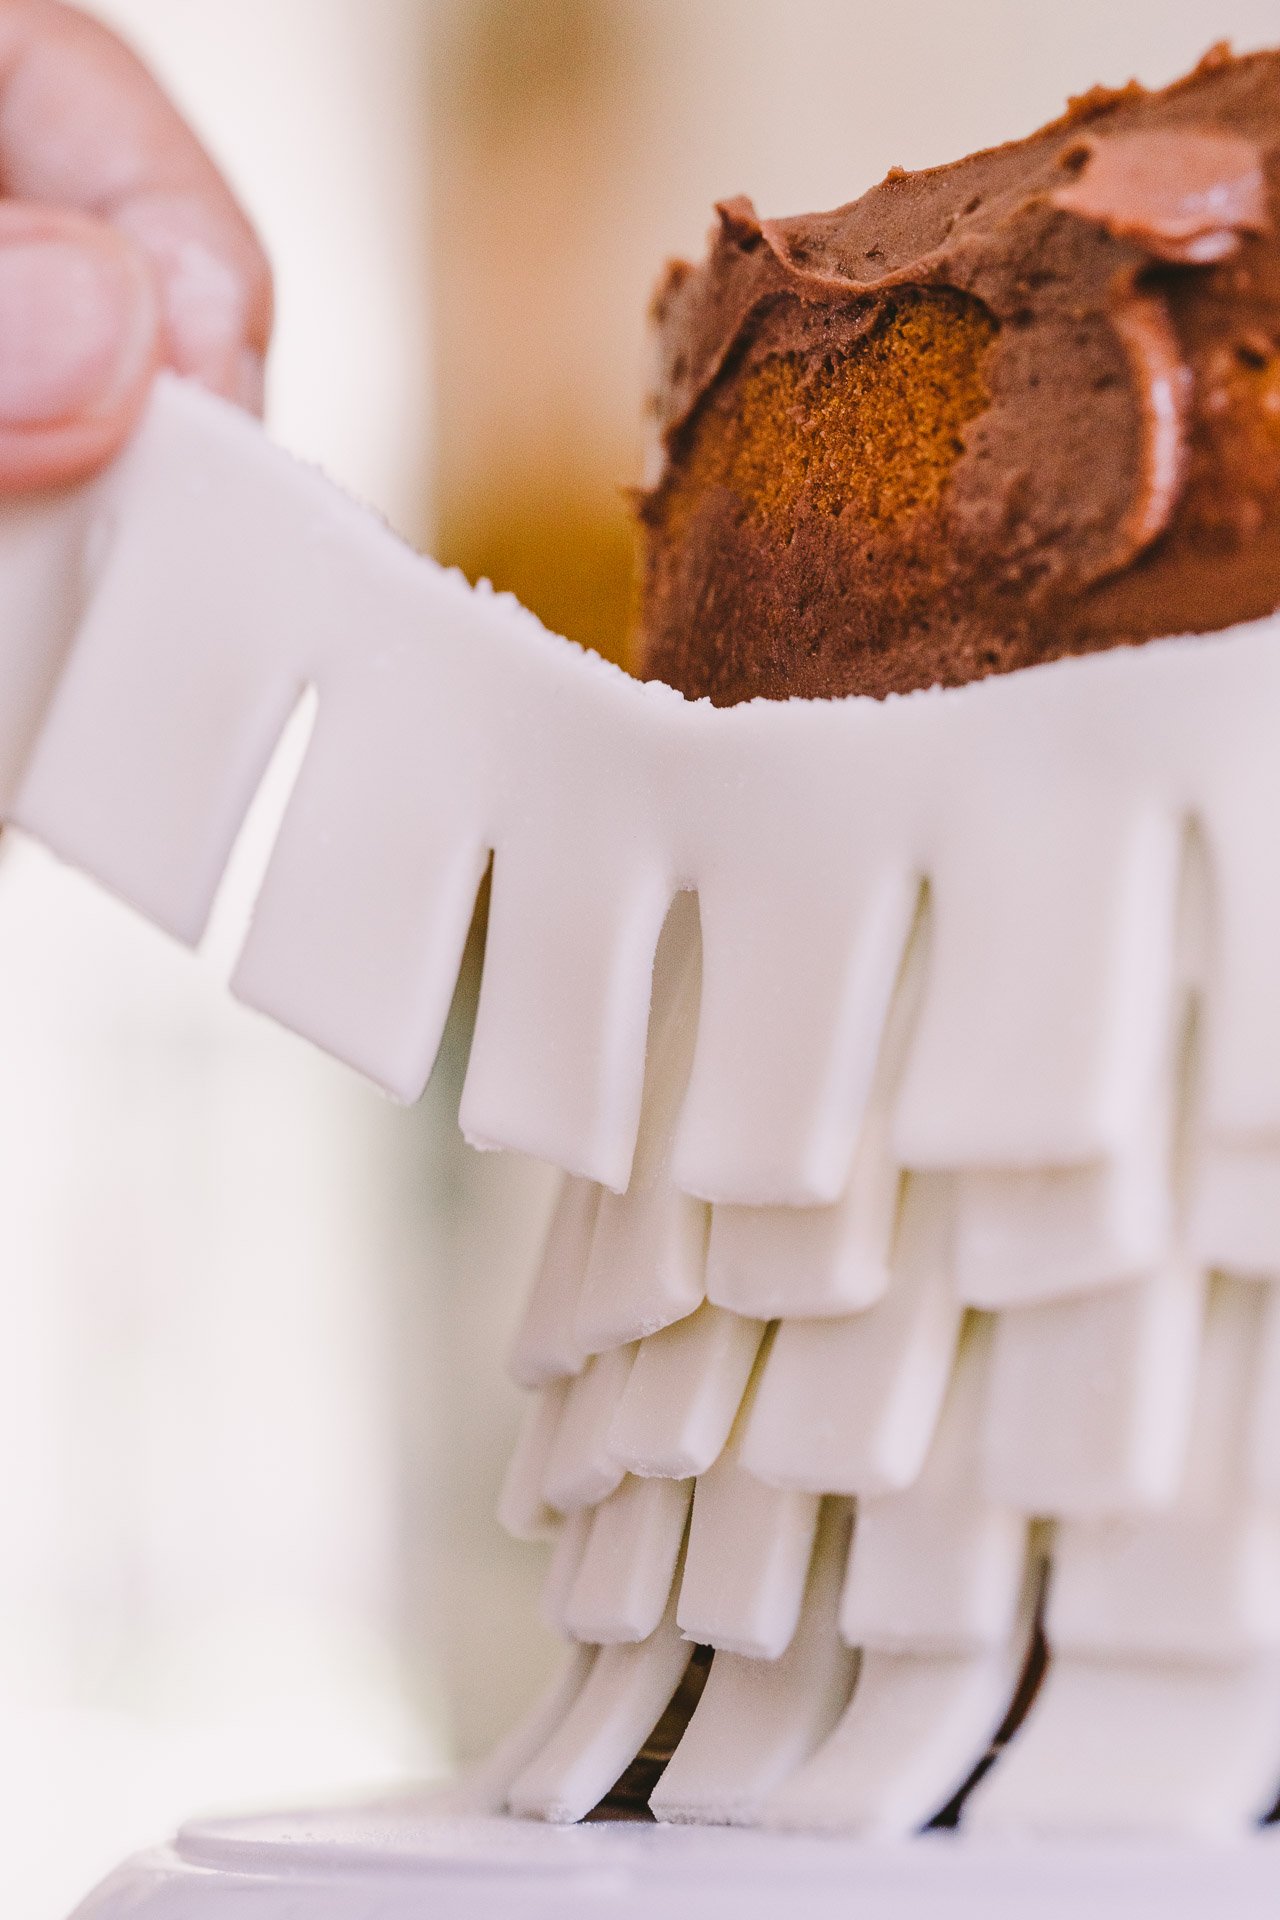
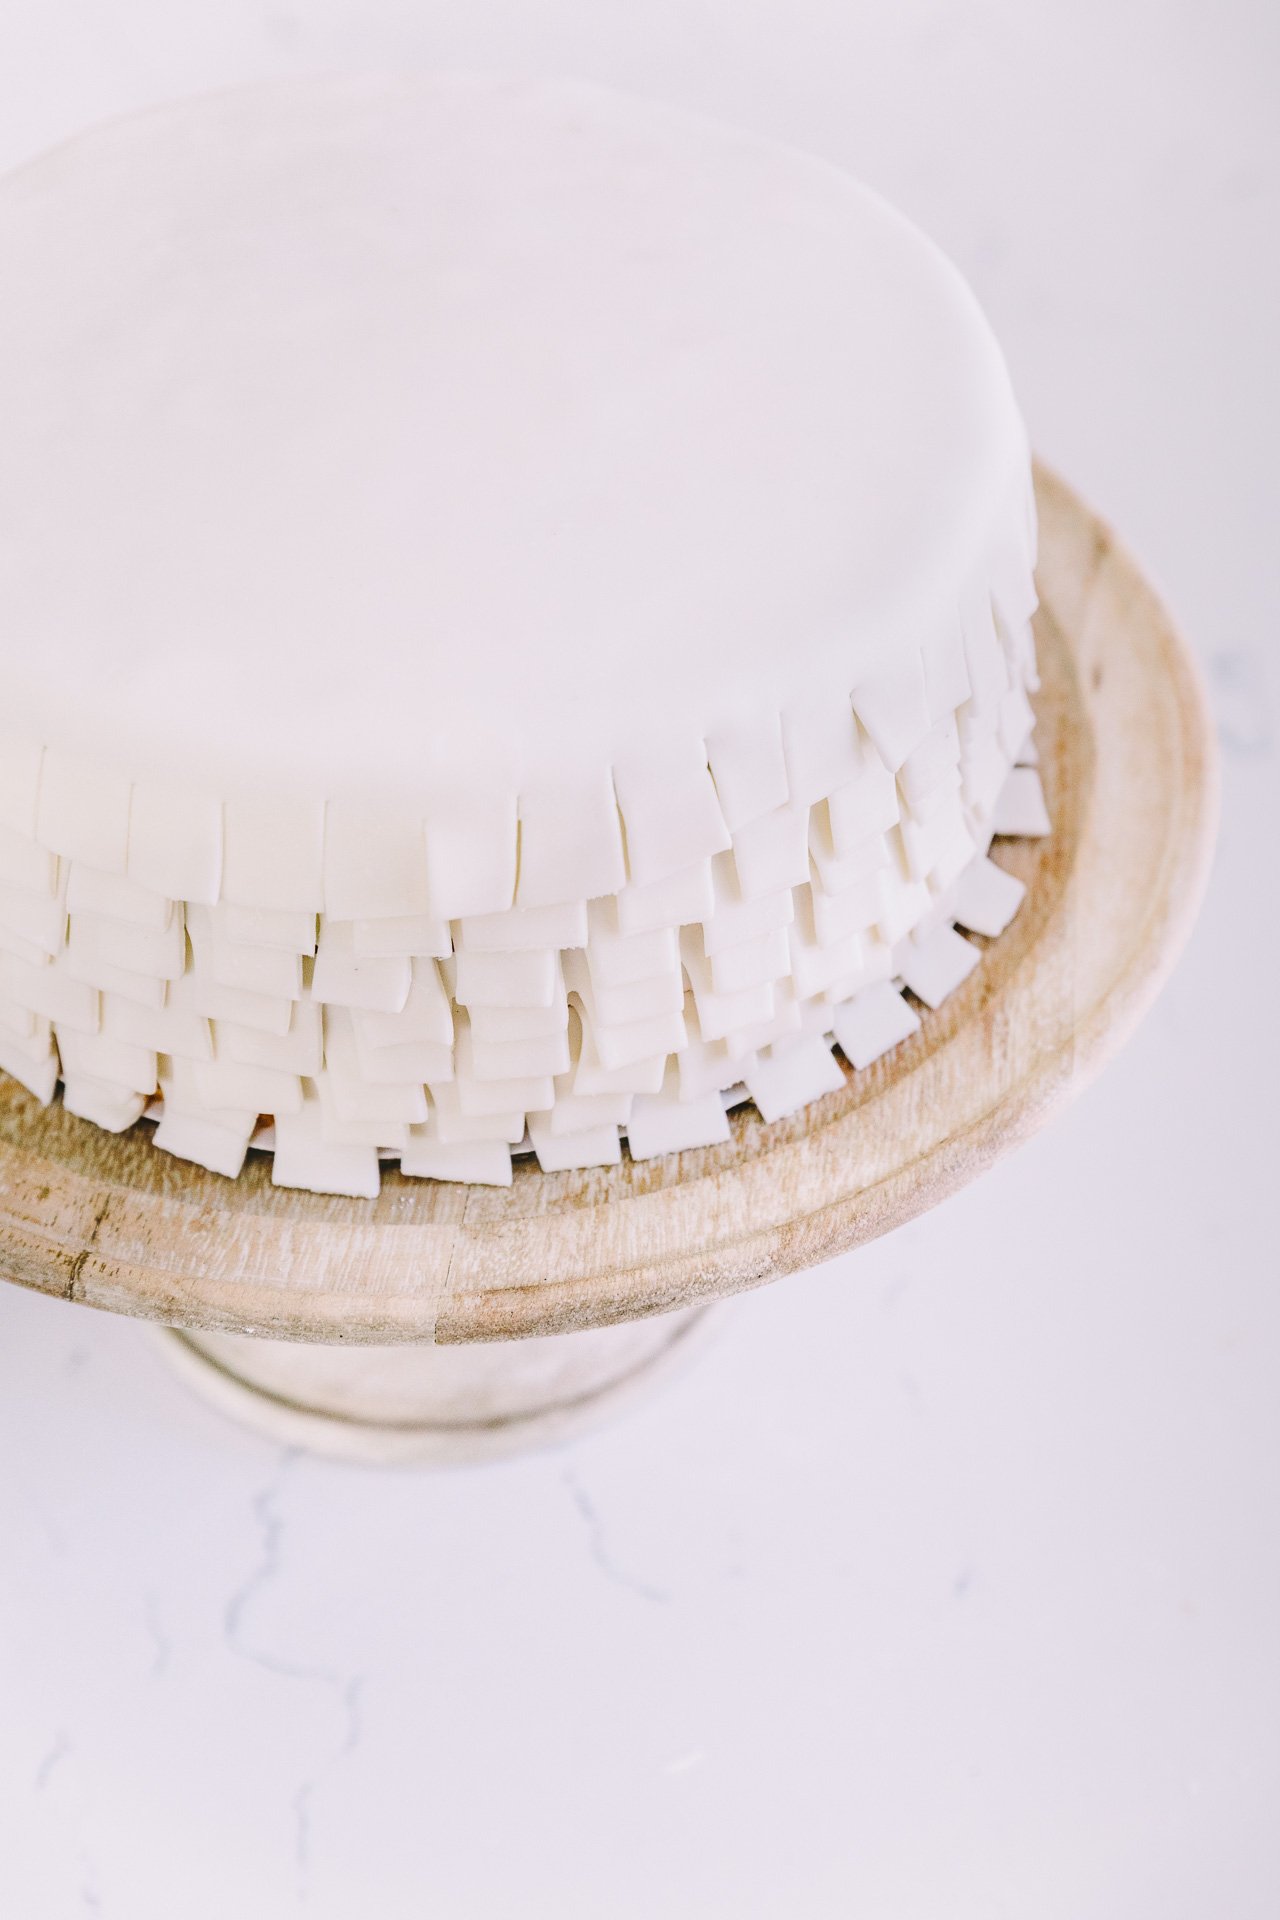
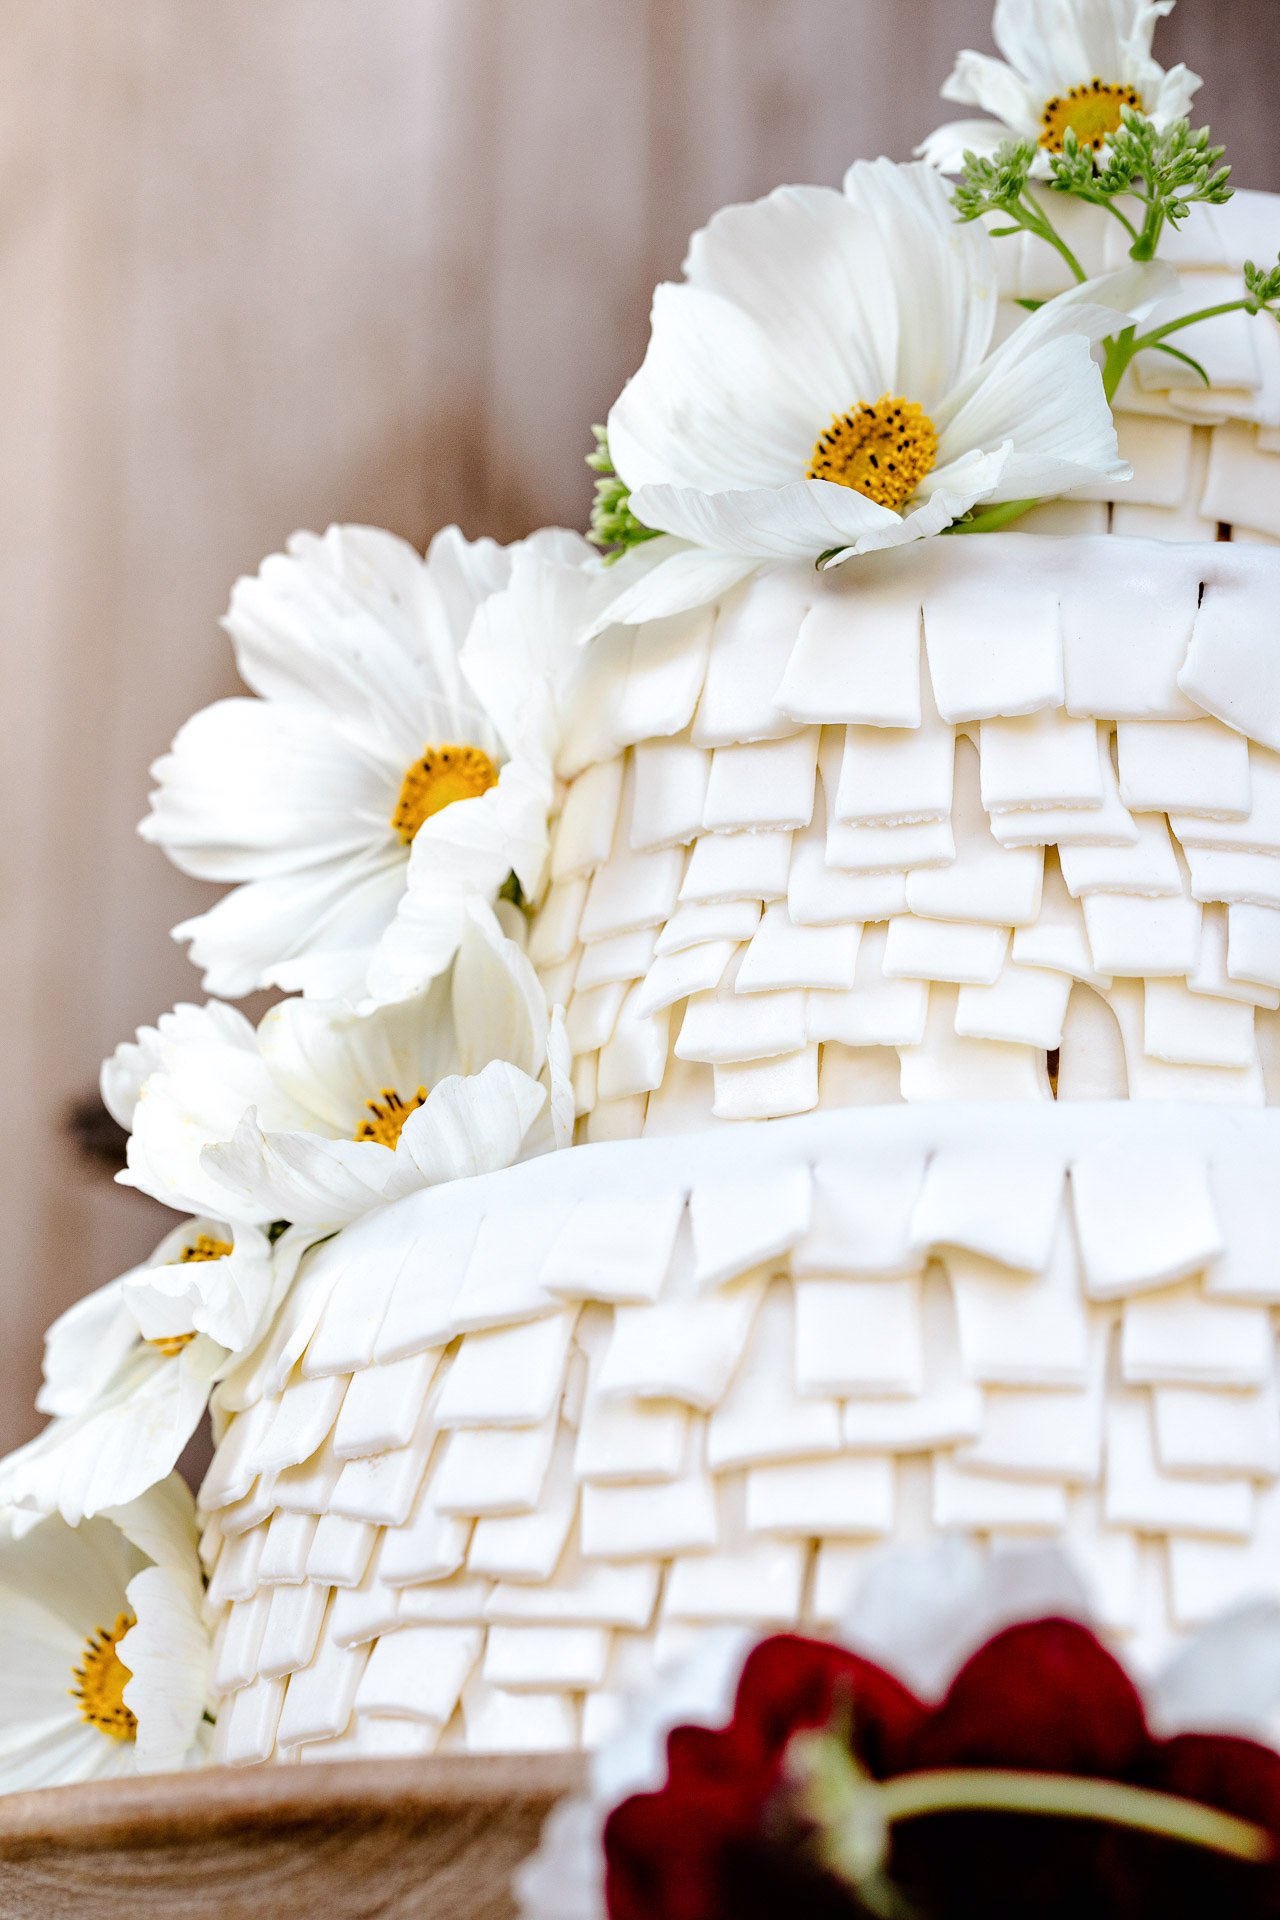
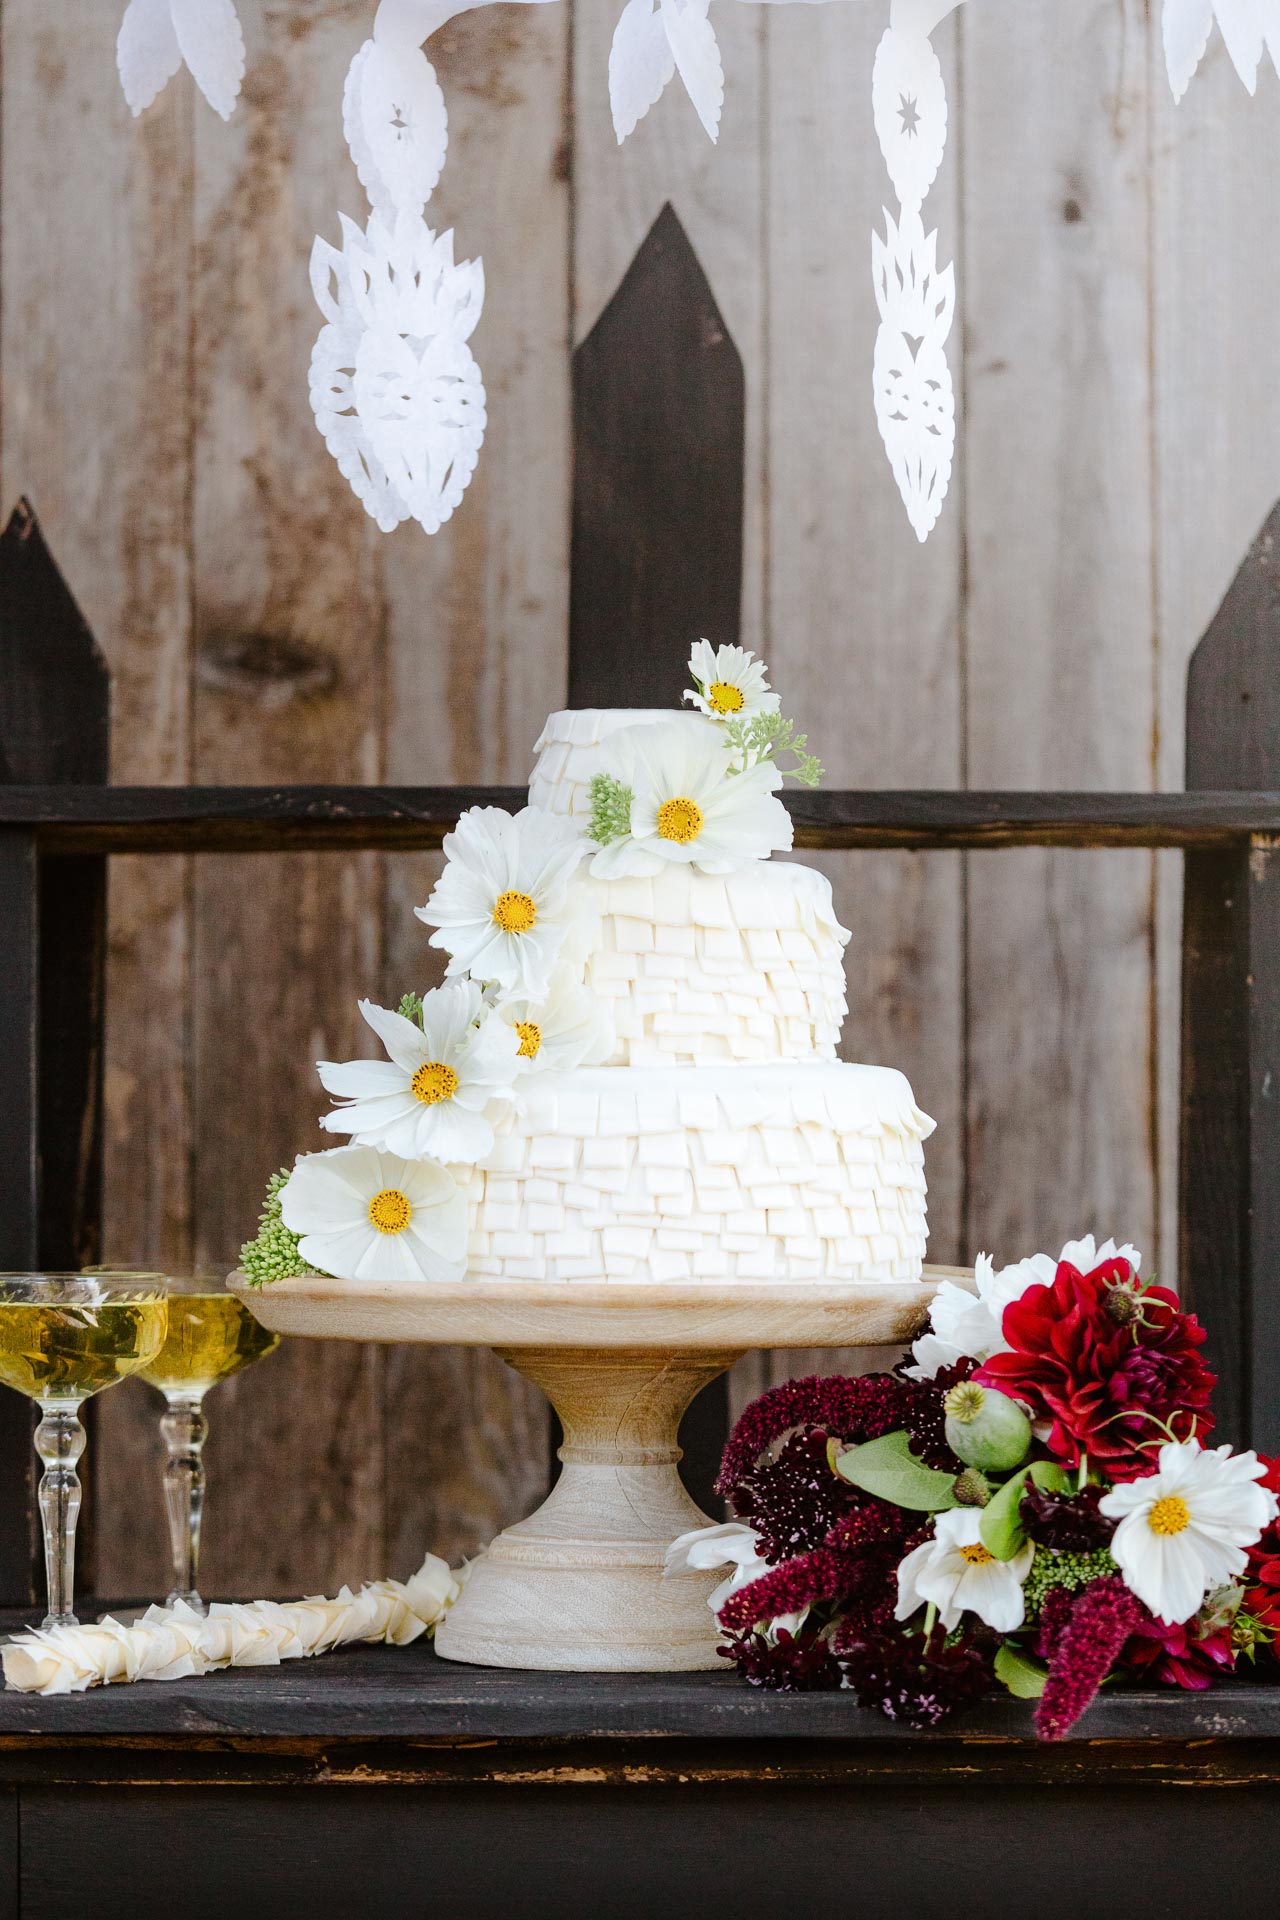
Clay and I didn’t have a wedding cake at our wedding– yes a bit untraditional. Instead, we had fresh churros with dulce de leche and a huge wedding cake-shaped piñata. Clay and I beat the crap out of it after dinner and let out all our frustration and stress with wedding planning– it was so much fun! Today, we’re celebrating our one year anniversary with this cake version of our cake piñata! This tiered cake is made out of a brown butter cake with a Mexican chocolate frosting and fondant that is cut to look like the fringe on a piñata. The fondant uses a short cut technique by using store bought marshmallows and is such a time saver so if you’re intimidated by making fondant, don’t be!


INGREDIENTS
Brown Butter Cake Ingredients
- 20 tablespoons unsalted butter
- 5 cups cake flour (20 ounces)
- 3 1/2 cups granulated sugar (24.5 ounces (divided))
- 2 1/2 teaspoons baking powder
- 1/2 teaspoon baking soda
- 1 1/2 teaspoons salt
- 2 cups buttermilk (room temperature)
- 6 large eggs (separated, room temperature)
- 6 large egg yolks (room temperature)
- 6 tablespoons vegetable oil
- 1 tablespoon vanilla
- 1/4 teaspoon cream of tartar
Marshmallow Fondant Ingredients
- 32 ounces mini marshmallow
- 5-10 tablespoons water
- 4 pounds powdered sugar
- 1 cup vegetable shortening
Frosting
- 4 sticks butter (room temperature)
- 6 cups confectioner's sugar (powdered)
- 6 tablespoons cold heavy cream
- 2 teaspoons pure vanilla extract
- 2 teaspoons cinnamon
- 1 1/2 teaspoons sea or kosher salt
- 1 pound bittersweet chocolate (melted, then cooled)
INSTRUCTIONS
Brown Butter Cake Directions
- Line the bottom of 9 inch, 6 inch and 3 inch pans with parchment rounds and grease the sides. Set oven to preheat at 350 degrees F.
- Start by browning the butter. In a large heavy skillet (preferably light in color), melt the butter. Swirl constantly until butter turns golden/light brown and smells nutty, about 5 minutes. Transfer to small bowl to cool to room temperature.
- In large bowl, whisk together cake flour, 2 1/2 cups sugar, baking powder, baking soda, and salt and set aside.
- In a medium bowl, whisk together cooled brown butter, buttermilk, the 12 egg yolks, vegetable oil, and vanilla. Set aside.
- In the bowl of a stand mixer fitted with the whisk attachment, whisk the 6 egg whites together on medium low until foamy, about a minute. Add the cream of tartar and mix on medium high for another minute. With the mixer still running, gradually add the last 1 cup of sugar in a slow and steady stream. Continue to whisk on medium high until glossy stiff peaks form, about 3 minutes.
- Whisk the buttermilk mixture into the dry ingredients until just smooth and fully incorporated, about a minute.
- Using a rubber spatula, mix 1/4 of the whipped egg white mixture into the batter to lighten the texture. Gently fold in the rest of the whites until no lumps/streaks remain.
- Divide the batter evenly into your pans, gently tapping them on the counter to settle and even out the top. If you don't have enough pans for all the layers, or not enough room in the oven, you can leave the batter at room temperature and do in a couple batches, just make sure your pans are cooled to room temperature before adding the next batch.
- Bake in the oven; baking time depends heavily on size of the pans and how many you are cooking in the oven at a time. I'd estimate 20-25 minutes if using 9 inch rounds, 12-15 minutes for 3 inch rounds, 18-20 for 6 inch rounds. I set a timer for intervals of 10 minutes, rotated the pans after the first 10 minutes and watched the smaller pans carefully. The center of the cake should have a little spongy bounce with light finger pressure, toothpick test should come out just clean, the top will be slightly golden, and the sides may just be pulling away from the cake pan. Cool on a wire rack in the pan for 10 minutes and then remove from the pan to cool on the wire rack completely.
Fondant
- Melt the marshmallows and 5 tablespoons of water in a microwave for about 30 seconds. Stir the marshmallows and keep microwaving in 30 second intervals, stirring between each 30 seconds until the marshmallow is melted.
- Grease your hands very well with the shortening and heavily grease your counters with the shortening-- pretty much anything that the marshmallow will touch. Dump the melted marshmallow onto the counter and add 3/4 of the sugar on top in the middle.
- Start kneading the marshmallow, folding the marshmallow over the sugar to incorporate the sugar. As the sugar is being absorbed into the marshmallow, add more sugar to the marshmallow and continue to knead. This will take a bit of time and work so be patient. Continue to grease your hands and the counter if the fondant becomes too sticky. If the fondant tears, it means it's too dry so add a bit of water a tablespoon at a time. The fondant should be smooth and elastic.
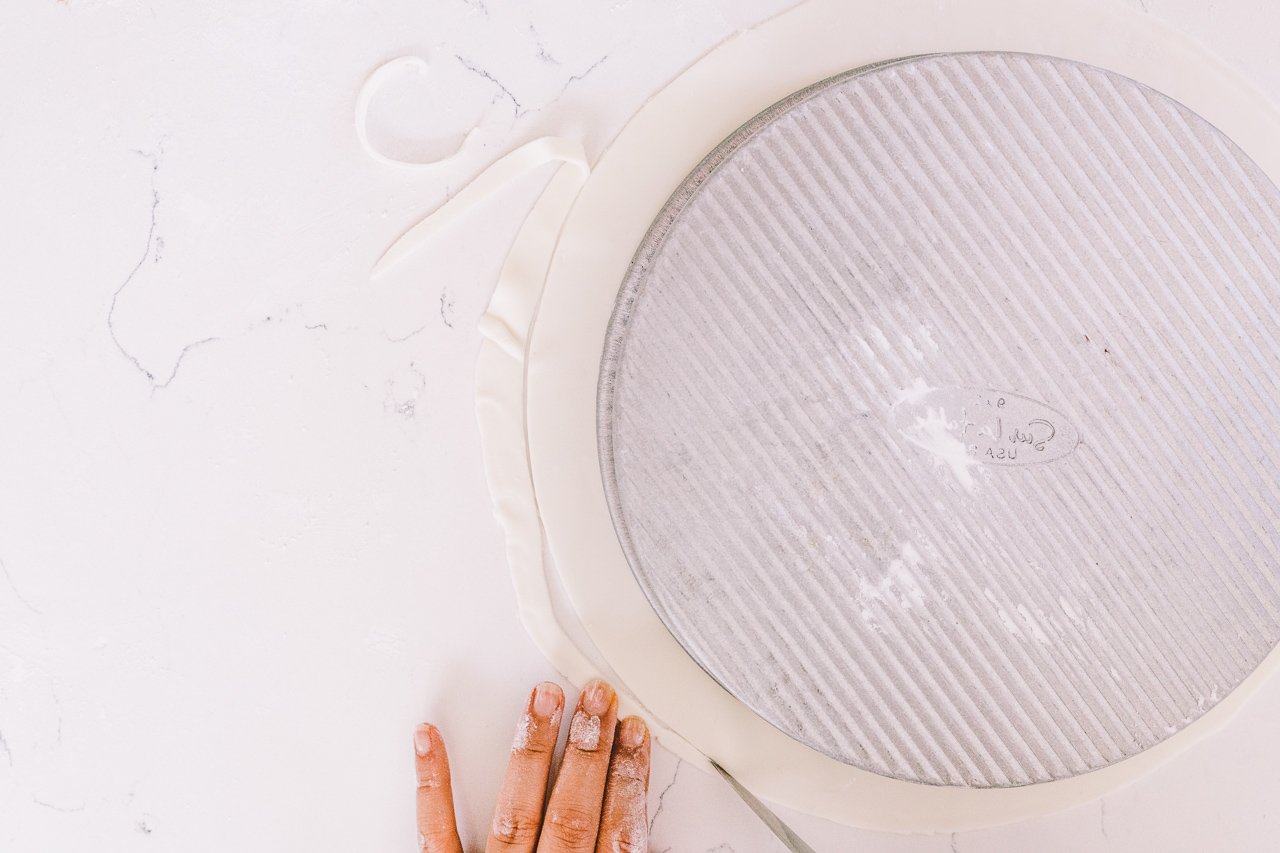
- Let the fondant sit for a few hours if possible and wrap in plastic wrap. When you are ready to decorate the cake, lightly sprinkle powdered sugar on the counter and cut the ball of fondant into two, roll out one half of the fondant to about 1/8 inch thick, keeping the other half wrapped in plastic.
- Cut out the fondant that covers the top of each layer of your cake by tracing a circle about 1 inch wider than edge of the pans you used to bake the cake. This will allow the top later to hang over the edge of each layer. Set these fondant layers aside.
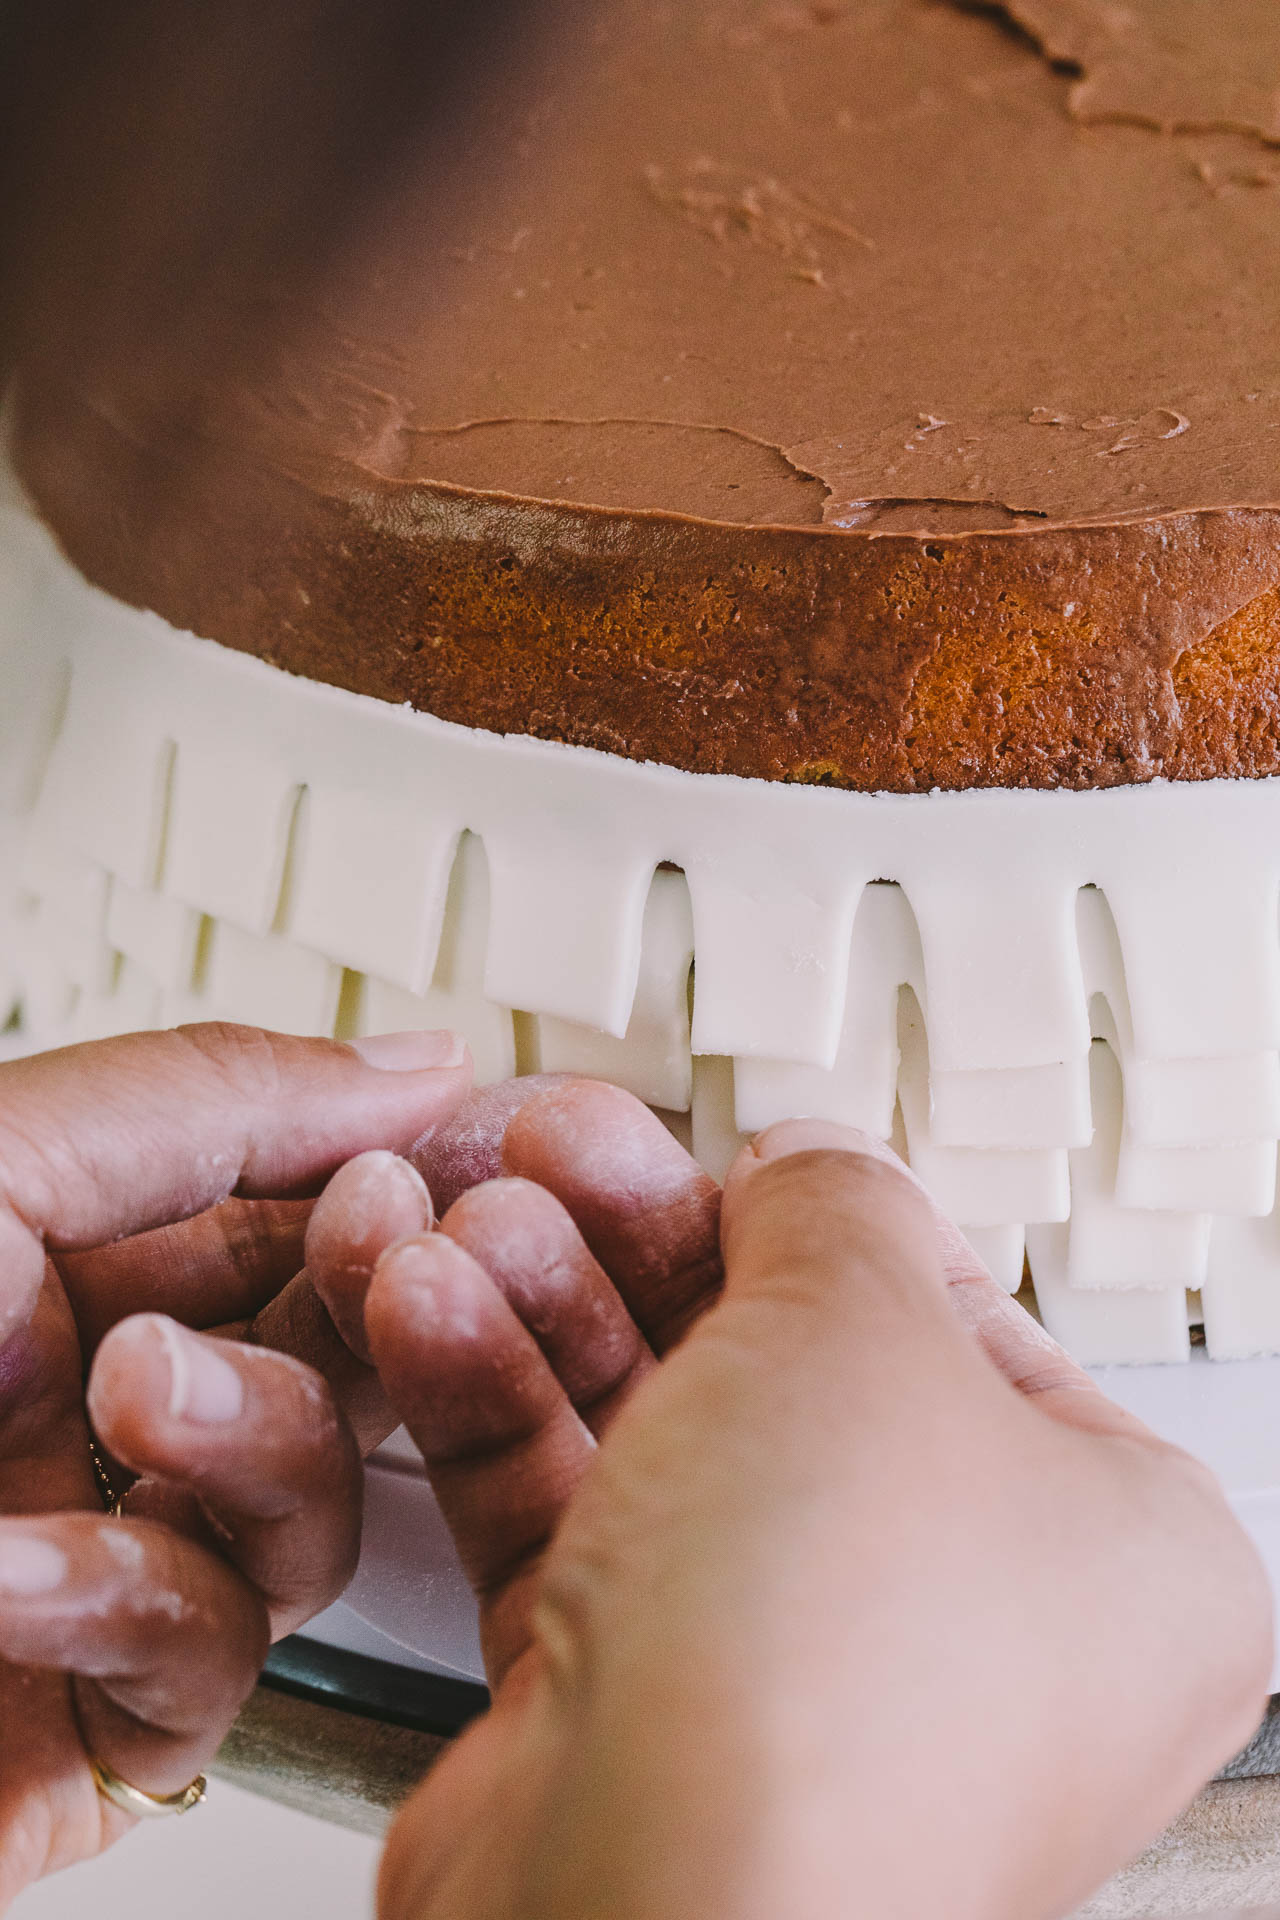
- Cut about one inch wide strips long enough to wrap around the circumference of each layer, about 7-9 strips per layer.
- Using kitchen shears make snips about every 1/2 inch halfway up the strips and along the circumference of the three pieces of round fondant that goes on top of each layer.
Frosting
- In the stand mixer fitted with the paddle attachment, cream the butter on high speed until light and fluffy.
- Turn the mixer to low and slowly add the confectioner’s sugar. Scrape down the sides of the bowl and turn the mixer on medium for another 30 seconds to blend well.
- With the mixer still on medium speed, add the vanilla, cinnamon, and salt and mix until well combined, stopping to scrape the sides of the bowl as necessary.
- Return the mixer to low and add the melted (cooled) chocolate in a slow stream. Mix until no streaks remain, stopping again to scrape the bowl as necessary.
- Use immediately, or can be refrigerated for up to one week. Bring to room temperature before using.
Cake Assembly
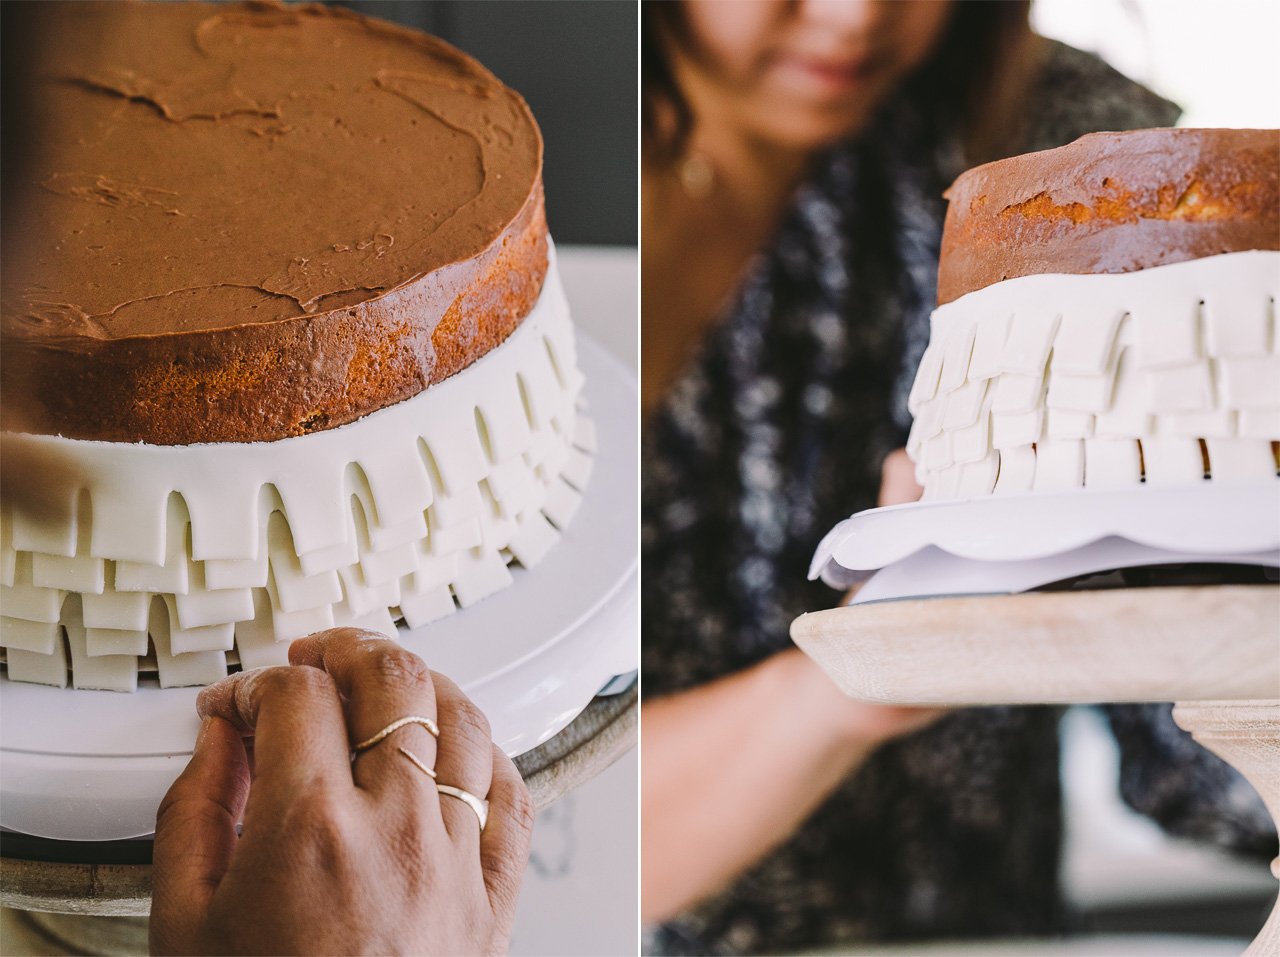
- Cut each layer horizontally into two layers. Frost each layer with the Mexican chocolate frosting and a thin layer on the tops and sides of each layer so the fondant has something to stick to.
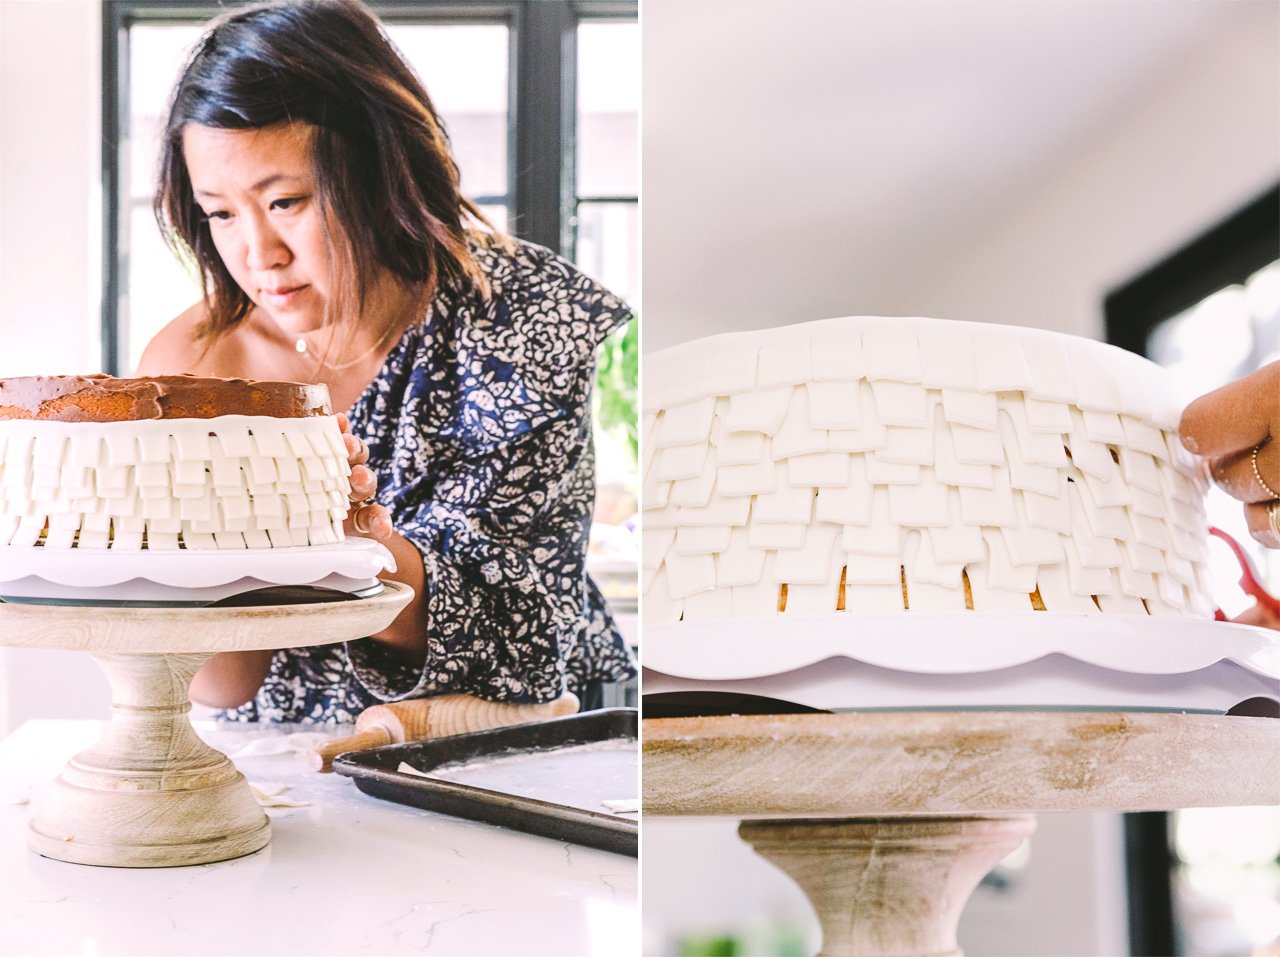
- Start decorating each layer by wrapping each fondant strip around layers, gently pressing the fondant into the cake to make it stick. Repeat up the sides of the cake and top with the round fondant cut out. Smooth out the top and edges with your hands. The warmth of your hands will re-mold the fondant. Repeat with each layer.
- Trim three dowels so they are the exact height of the base layer. Place the middle layer centered on the base layer on top of the dowels. Place the smallest layer on top.
- Decorate with fresh flowers.
(images by HonestlyYUM)
Happy anniversary and congrats on becoming a soon to be new mom. Cake is beautiful and loved the video.
Aw thanks Pattie! 🙂
This is such a creative way to celebrate your anniversary! I love both the real pinata and the pinata cake version. I want to get married again just to have both.
What an incredible cake! So fun. And gorgeous!
Aw thanks!
Yay, amazing! Beautiful work as always
CK
Thank you!
I like ALL forms of cake now 😉
Let’s make a Todd + Clay cake.. 😉
It would be a warriors + fantasy football cake
lololol
Such a fun wedding!! Happy anniversary! And love love love baby boy already, so exciting!!!!!
Thanks Audrey!! We’re super excited! <3
Congratulations Karen!! I had a sneaking suspicion you were pregnant 😉
Thanks Margot 🙂
This is the cutest idea I’ve ever seen. Can I get a wedding do-over?
Aww, thank you Sherrie!! 🙂
Thanks Sherrie! 🙂