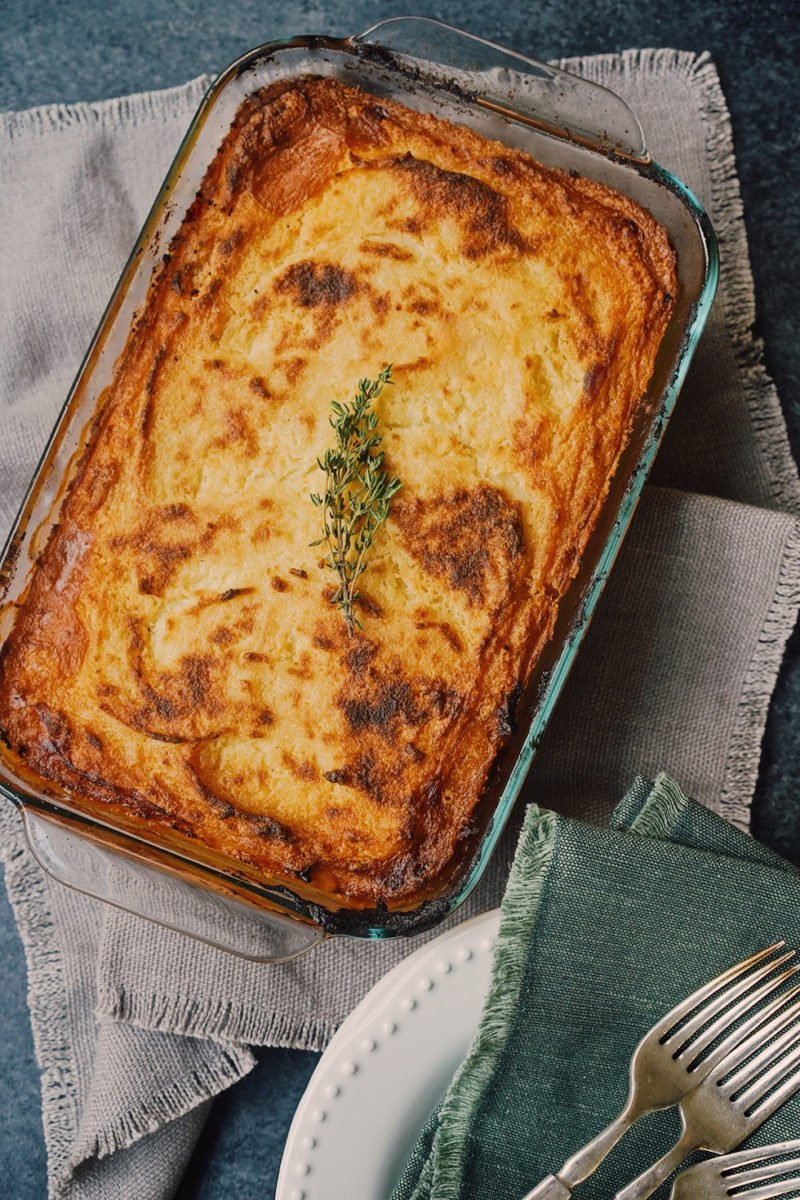
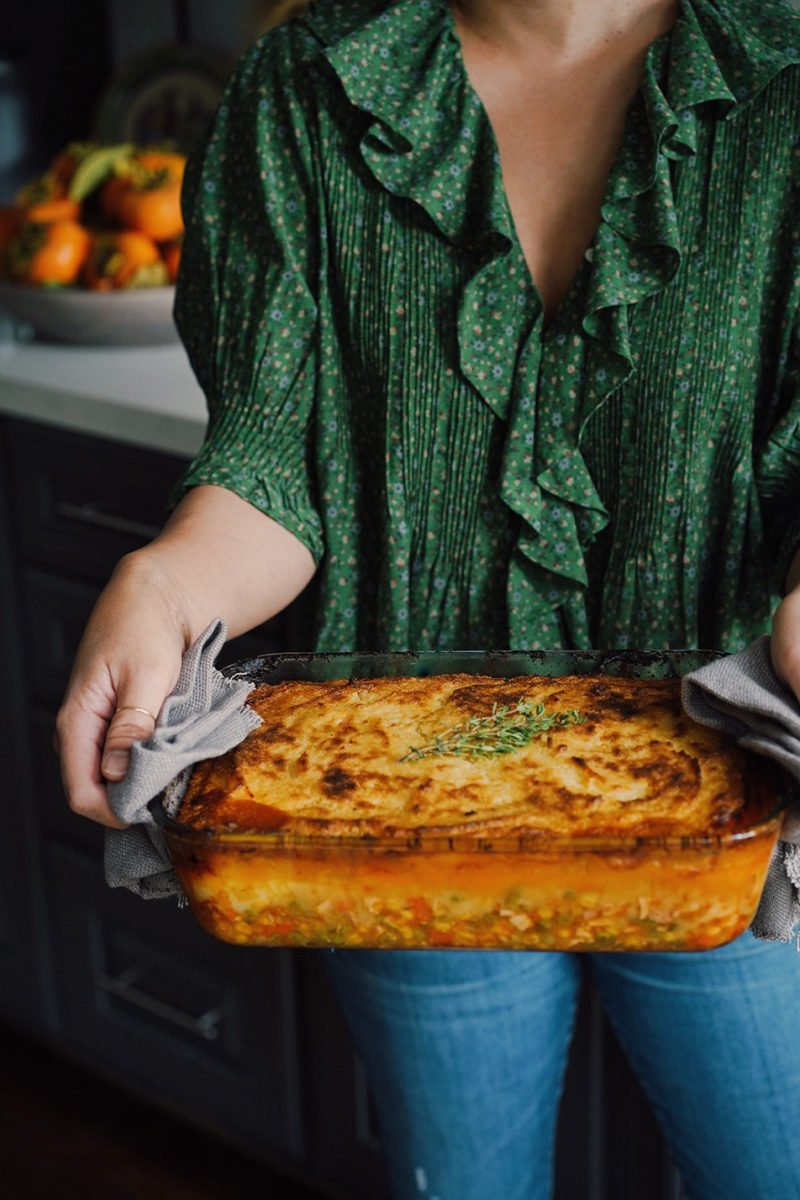
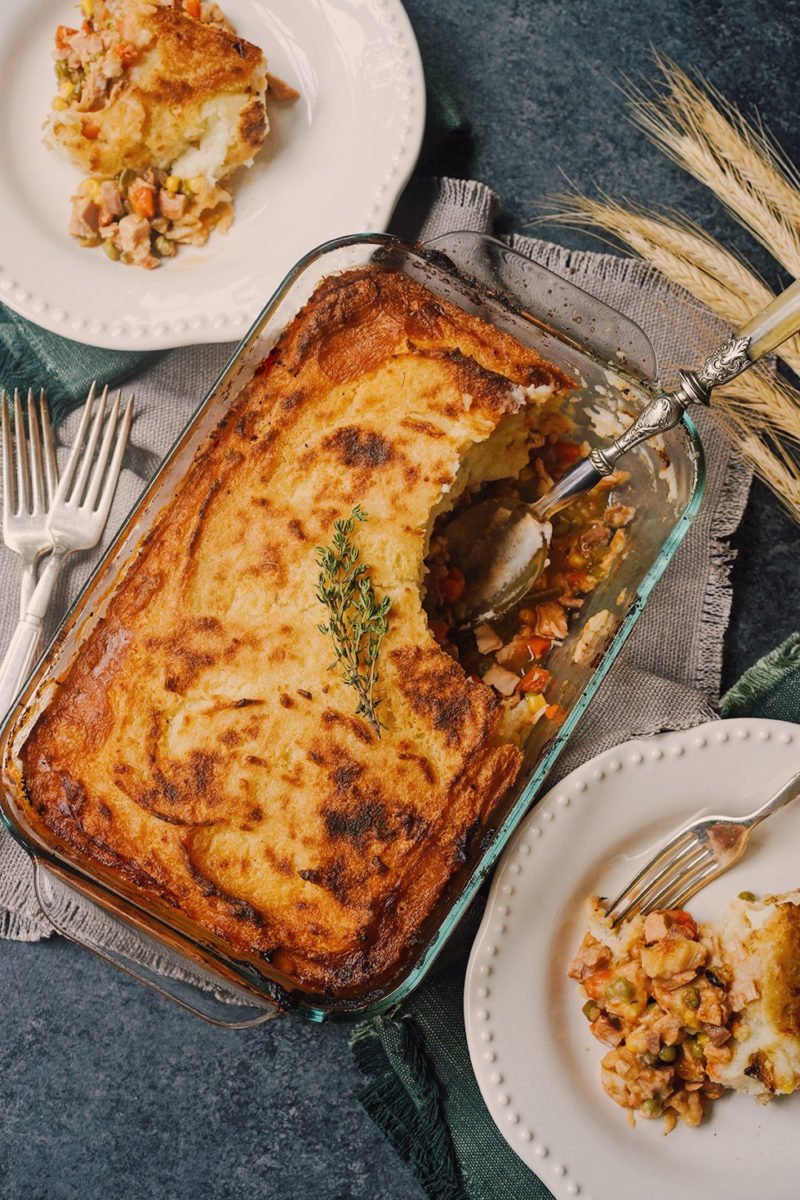
One of my favorite things about winter is the abundance of savory, satisfying, all-in-one baked meals. One that my family absolutely loves during the holidays is Turkey Shepherd’s Pie. Roast turkey, hearty vegetables, herbs and mashed potatoes are layered inside a 7×11 inch Pyrex Deep, which holds 50% more than your current baked glassware, and baked to bubbly, golden-brown perfection. It’s a crowd pleaser despite the fact that everyone ends up fighting over who gets the toasty corners! What I like is how easy this recipe is to make and how adaptable it is. You can easily sub out whatever leftover meat or vegetables you might have on hand in your fridge. And the bonus? If there are leftovers, simply put the lid on, pop it in the fridge and reheat later. Less time in the kitchen and more time with family. What’s not to love.
(images by HonestlyYUM. This post is sponsored byPyrex. All opinions are our own. Thank you for supporting the brands that keep HonestlyYUM going!)
Turkey Shepherd's Pie
A holiday favorite: comforting turkey shepherd's pie.
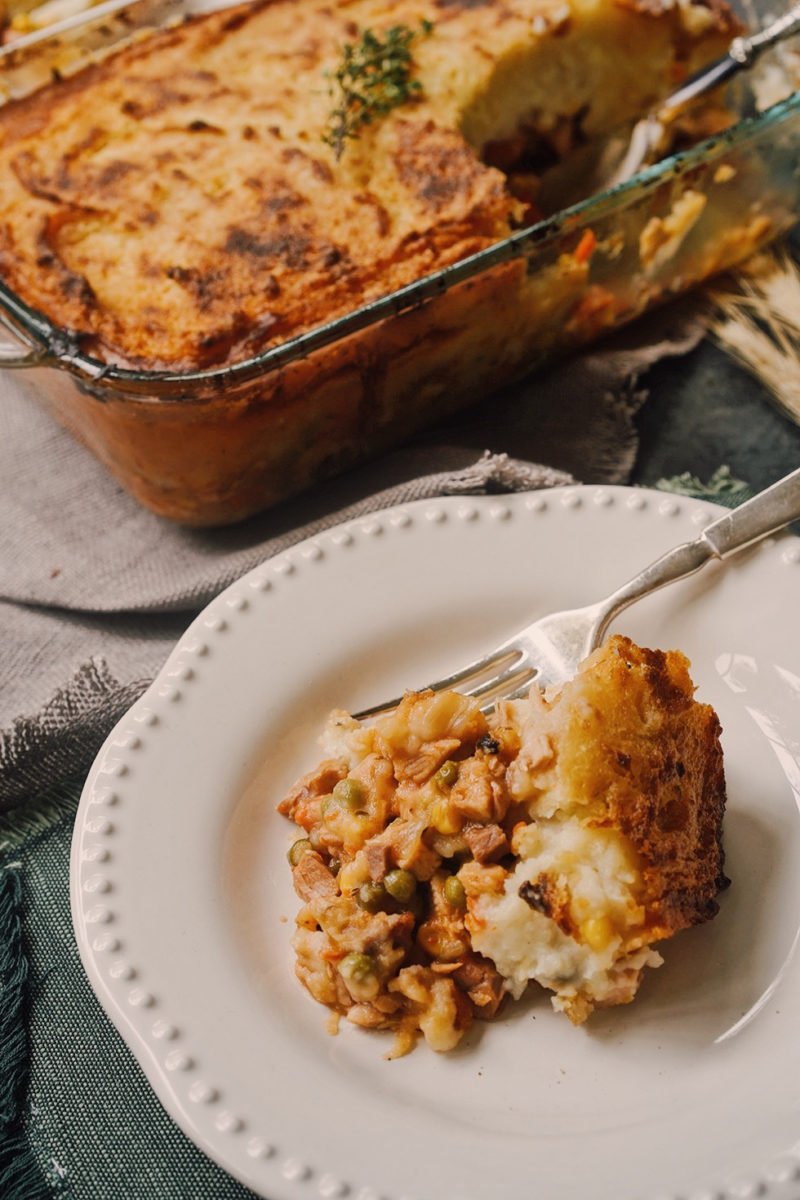
Preheat oven to 400 degrees. Pour a couple of glugs of olive oil into a large skillet. Sauté onions over medium-high heat until translucent. Add carrots, peas, corn, green beans and any other leftover vegetables you might have. Add spices and bay leaf and then add turkey and stir for 5-6 minutes.
Add chicken or beef broth, gravy and tomato paste. Stir until mixed and bring to a boil and reduce heat. Simmer for 10 minutes or until mixture has thickened.
Meanwhile, reheat your mashed potatoes in a pot. Add milk a little bit at a time to help soften the mashed potatoes for easy spreading.
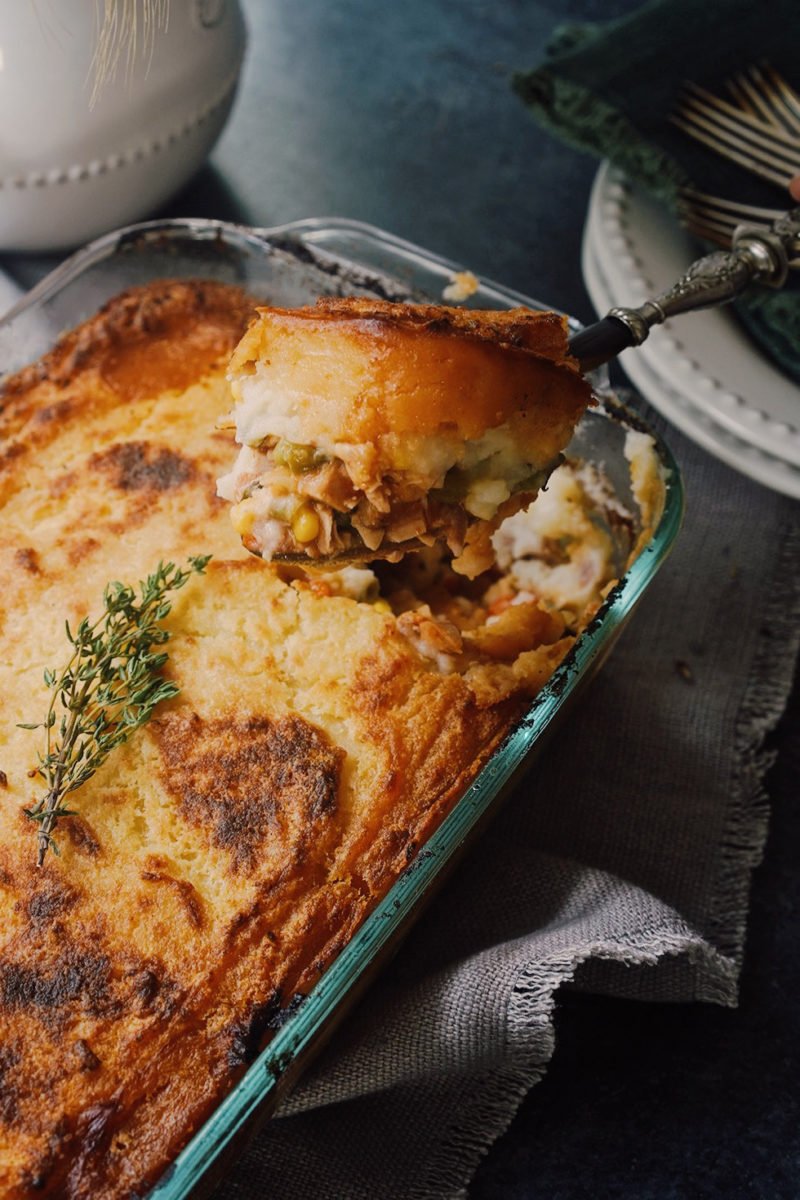
Transfer the turkey mixture into a 7 x 11 Pyrex Deep Dish.
Use a spatula and add dollops of mashed potatoes over the turkey mixture. Spread until all the edges are covered
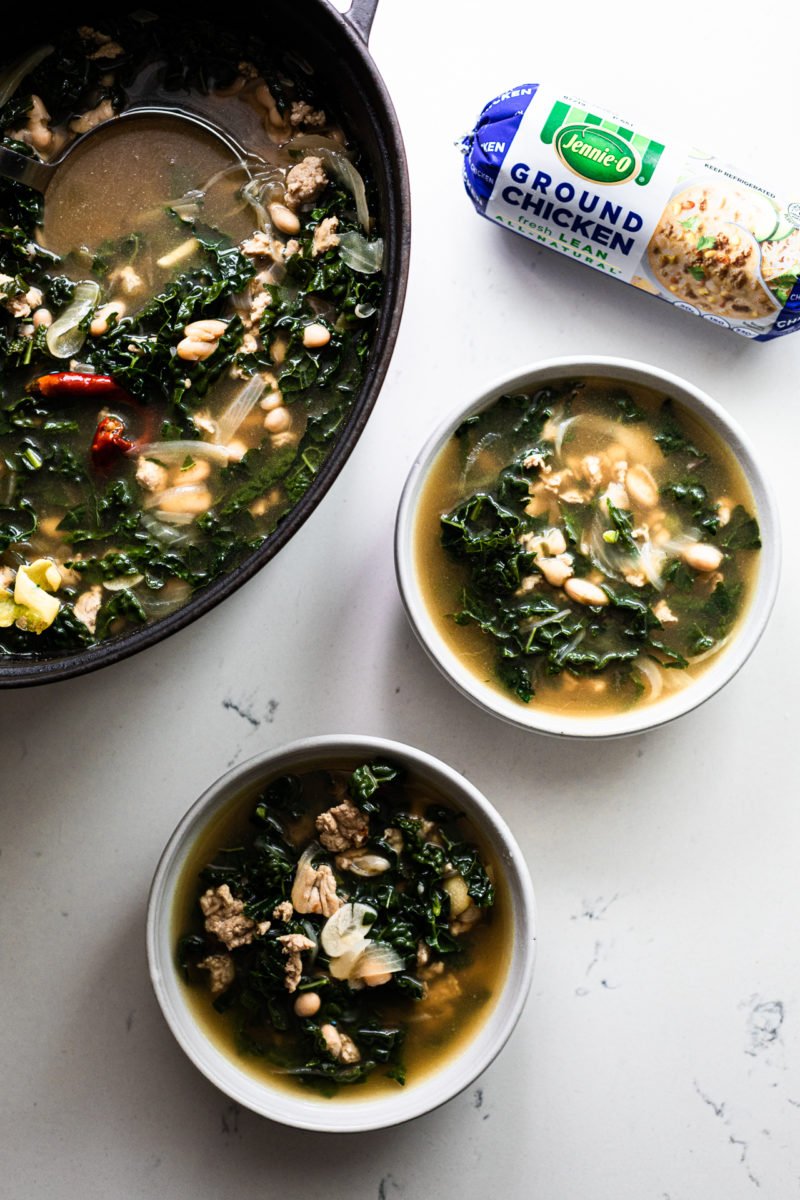
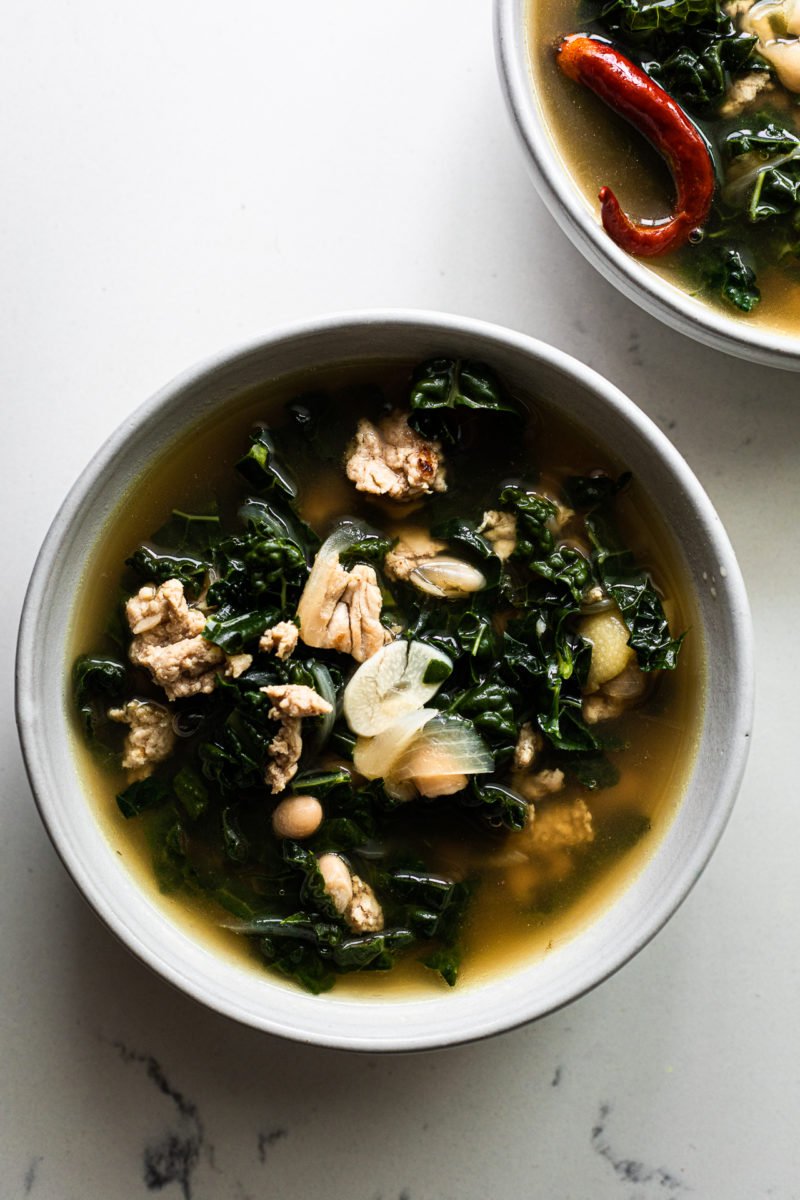
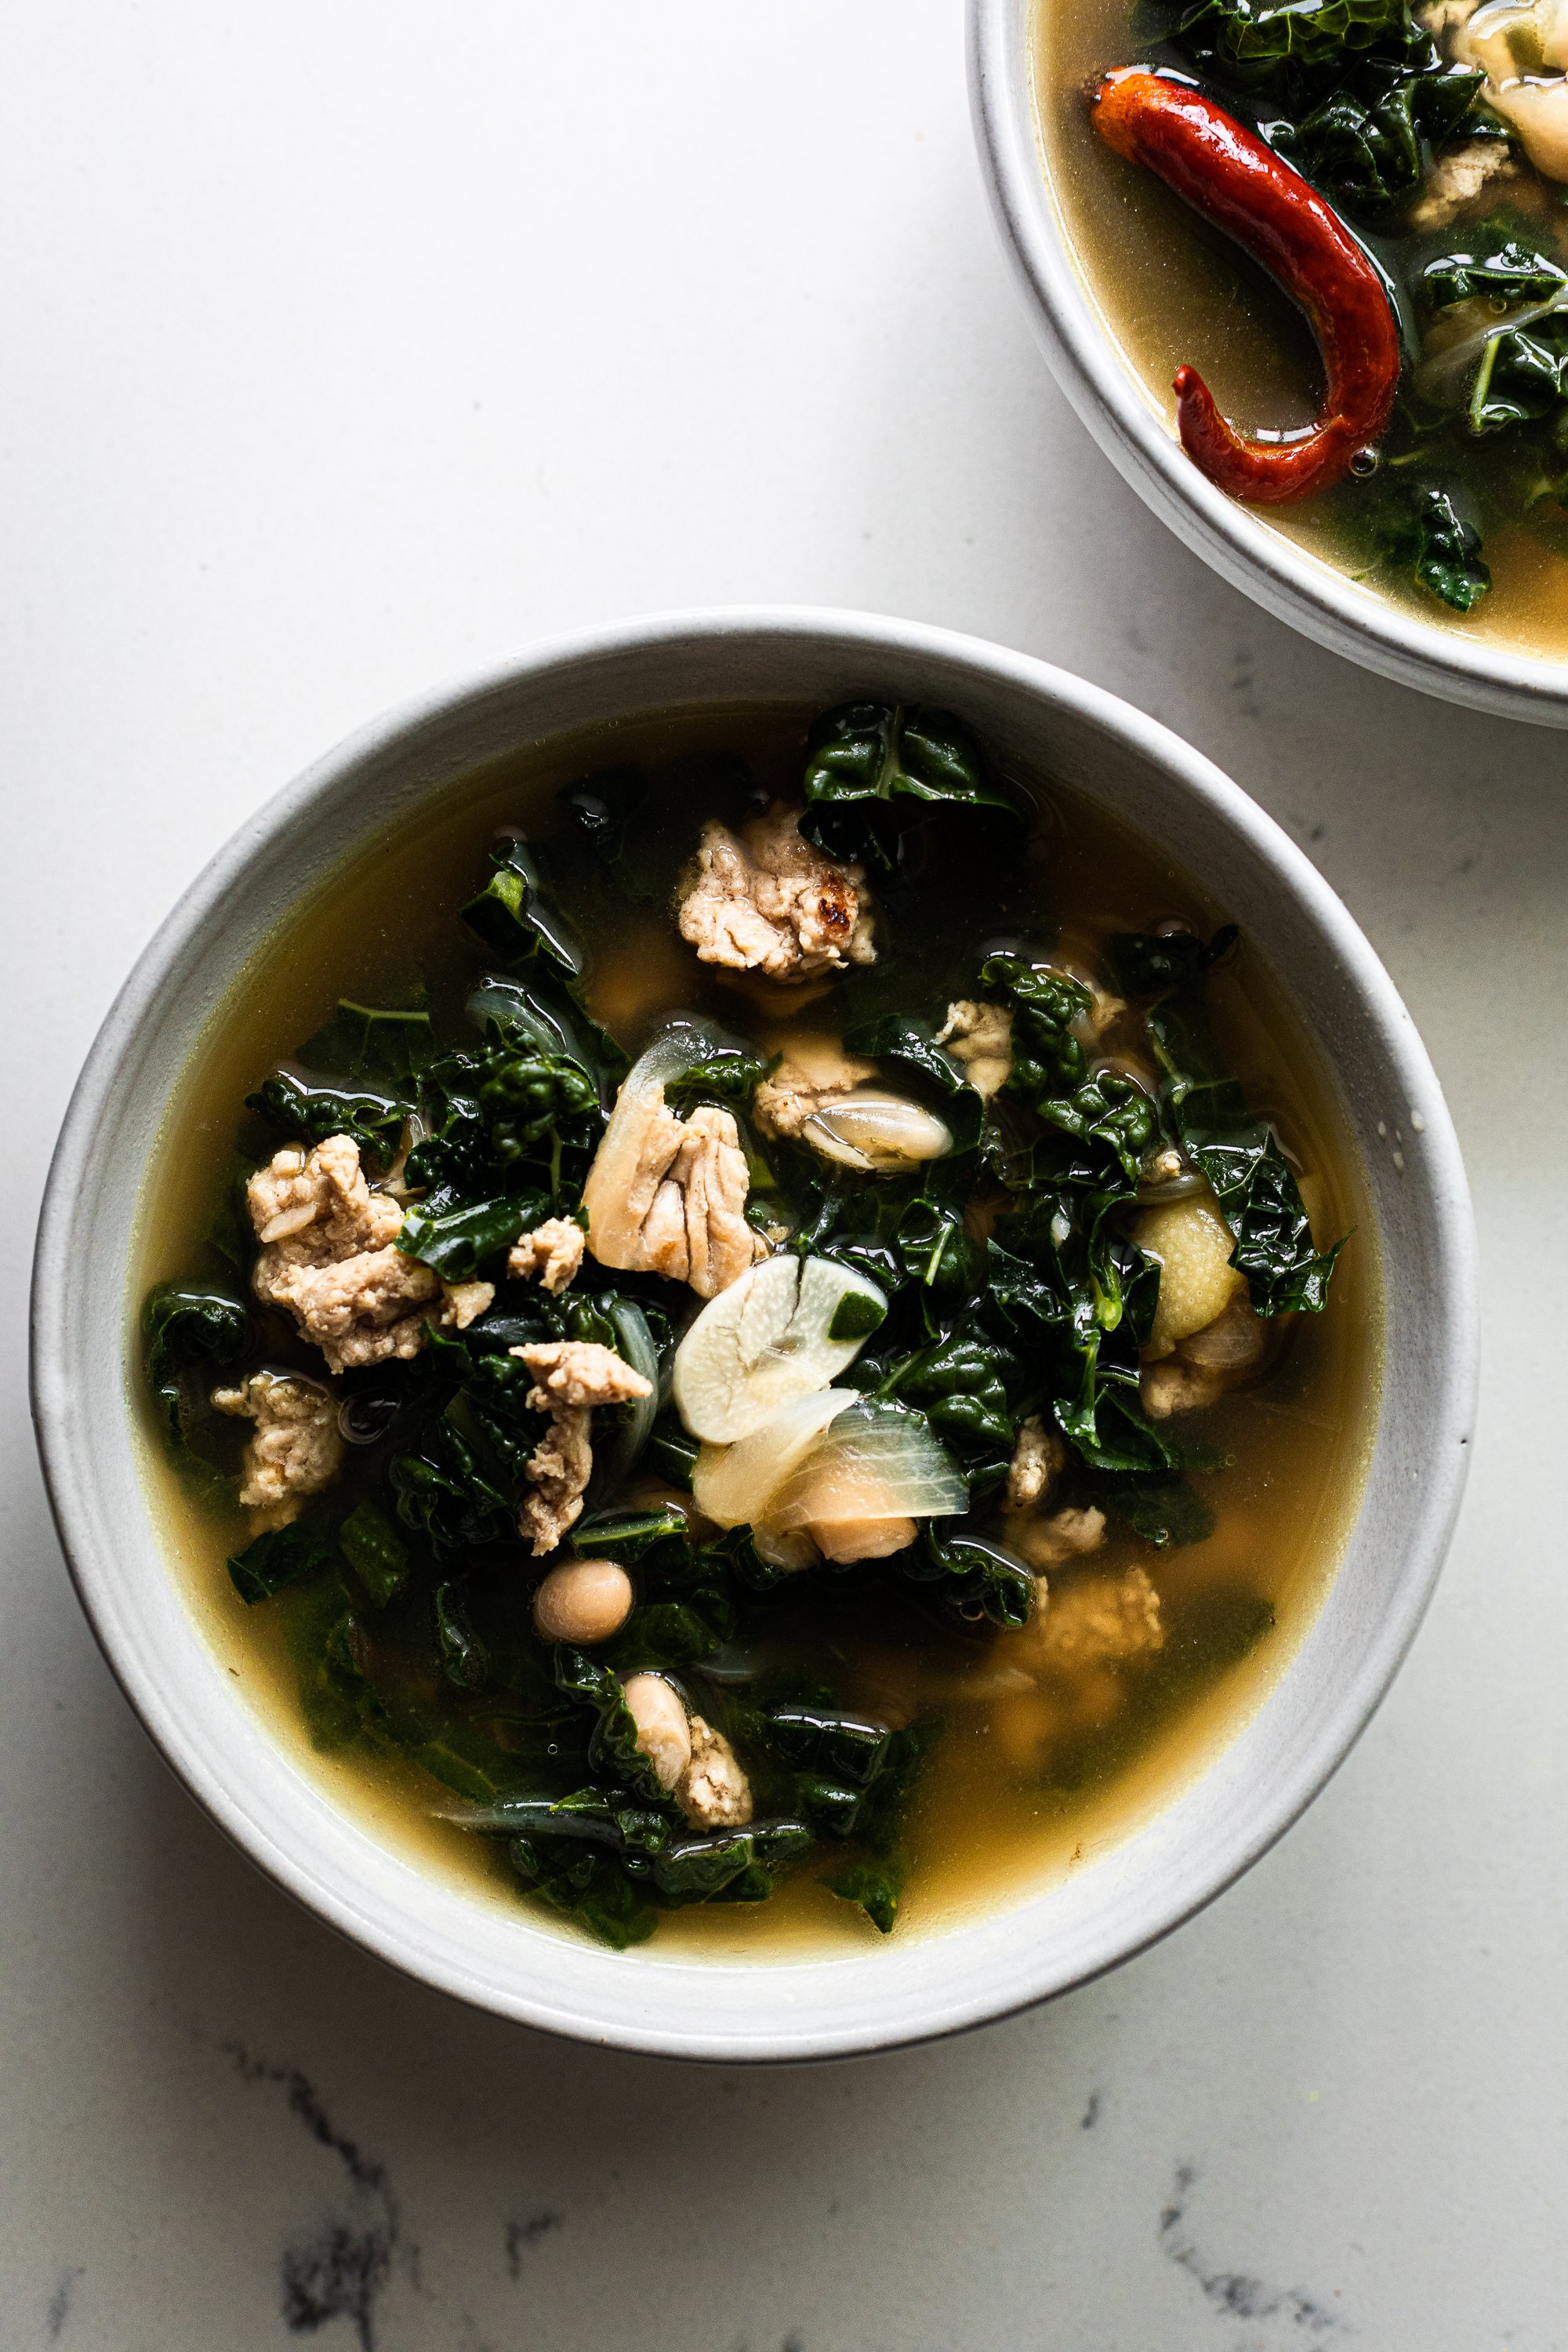
I have made more variations of this soup than I can count. It’s hearty and flavorful with the soul-soothing goodness of chicken broth. This time I’ve made this with Jennie-O ground chicken, which is browned with onions and garlic and simmered with spicy chile de arbol and fragrant lemon zest. I guarantee this soup will be on repeat this fall. Make a whole pot at the beginning of the week and each day the flavors will get better and better!
(images by HonestlyYUM. This post is sponsored by Jennie-O. All opinions are our own. Thank you for supporting the brands that keep HonestlyYUM going!)
Chicken Kale White Bean Soup
This hearty but light soup is packed with tons of flavor and easy to make!
Pour a couple glugs of oil in a large pot over high heat. Sautee the ground chicken, breaking up the meat with a spatula. Season the chicken by adding a couple pinches of salt. Cook until the liquid evaporates and the chicken begins to brown slightly.
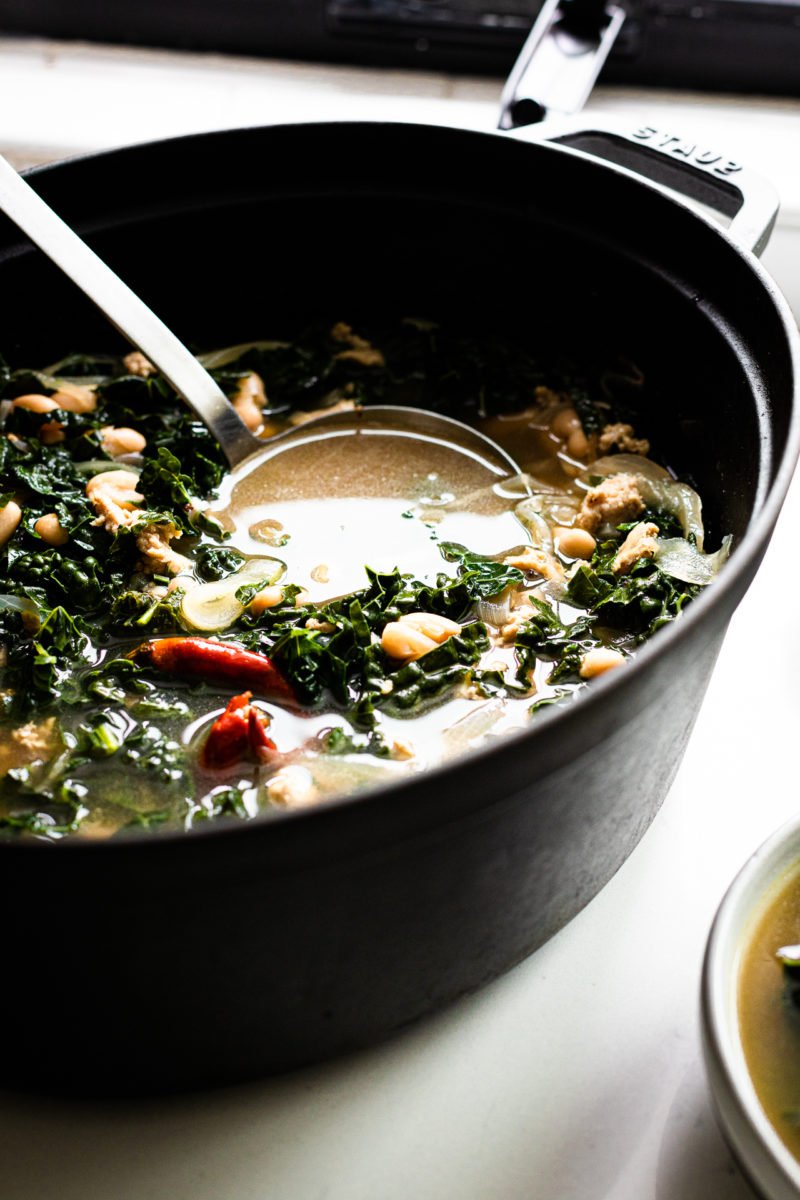
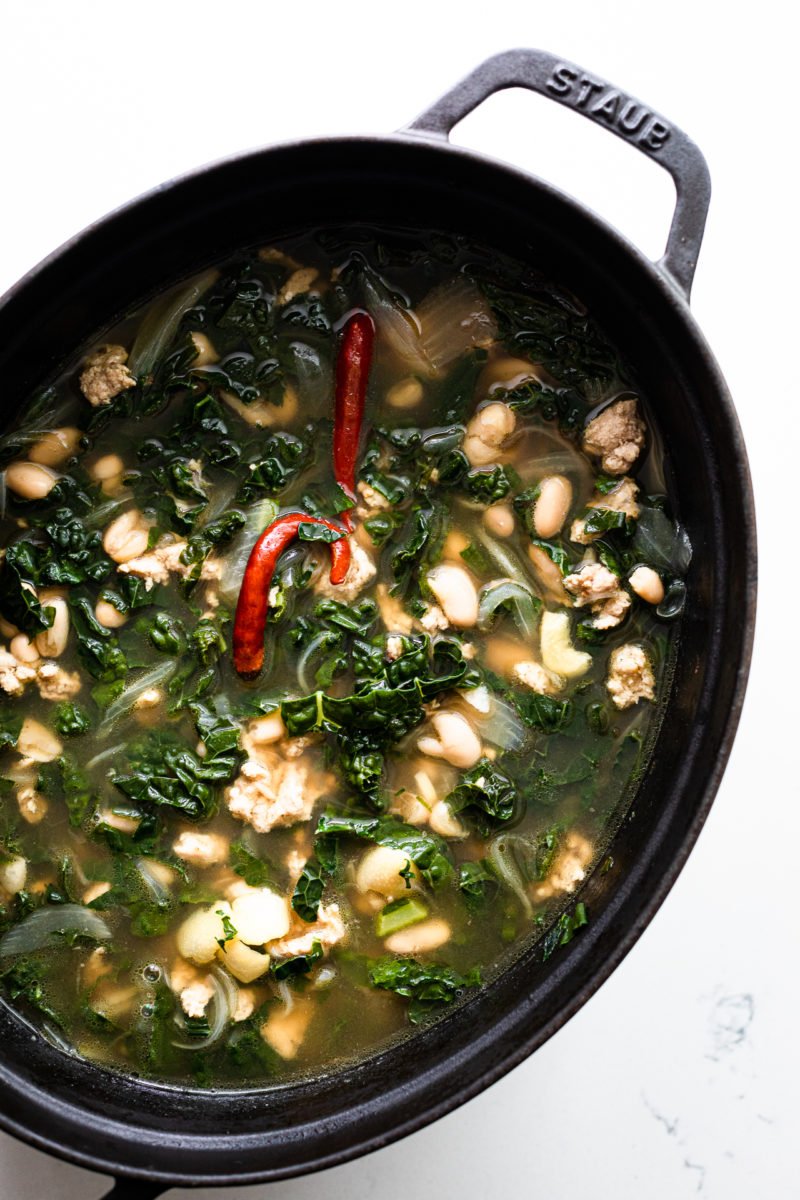
Add the sliced onions and garlic and sautee with the chicken until soft. Add a little oil if it starts to get too dry. Add the chile de arbol crumbled with your fingers. Using a vegetable peeler, peel a couple slices of lemon zest off the lemon and add to the pot. Add the beans. Add the chicken stock and enough water so that the ingredients are barely submerged.
Lower to a gentle simmer and add enough salt and pepper to taste. Simmer on low for 30 minutes. Meanwhile, remove the kale stem and slice the kale into thin strips.
Add the kale and cook for another 10-15 minutes covered over low heat. Season the soup with salt and pepper to taste and serve.
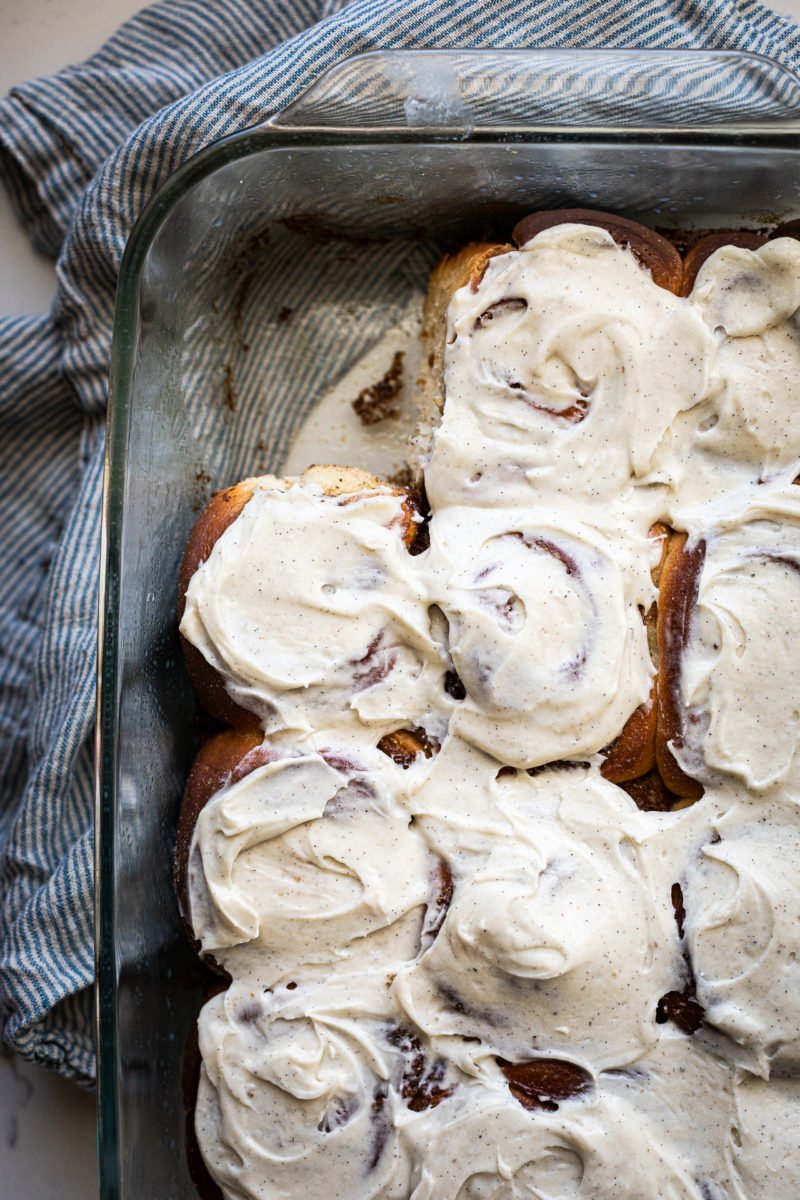
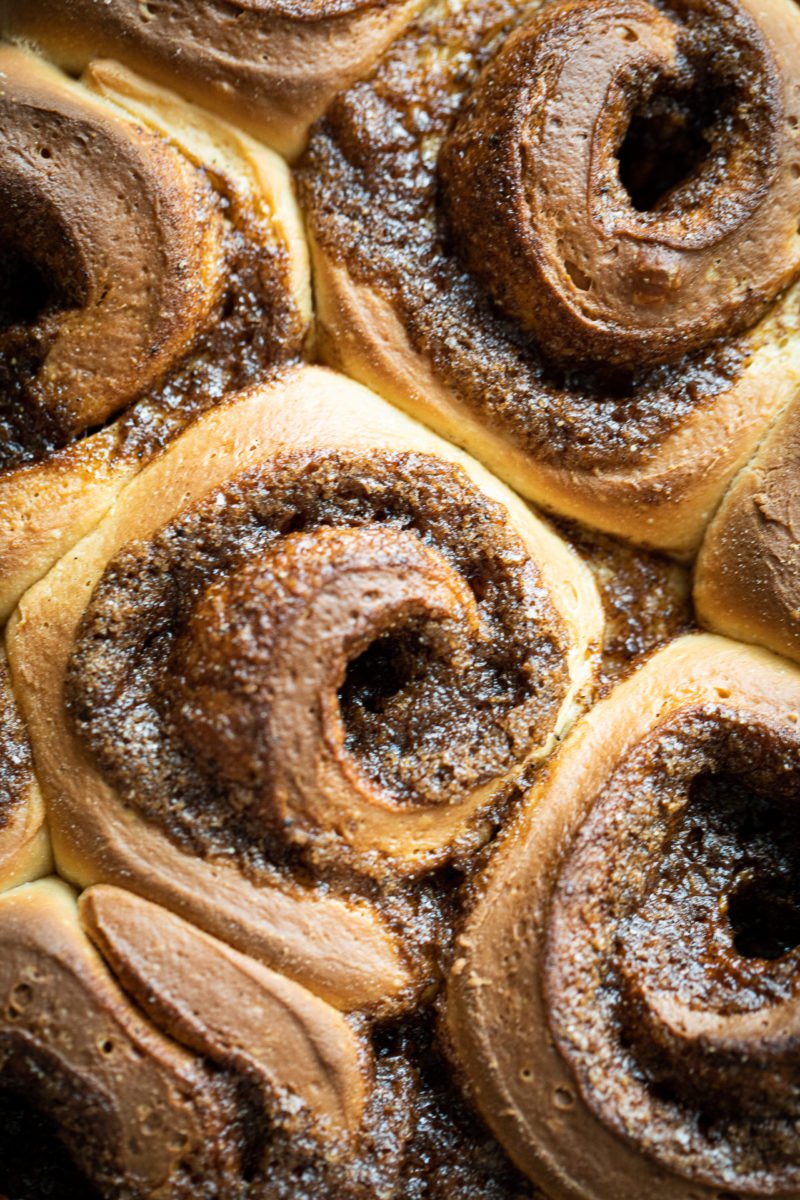
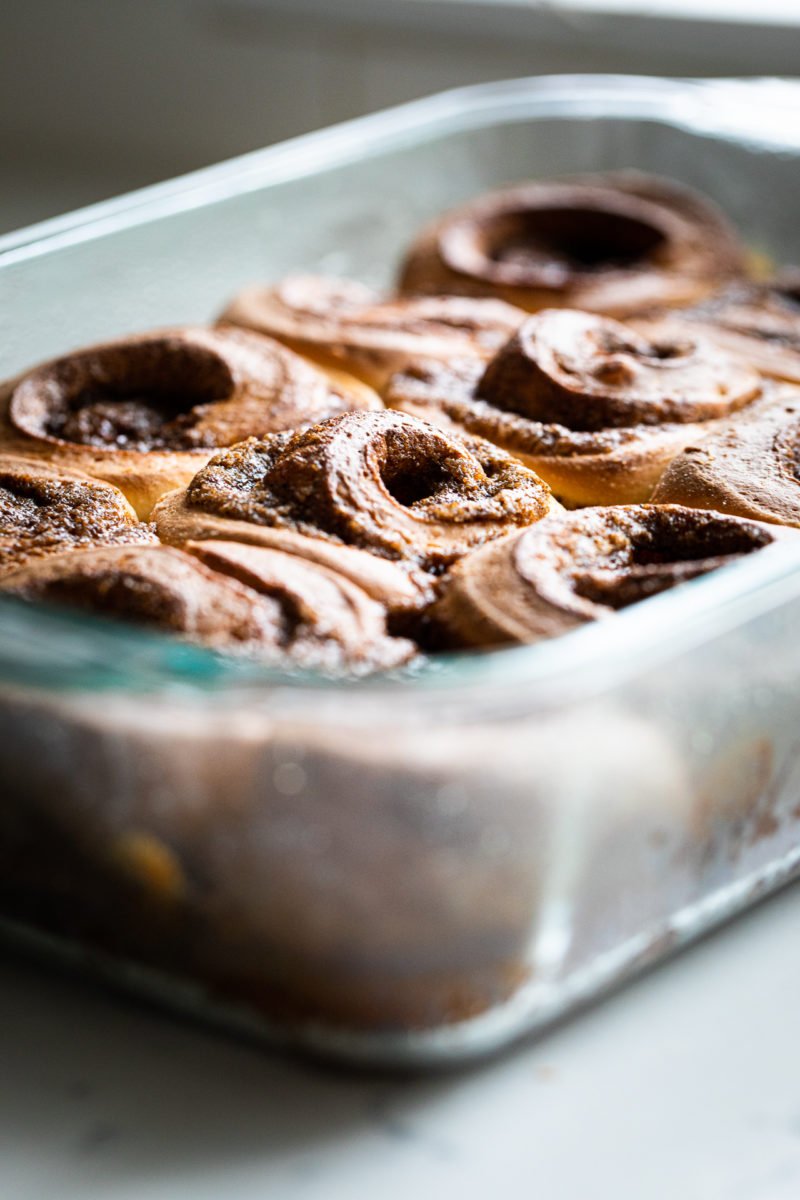
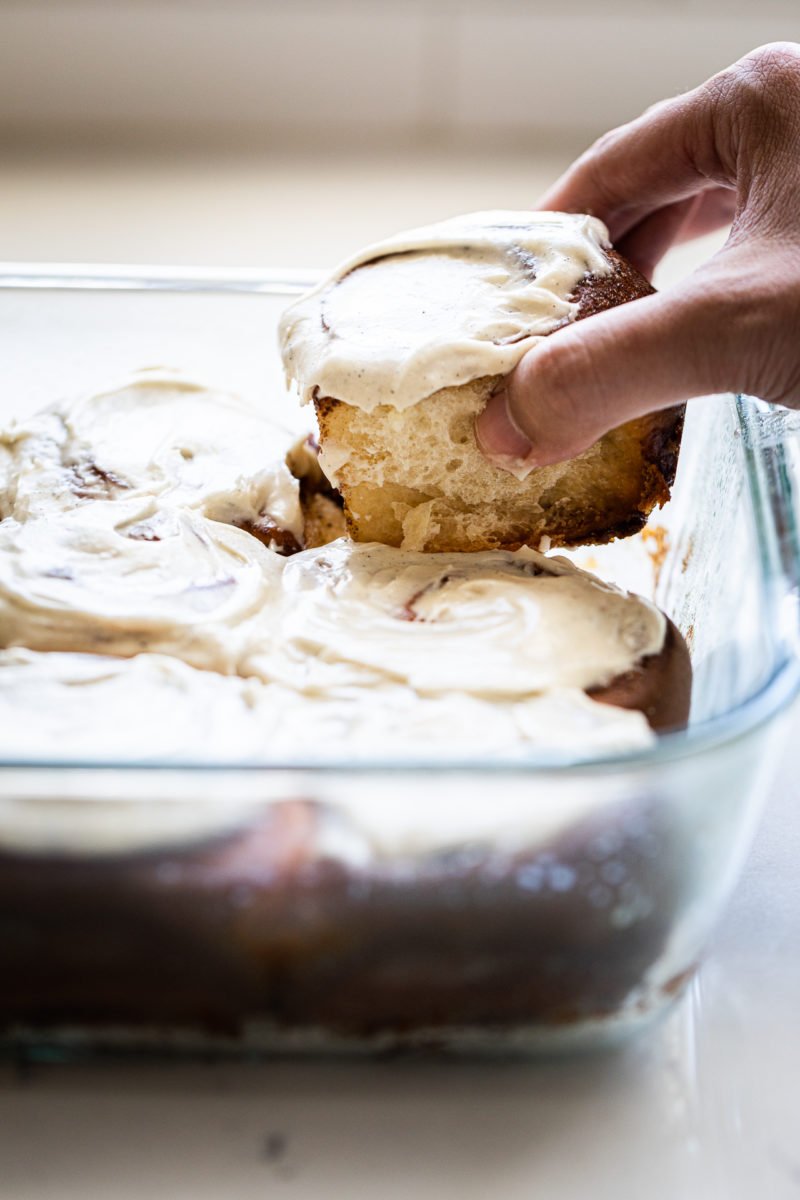
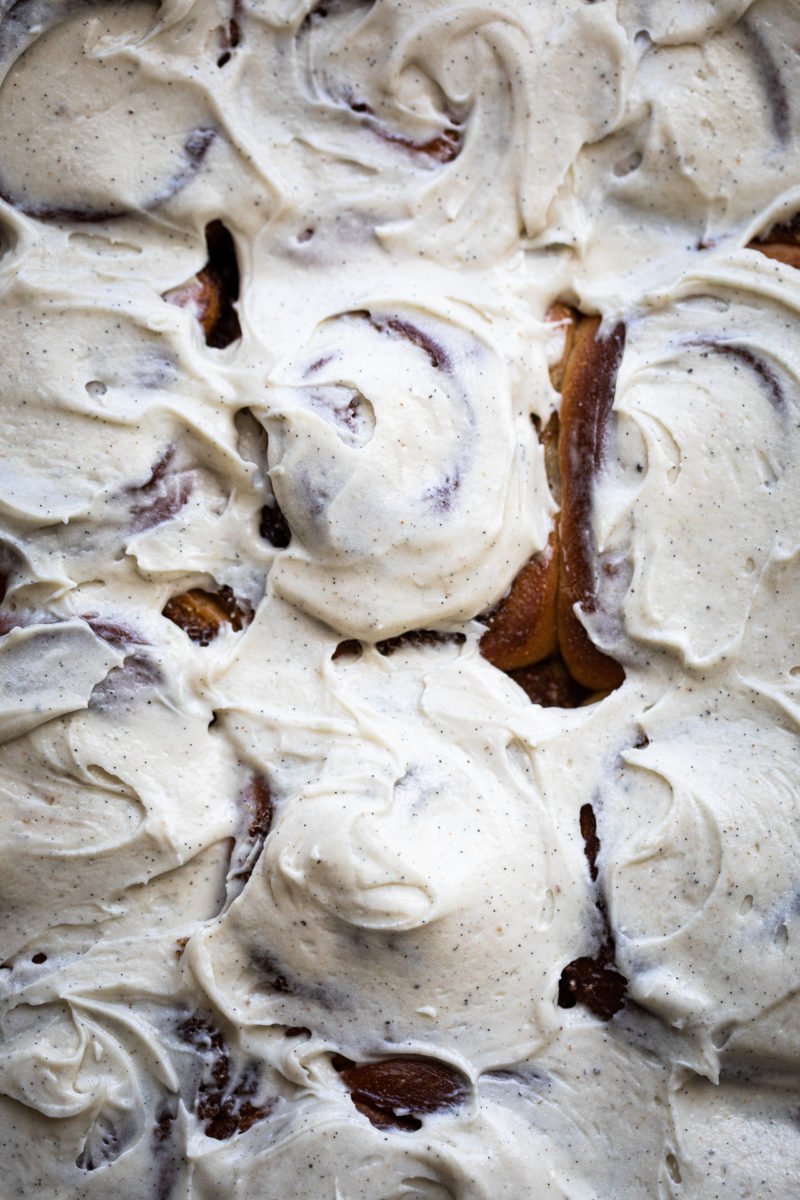
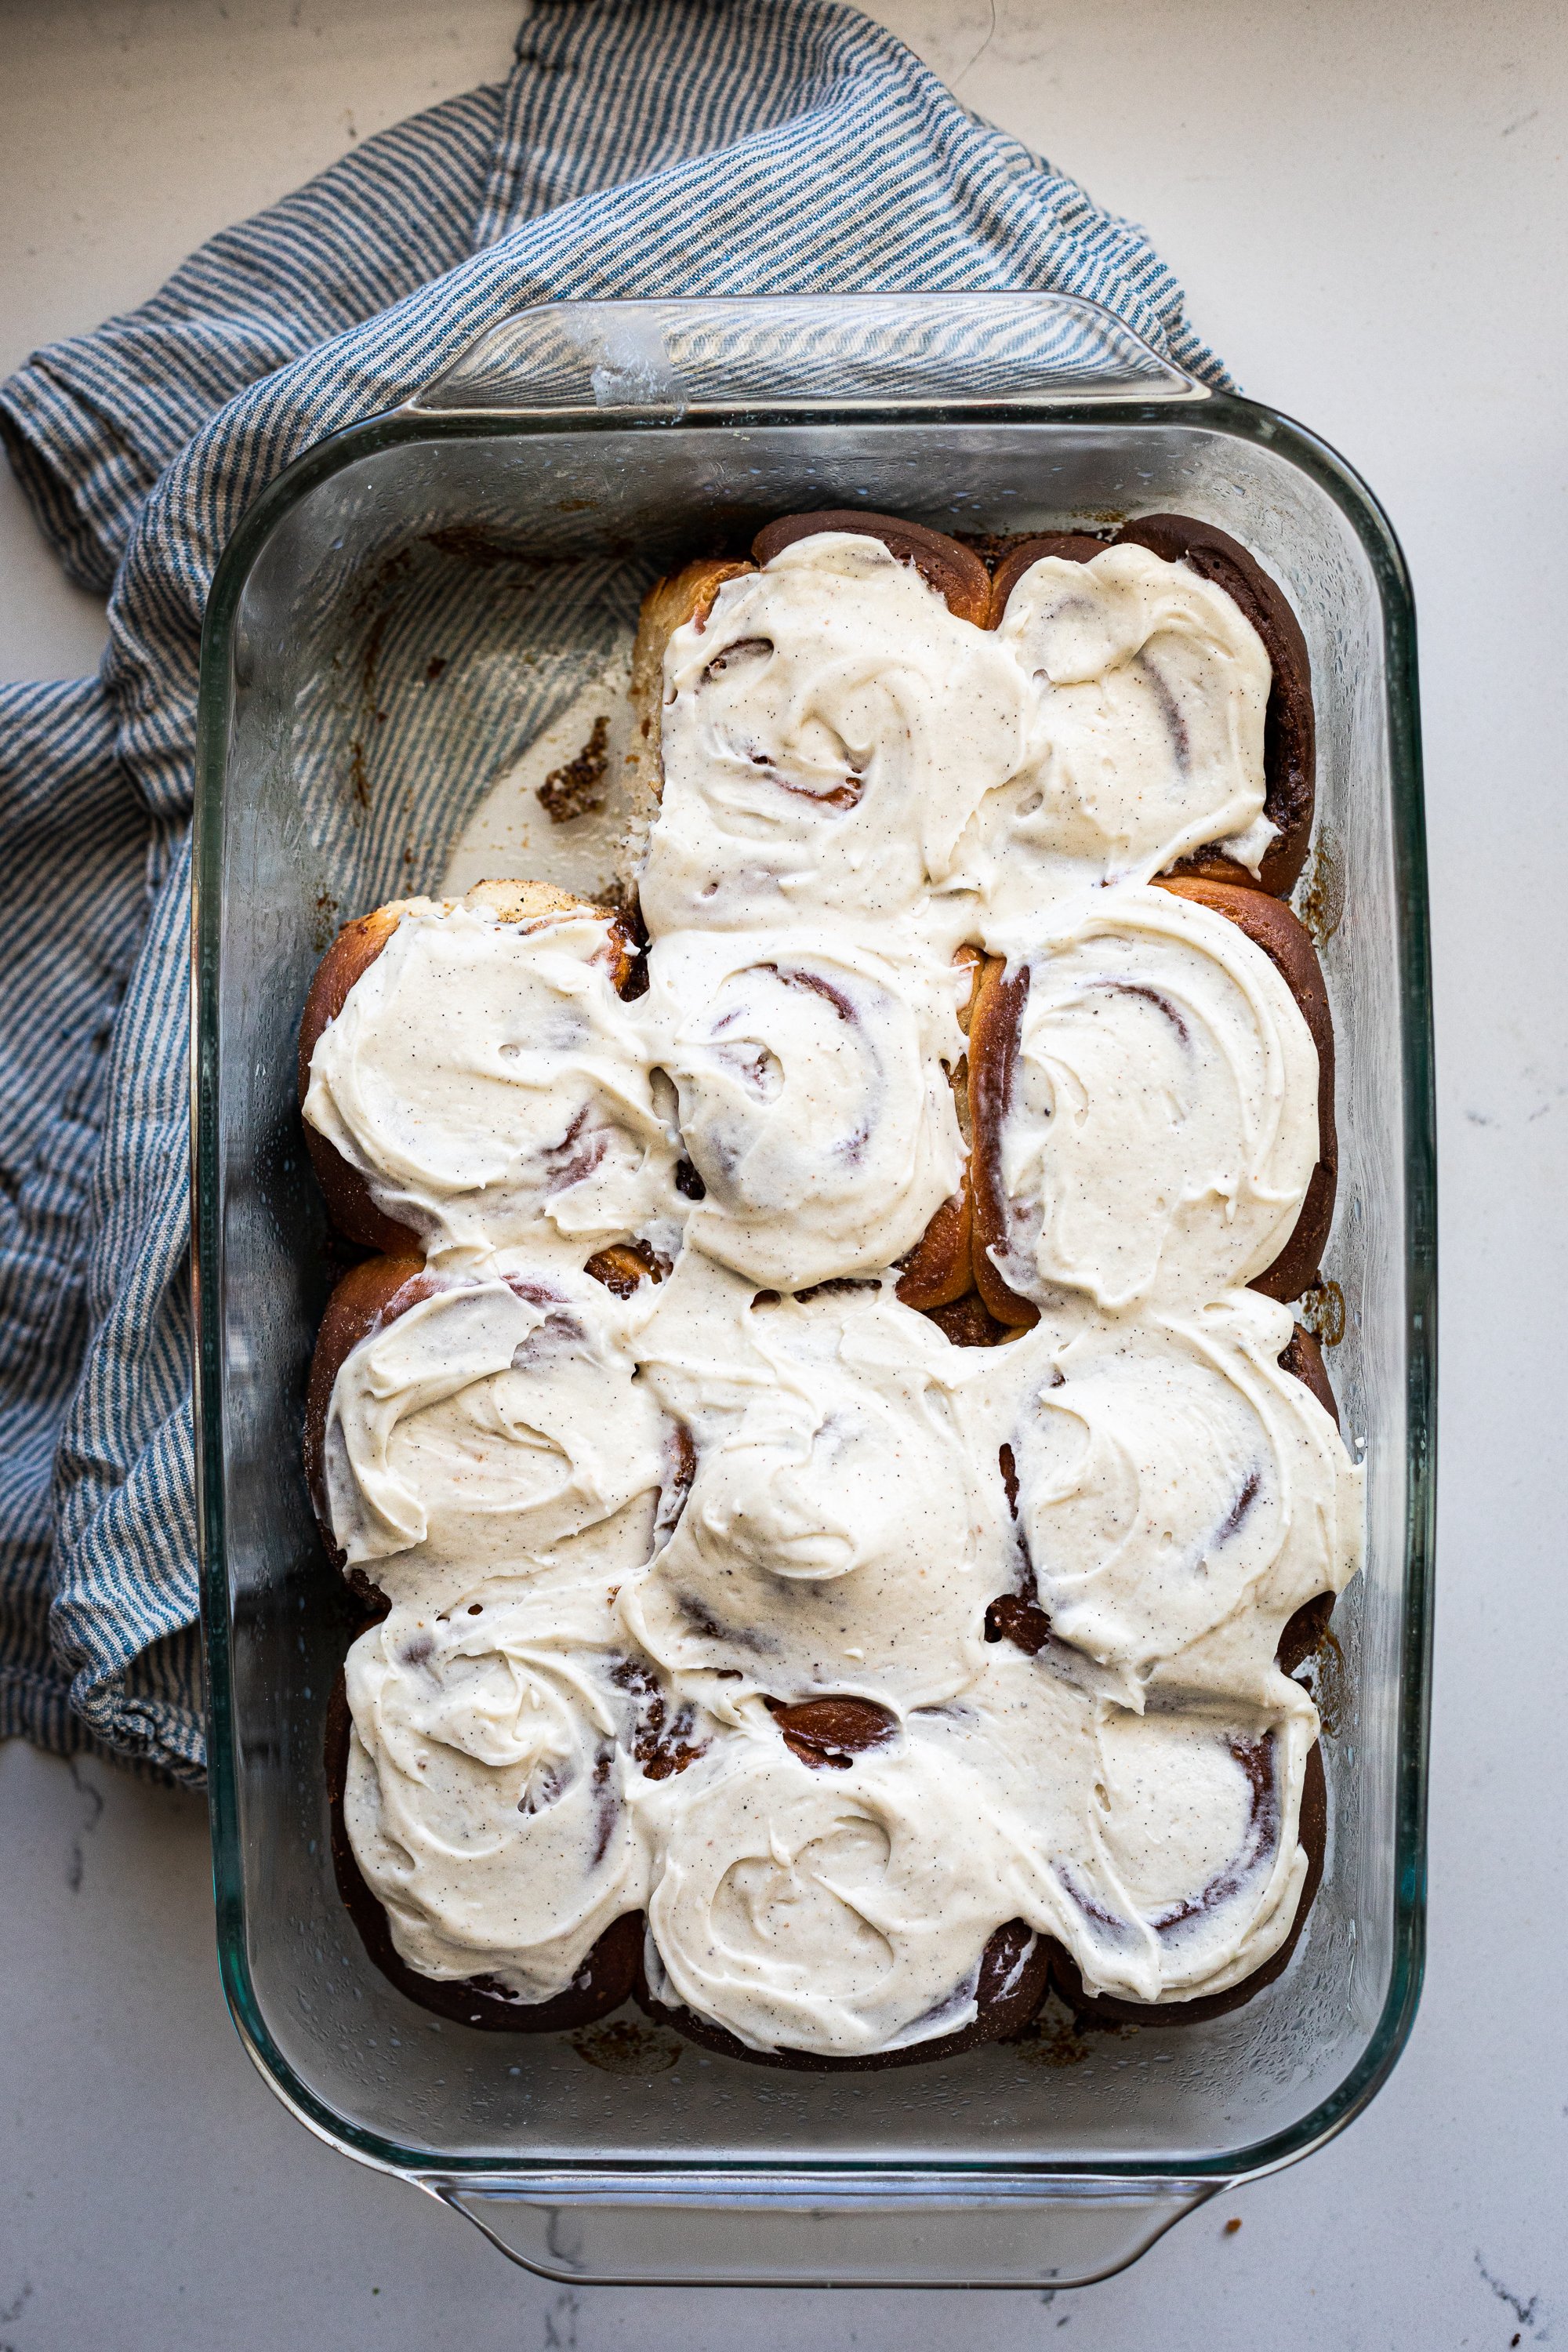
I like cinnamon, but I LOVE cardamom. I never understood why rolls only had to have cinnamon in them, why not add other complementary spices that go well with cinnamon? I’m known to sneak cardamom into desserts whenever I can so, of course, I had to put a cardamom twist on my favorite cinnamon roll recipe. I made these rolls in Pyrex’s new Deep Dish line, which is up to 50% deeper than your current glass bakeware. This gives your rolls more room to rise during the proof and when it bakes so you get deep fluffy rolls! It makes for the perfect centerpiece for a weekend brunch. You can find their new Deep Dish line at Walmart or on Pyrexhome.com!
This recipe is adapted from one of my favorite recipes in the BraveTart cookbook. I’ve made several variations of these rolls now and they are the best!
(images by HonestlyYUM. Recipe adapted from Bravetart. This post is sponsored byPyrex. All opinions are our own. Thank you for supporting the brands that keep HonestlyYUM going!)
Split the vanilla bean in half and scrape the inside of the bean with the back of a small knife and add the vanilla to the bowl of a stand mixer. Add the cream cheese, cardamom and the powdered sugar. With the paddle attachment, beat on slow speed until the sugar is absorbed and increase to high speed and beat for about 5 minutes. Transfer to a zip lock bag and set aside until needed, about 24 hours at room temperature.
Filling
Clean the bowl of the stand mixer and add all ingredients for the cardamom-cinnamon filling on low speed until the ingredients are combined, then increase the speed to medium and beat until the filling turns cream light, about 5 minutes. Transfer to a zip lock and set aside until needed, about 24 hours at room temperature.
Dough
Clean out the bowl of the stand mixer. Add flour, sugar, yeast, salt and baking soda and mix to combine.
Melt the butter, milk and yogurt together in a small pot and whisk. Melt until about mixture is 80 degrees. Add to the flour slowly with a spatula until the dough is a shaggy dough. With the dough hook, knead on low speed for about 20 minutes.
Cover the bowl with plastic and proof for about 90 minutes until it has doubled and is light and puffy. If the dough is still firm and dense let it proof for 15 more minutes.
Turn the dough out onto a lightly floured surface and roll into a 13 inch square. Cut the corner of the ziplock bag of filling with scissors and squeeze the filling over the surface of the dough and spread in an even layer with a spatula.
Roll the dough into a log with seam side down. Slide a long strand of thread or dental floss under the dough and cross the ends over the top and pull tight to divide the dough in the middle of the log. Cut each half into 6 slices with the floss int he same manner.
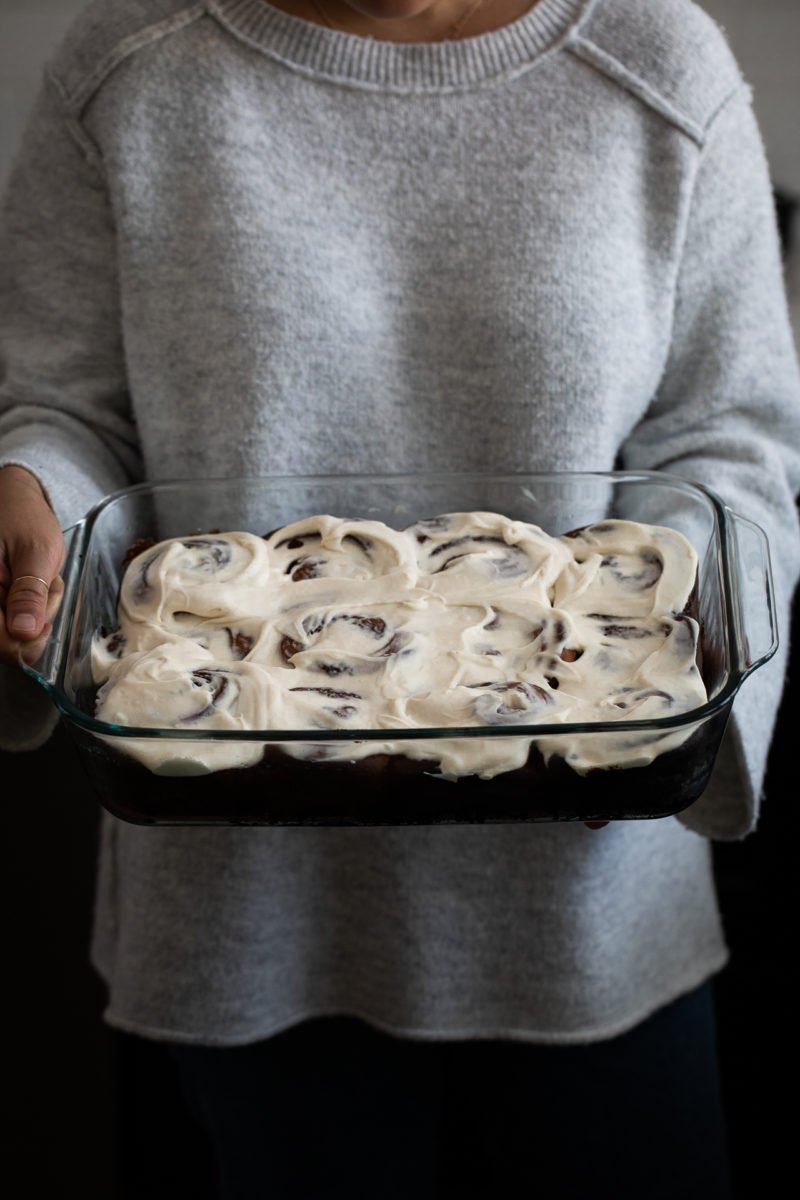
Lightly butter a 9 by 13 inch Pyrex Deep Dish and add the rolls evenly spaced. Cover with foil and refrigerate overnight or for up to 48 hours.
Preheat the oven to 350 with the rack adjusted to the middle. Let the cinnamon rolls come to room temperature while the oven preheats. Bake the rolls covered until they are firm but pale, about 45 minutes. Remove the foil and continue baking until light brown, about 15 more minutes.
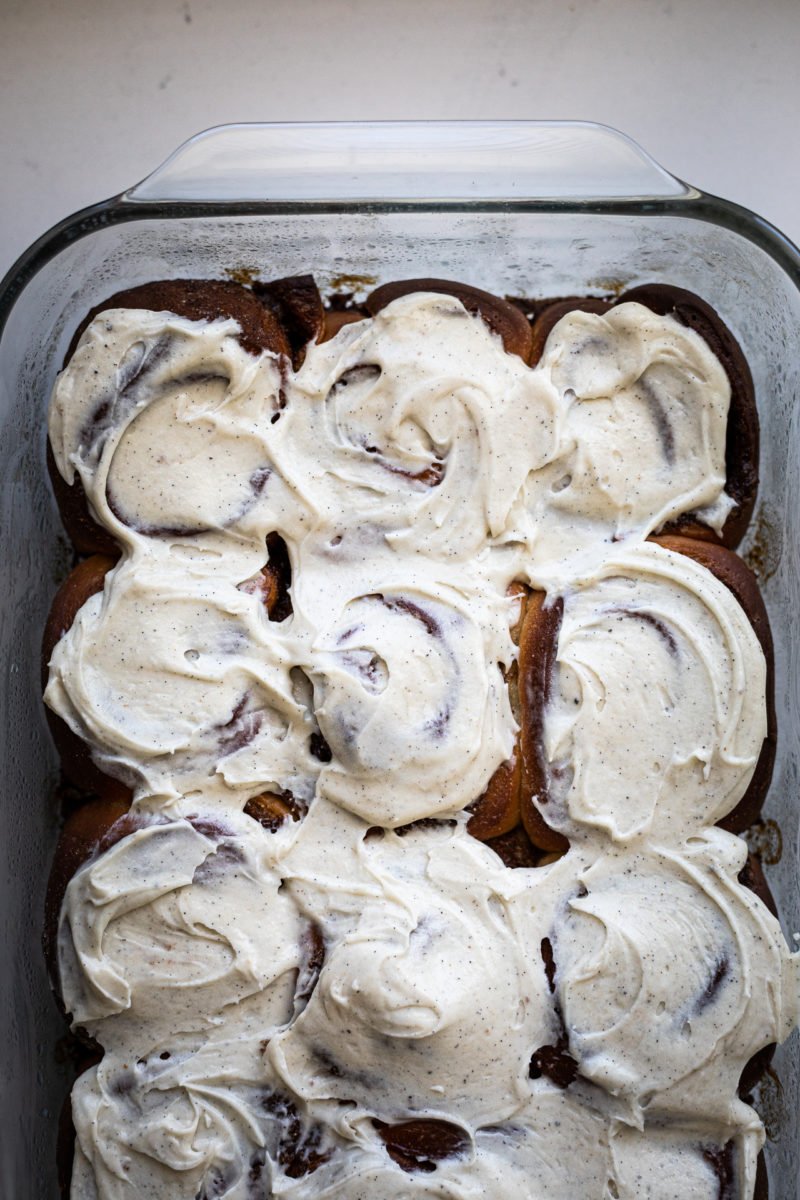
Allow the rolls to cool until just warm to the touch and frost the tops of the rolls with a spatula.
Summer is right around the corner and that means strawberry season is upon us! Fragrant red California strawberries are everywhere. Our family will be snacking on strawberries all summer since they’re low in sugar and high in vitamin C. It is a great treat, especially for kids. My 7 month old already loves gnawing on a whole strawberry!
That’s why I’m so excited to partner with California Strawberries and show you my favorite simple strawberry snacks that celebrate this classic California fruit. I’ve got two sweet snacks and two savory snacks in this post: Matcha-covered strawberries, strawberry bruschetta, herb marinated strawberries and feta and strawberry and champagne granita. I hope these inspire you to make your own strawberry snack, which you can enter the Get Snacking Challenge to win amazing monthly prizes (like a KitchenAid Mixer) and/or a grand prize of $1,000 on Instagram! The challenge will run until August 31st so enter soon!
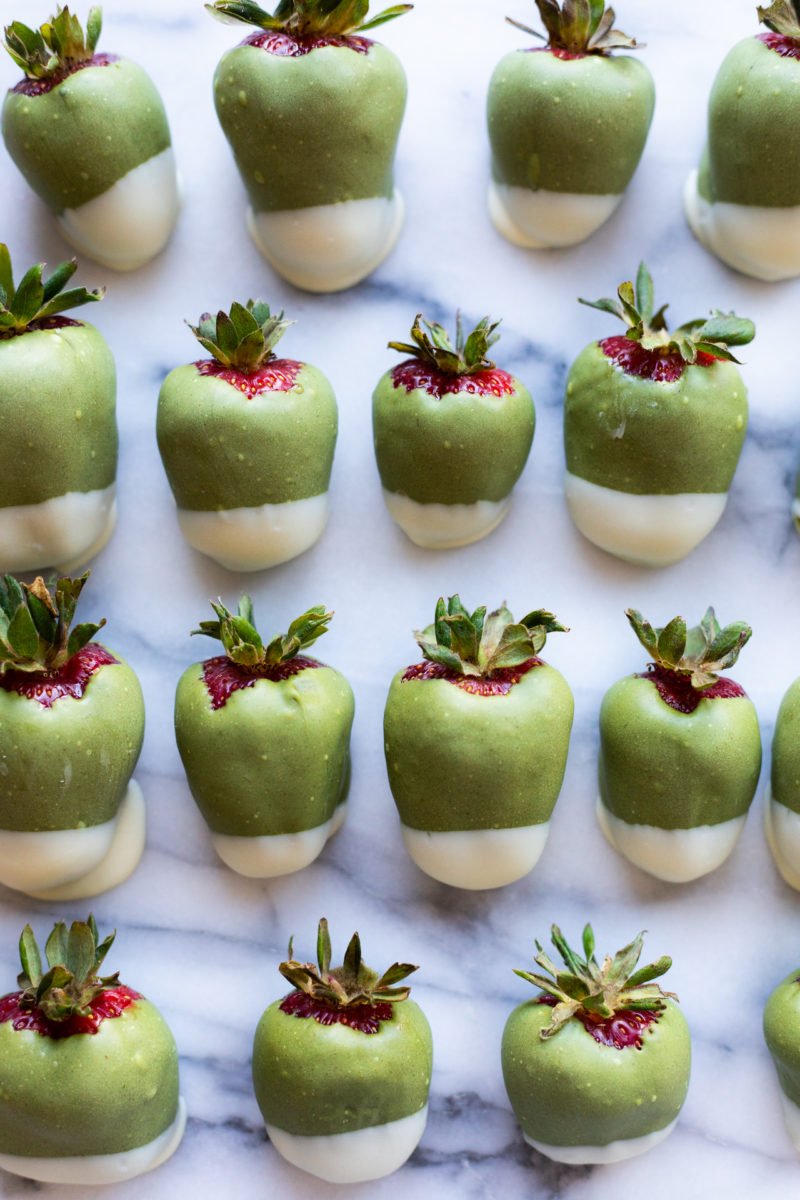
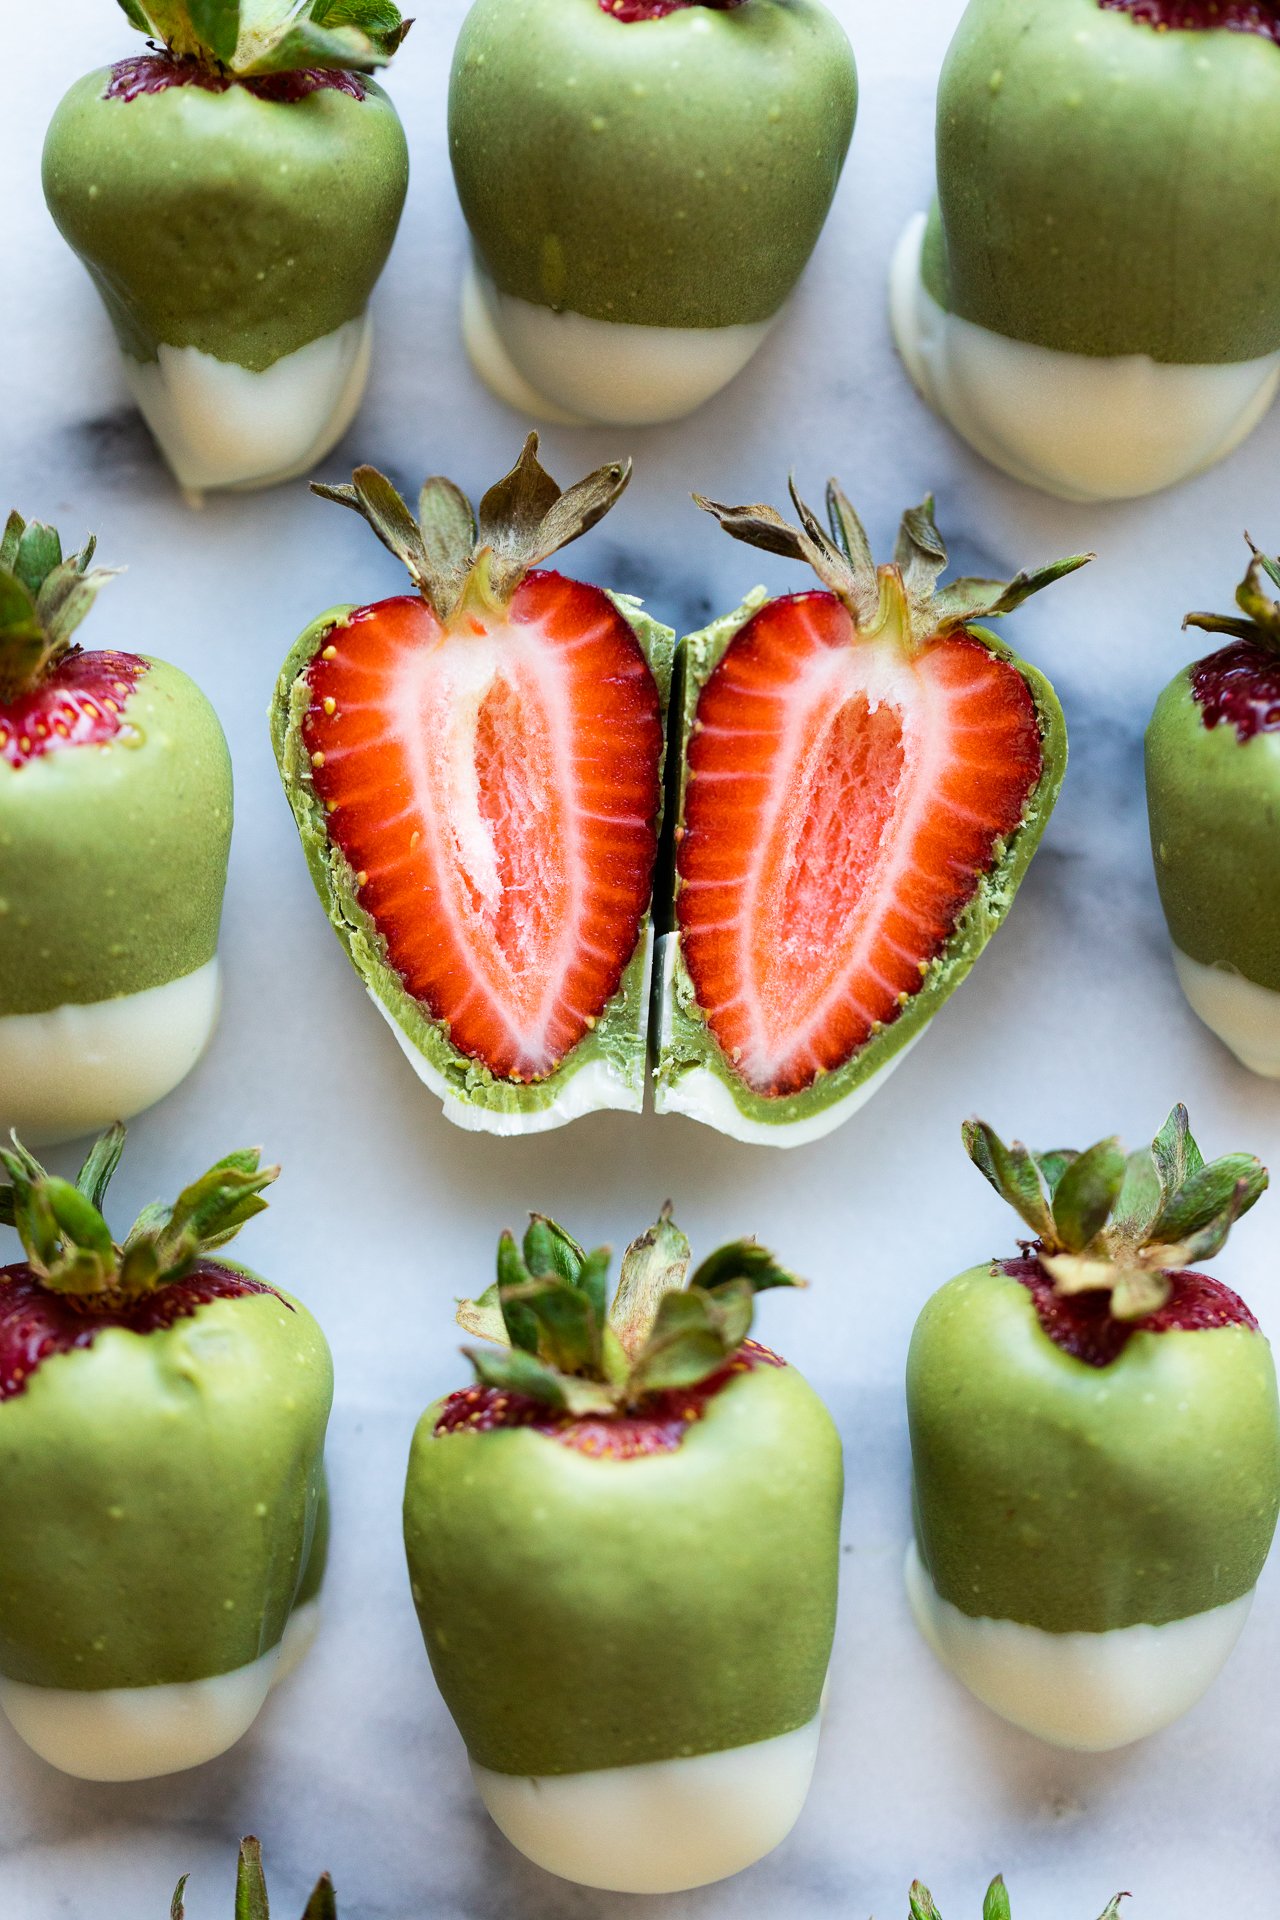
MATCHA-COVERED STRAWBERRIES
The combination of white chocolate, matcha and strawberries is incredible. These are so easy to make, simply melt chocolate, stir in matcha and dip. The hardest part is waiting for the chocolate to harden!
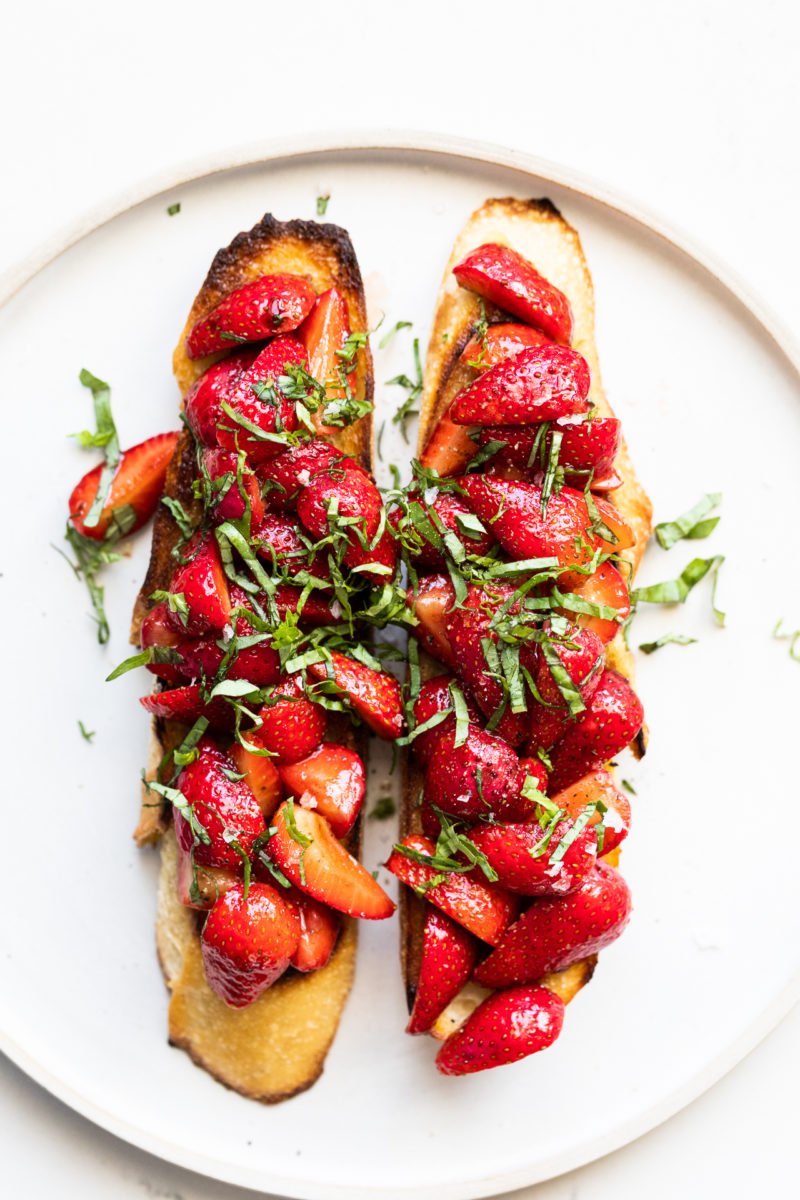
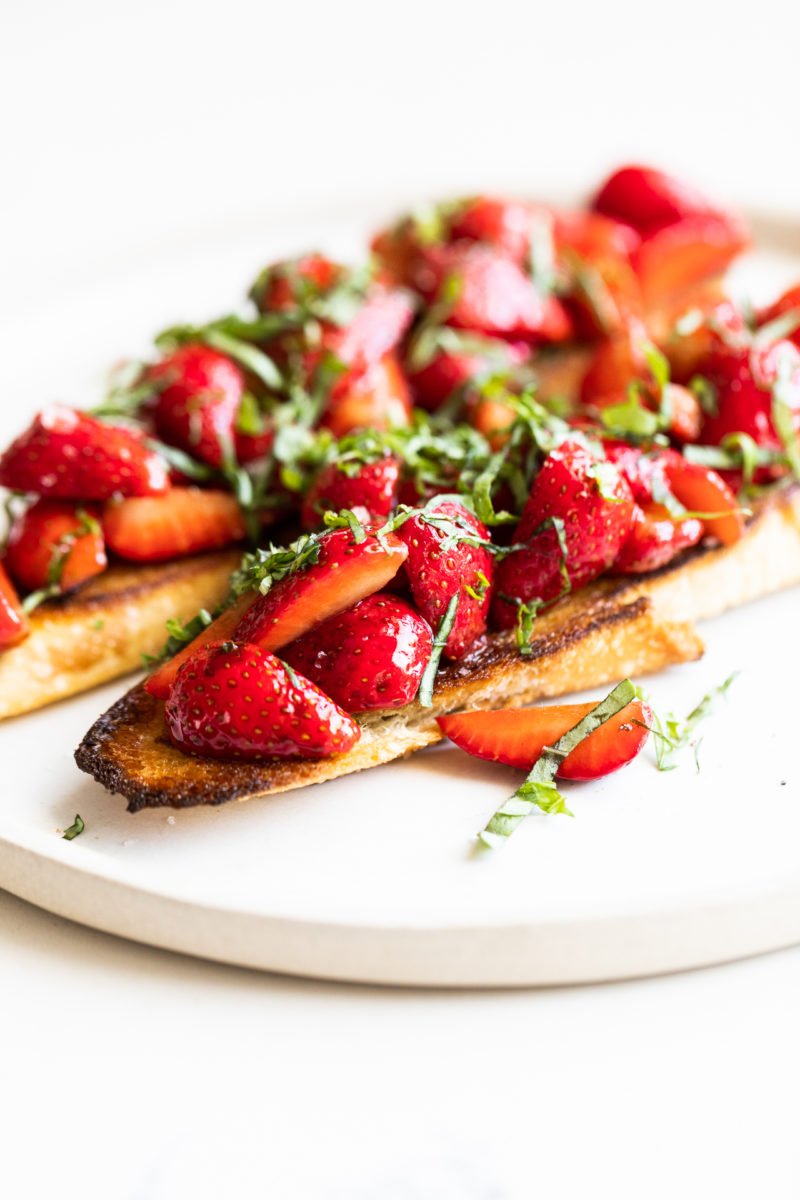
STRAWBERRY BRUSCHETTA
You’re probably used to seeing bruschetta made with tomato but strawberry is a fantastic twist on the classic. It has a similar flavor profile– sweet and slightly tart and dressed in the classic extra virgin olive oil, balsamic vinegar and basil.
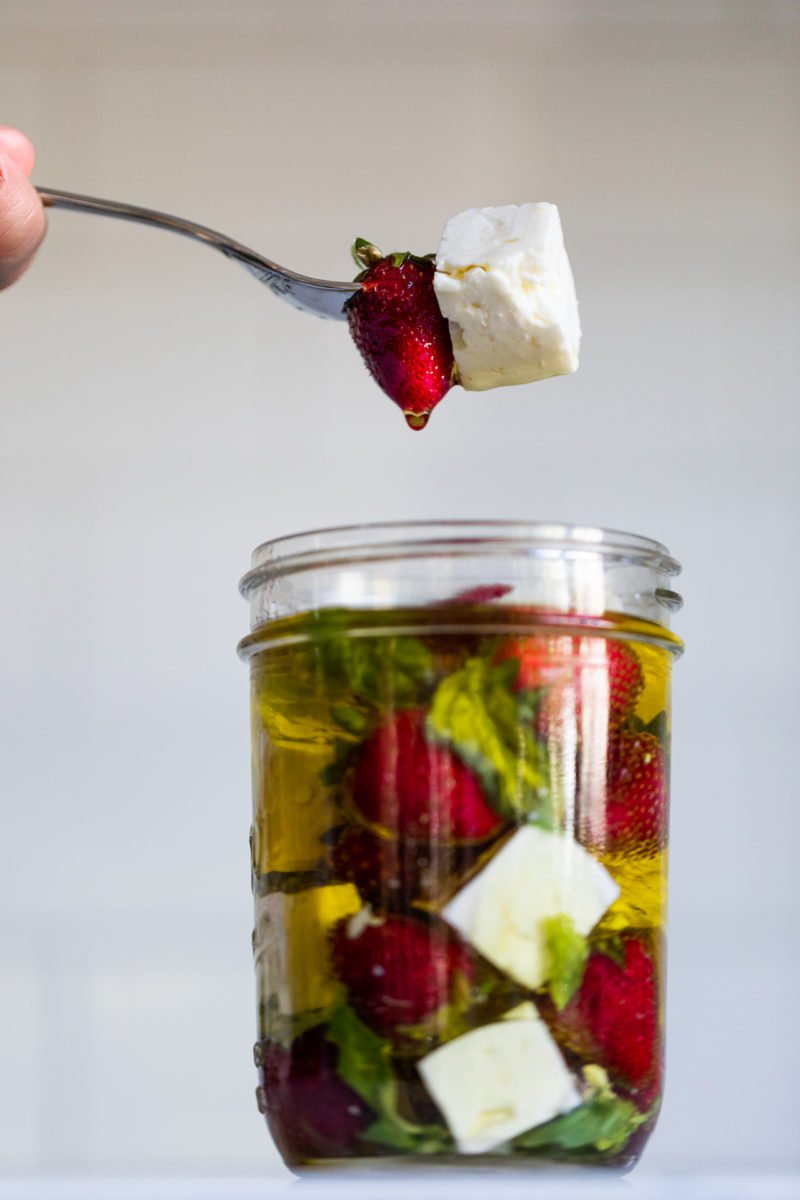
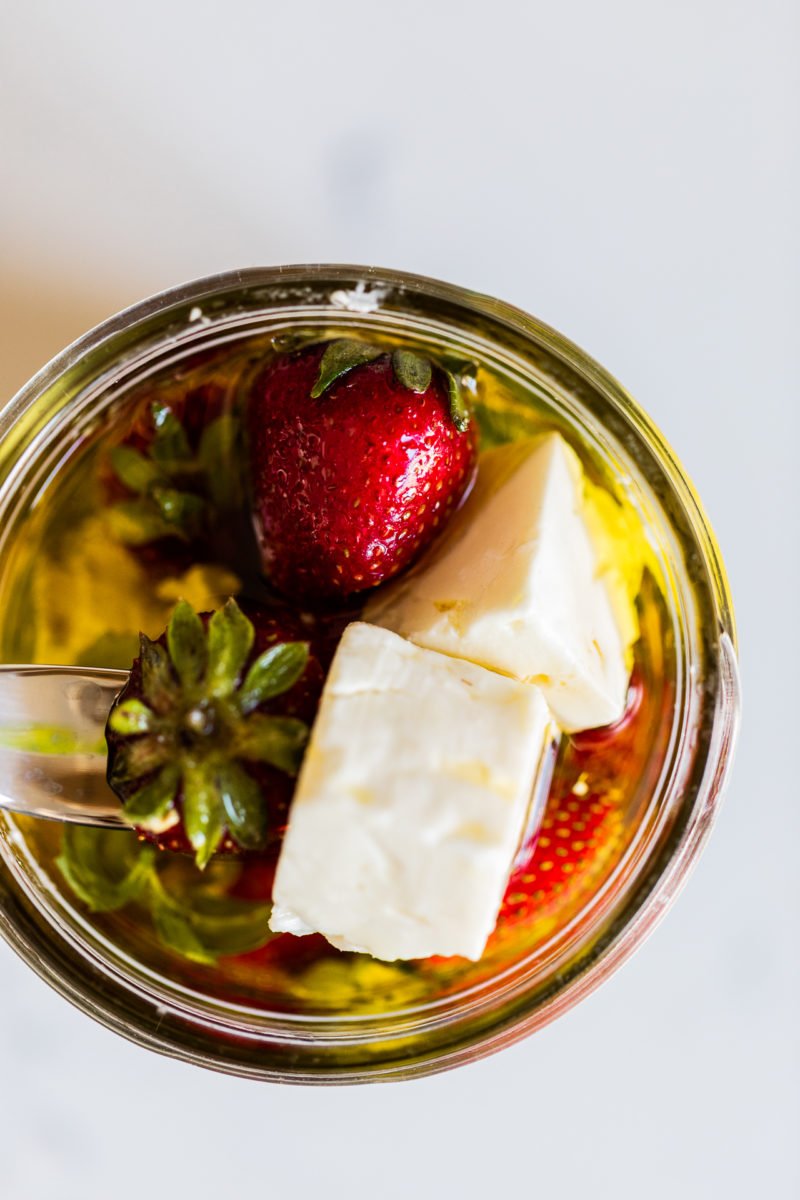
HERB MARINATED STRAWBERRIES AND FETA
You may think feta and strawberries seem like a weird combination but this marinated jar of strawberries with feta is a perfect topping on any salad. I love this on any greens and rice to make a salad like my strawberry and herbed rice salad!
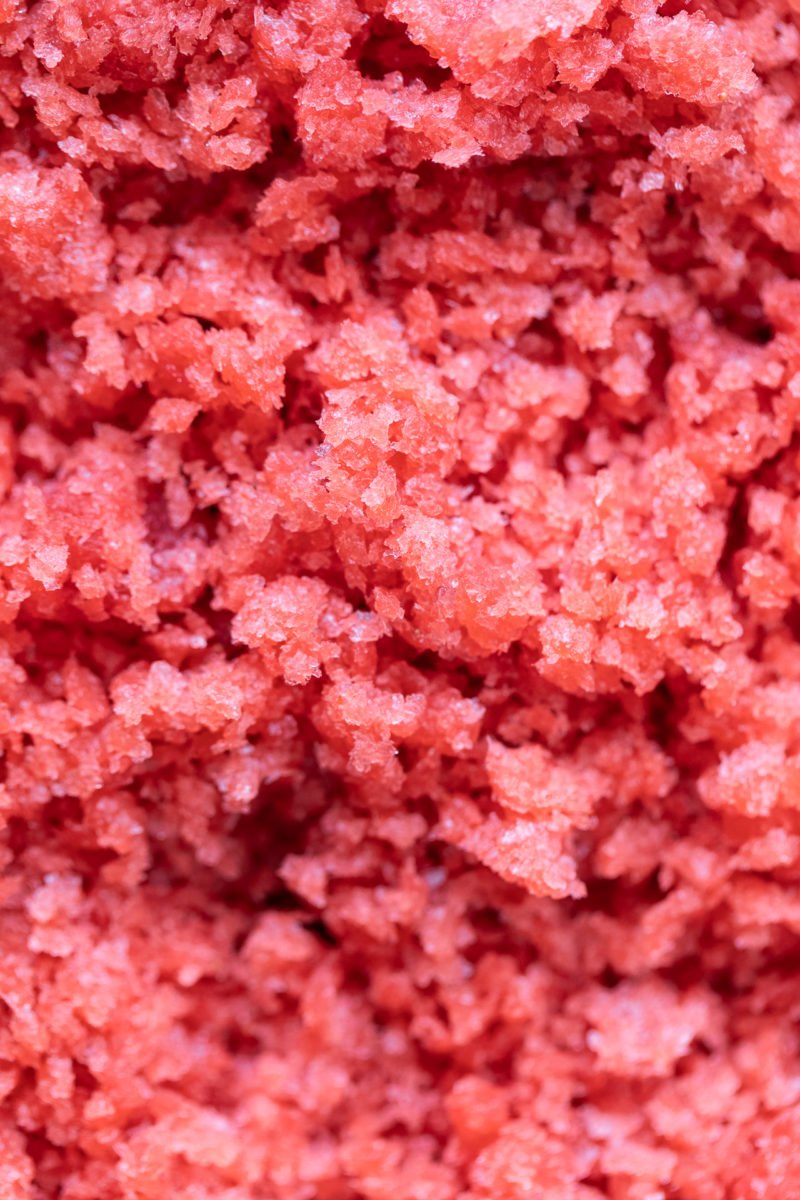
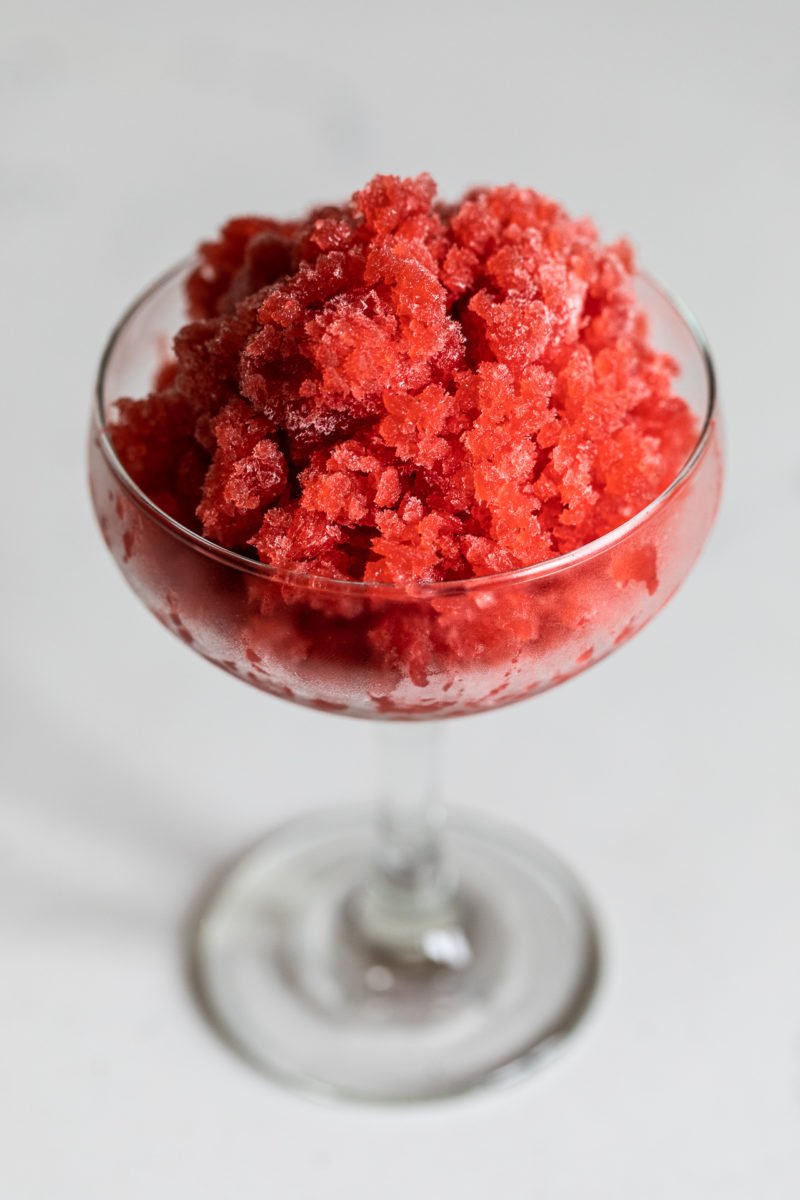
STRAWBERRY AND CHAMPAGNE GRANITA
Is there a more classic combination than strawberries and champagne? Well, I’ve combined them into an icy delicious adult treat here. This only requires 3 ingredients and some time, but you will love this on a hot summer day!
(images by HonestlyYUM. This post is sponsored byCalifornia Strawberries. All opinions are our own. Thank you for supporting the brands that keep HonestlyYUM going!)
Melt 3/4 of the white chocolate chips in a bowl over a double broiler or in the microwave. If using the microwave, melt for 30 second intervals, mixing the chocolate in between, until chips are fully melted.
Add the matcha and whisk until the matcha is incorporated. Dip each strawberry in the matcha chocolate and place on a baking sheet lined with parchment or a Silpat. Place in the refrigerator for about 15 minutes until the chocolate has hardened.
Melt the other 1/4 of chocolate chips in a small bowl using the same method as above. Dip the bottom tip of the matcha-covered strawberries in the white chocolate and place back on the baking sheet. Place in the refrigerator until the chocolate shell is hardened.
STRAWBERRY BRUSCHETTA
Slice the baguette in 1/4 inch slices at an angle. Brush each side with extra virgin olive oil and sprinkle with salt and pepper. Heat a pan over medium high heat and toast each side of the bread until golden brown.
Remove the stems from the strawberries and quarter strawberries. Mix 1/4 cup of the extra virgin olive oil and balsamic vinegar and salt and pepper to taste. Toss the strawberries in the dressing.
Spoon the strawberries over the toasted bread. Thinly slice the basil leaves and scatter on top. Season the tops of the toasts with salt and pepper to taste.
HERB MARINATED STRAWBERRIES AND FETA
Cut the feta into cubes and quarter the strawberries. Place in a jar and add the basil leaves. Cover the feta and strawberries with olive oil until covered. Store in the refrigerator and top on salad.
STRAWBERRY AND CHAMPAGNE GRANITA
Remove stems from the strawberries. Place in a blender. Add a small splash of water if you need liquid to get the blender going. Blend until the strawberries turn into a smooth puree. Pour the bottle of champagne into the blender and pulse 2-3 times so that the champagne is incorporated.
Transfer into baking dish and place in the freezer. After 1 hour, use a fork to scrape the frozen edges towards the center in a raking motion. Repeat 2-3 times with 1 hour intervals until the entire dish is frozen with the granita texture. Serve in champagne glasses.
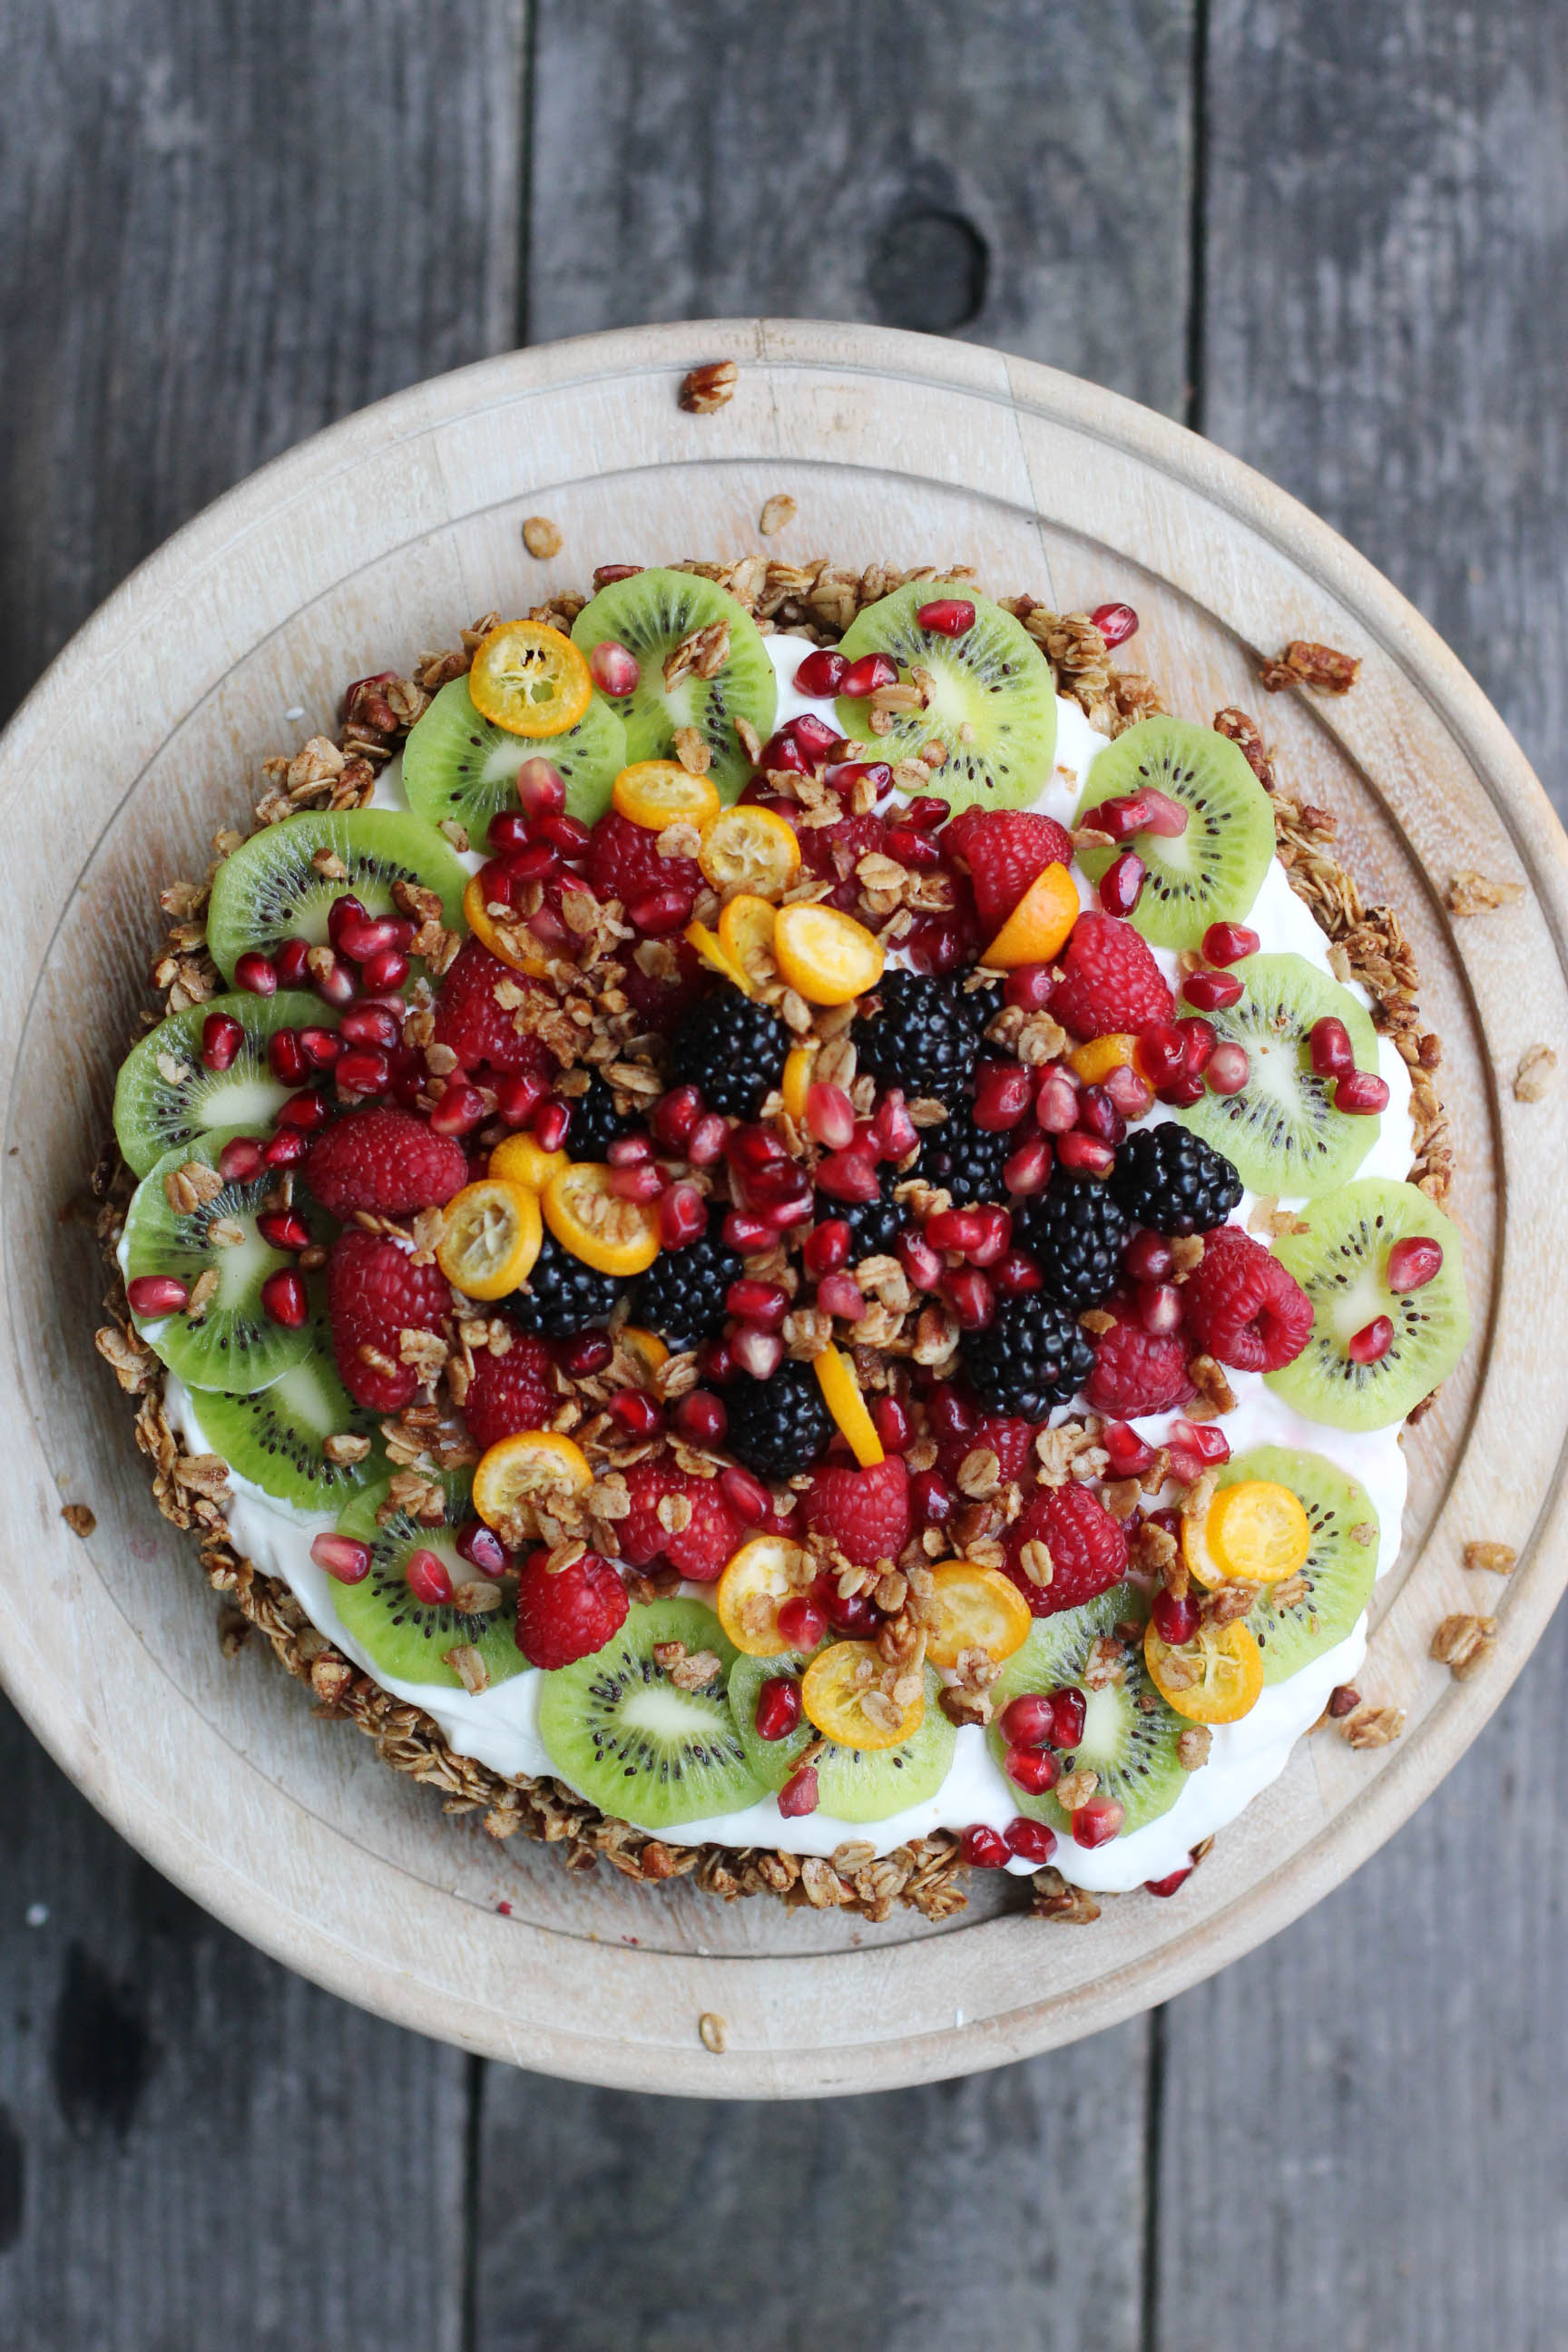
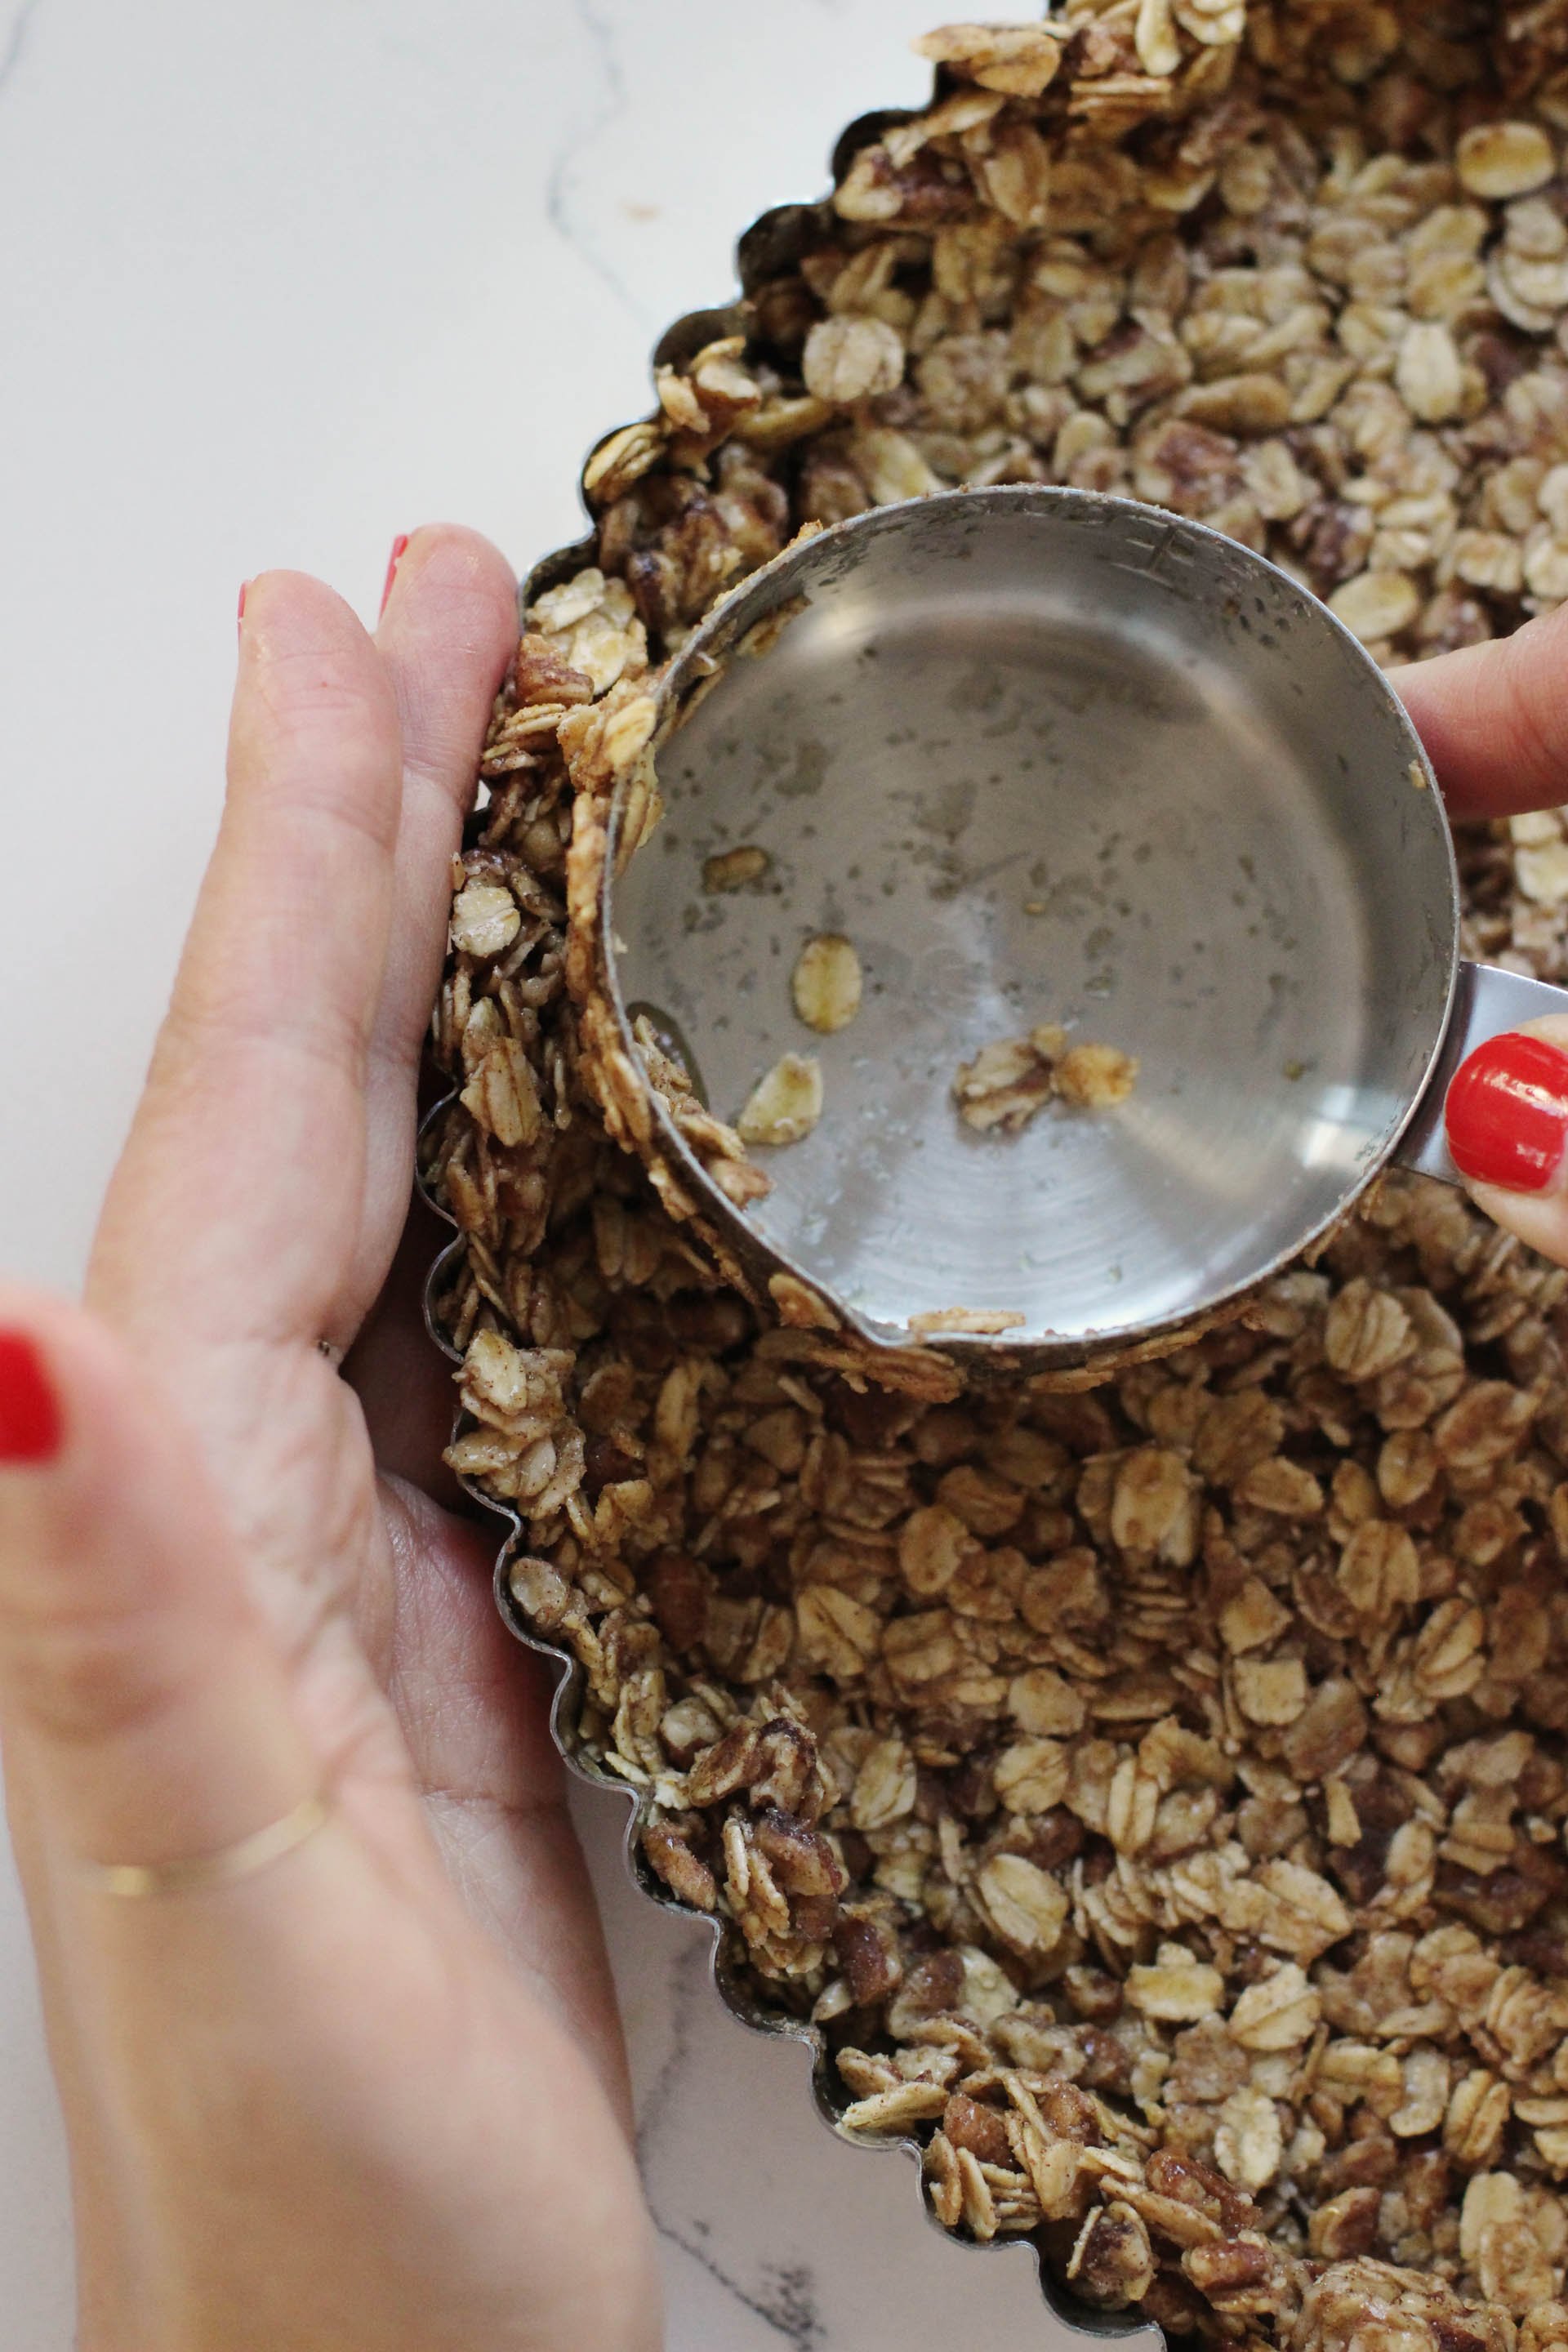
So this looks pretty impressive right? Well, the reality is that this Granola-Crusted Yogurt Fruit Tart is just a granola, yogurt and fruit parfait. For brunch entertaining, I love the idea of a simple classic breakfast dish reformatted into something more elevated and elegant. The crust is a simple granola recipe that is baked into a tart pan with a removable bottom. Once the granola crust cools completely, you simply fill the crust with yogurt and top with fruit. This dish does not slice neatly like a tart and it’s not meant to. Just dig in and turn the whole thing into a crumbly, creamy mess– for some reason it tastes even better that way!
Preheat the oven to 325 degrees. Start by making the granola crust. Mix all the granola ingredients in a bowl until evenly combined. Use the bottom of the tart pan to trace a circle of parchment paper to line the bottom of the tart. Smear a dab of coconut oil to the bottom of the tart pan so the parchment paper stays in place. Grease the sides and top of the parchment well then lightly flour the greased areas and tap the excess flour out. The granola gets very sticky so it’s important that your pan is well greased!
I’ve never been really into sweets. I like a dessert or sweet treat here and there, but I wasn’t someone who had a big sweet tooth. Everything changed during my pregnancy and post-partem. I was the cliche pregnant woman walking down the supermarket aisle at 11 pm on a Tuesday with 3 pints of ice cream. I don’t know if was the hormones or if I needed a substitute for alcohol, but the addiction was BAD. I needed some healthy alternatives and I got hooked on making a healthy twist on my favorite desserts.
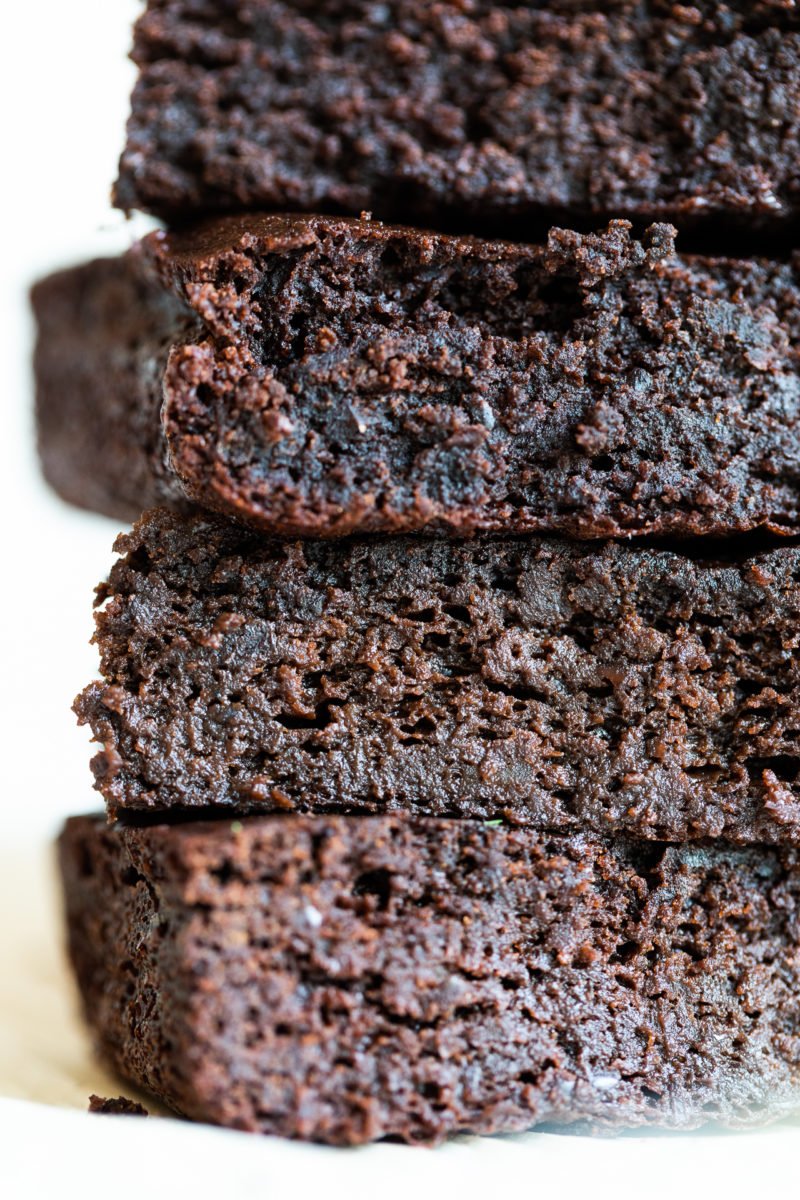
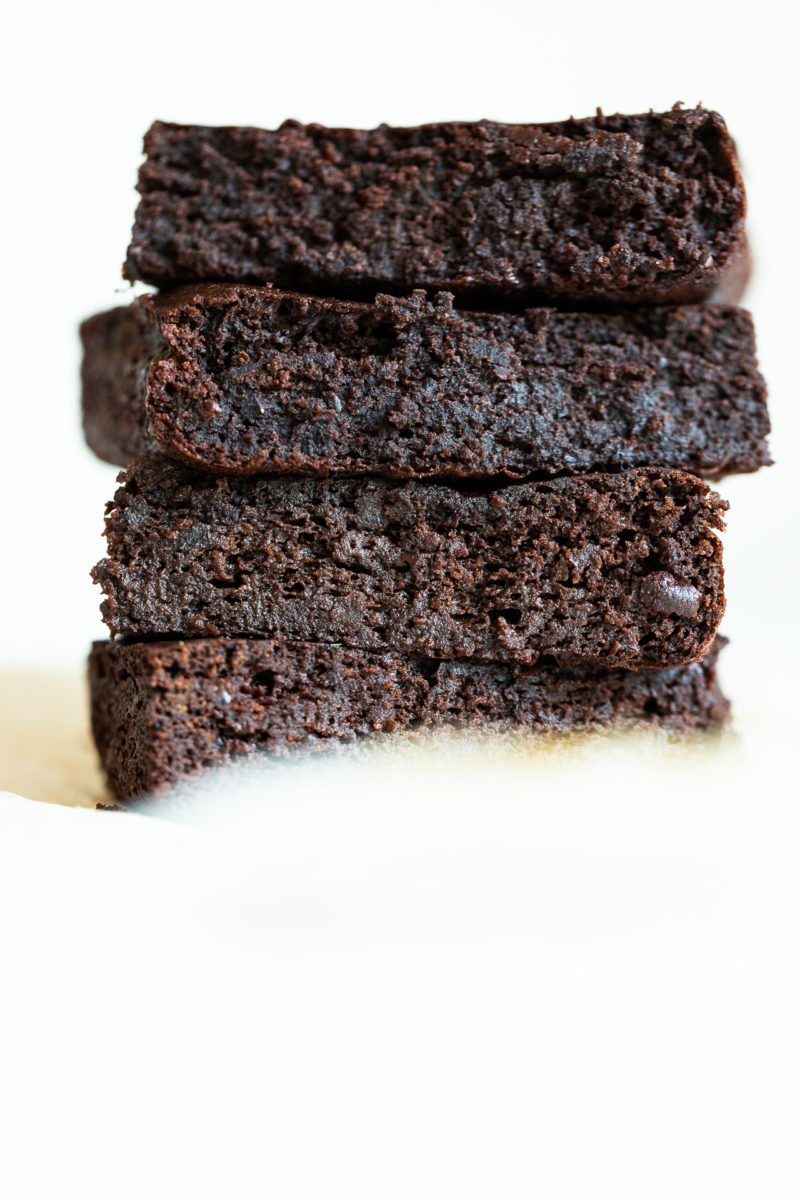
These brownies have no flour or refined sugar. Adzuki beans (also known as red beans) replace all the flour you would ordinarily find in brownies. You would never know it. As dense as beans sound, they offer a fluffy texture that lightens the brownie batter, much like wheat flour does. I absolutely love adzuki beans and they are so nutritious but if you can’t find any or don’t want to go through the hassle of cooking them from dried beans, you can substitute with canned black beans. These are decadent, fudgey and rich in chocolate that you crave and expect from a brownie!
(images by HonestlyYUM)
Adzuki Bean Brownies
Adzuki beans substitute the flour in these rich, fudgey chocolatey brownies.
If starting with dry adzuki beans, simmer the beans in enough water to cover the beans until they are tender and fall apart easily. Drain the beans well.
Pre-heat the oven to 350 degrees. Blend all ingredients, except eggs, until smooth in a food processor. Then add eggs and pulse until combined.
Line a small pan (for example, 8 inch square pan) with parchment paper and grease with coconut oil. Bake for about 25 minutes until the middle is firm and springs back.
Allow the brownies to cool before slicing into squares.
NOTES
If using black beans, use a 16-ounce can of black beans.
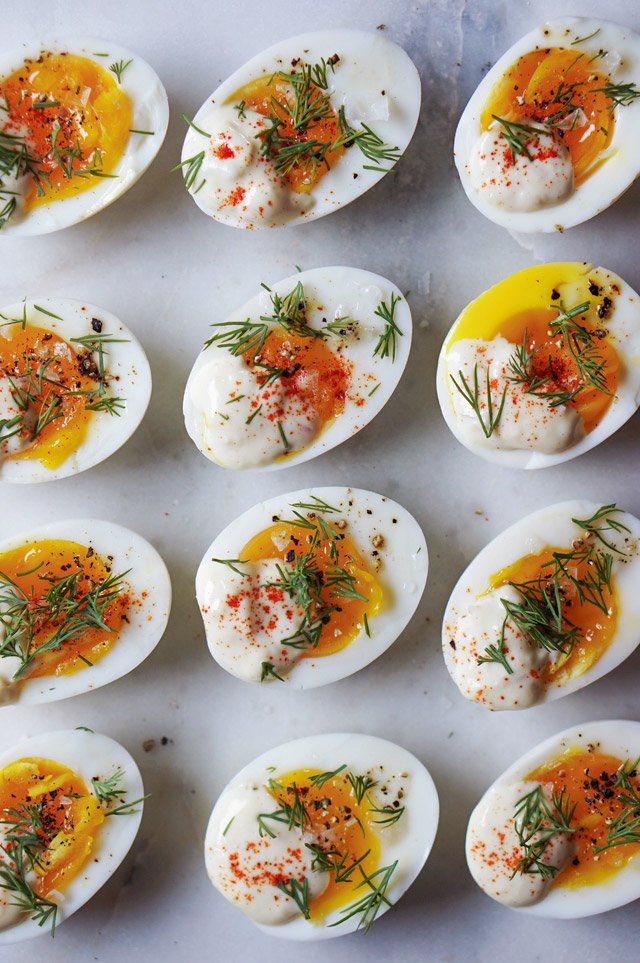
These are not your traditional deviled eggs, but they have classic deviled egg flavors, and in my opinion– better texture. I just love the velvety and thick runny egg yolk, so I thought why turn them into crumbly hard yolks only to smooth them out again with mayo? Also, these are easier to make. Each medium boiled egg gets a little dab of shallot-infused mayo. Top each off with a little sprinkle of paprika and dill and you’ve got my favorite version of deviled eggs!
Our journey continues onto Somerset, just about 97 miles west of London, to a little town called Bath. As you might know, it’s best known for its Roman Baths which were once used for public bathing and now considered one of the best preserved Roman sites in the world. And in a town as small as Bath, it might be easy to underestimate the food. But to my surprise, the dining and drinking scene in this uniquely historic town is not to be overlooked. Actually, this was a consistent discovery throughout the rest of our trip through the English countryside! So yes, indeed, I would absolutely consider Bath nothing less than a foodie destination! And to think, we only scratched the surface in the little time we had there. It had certainly left me craving more and eager to return to explore more of what this little city, full of Roman history and beautiful Georgian architecture, has to offer . . .
EAT & DRINK
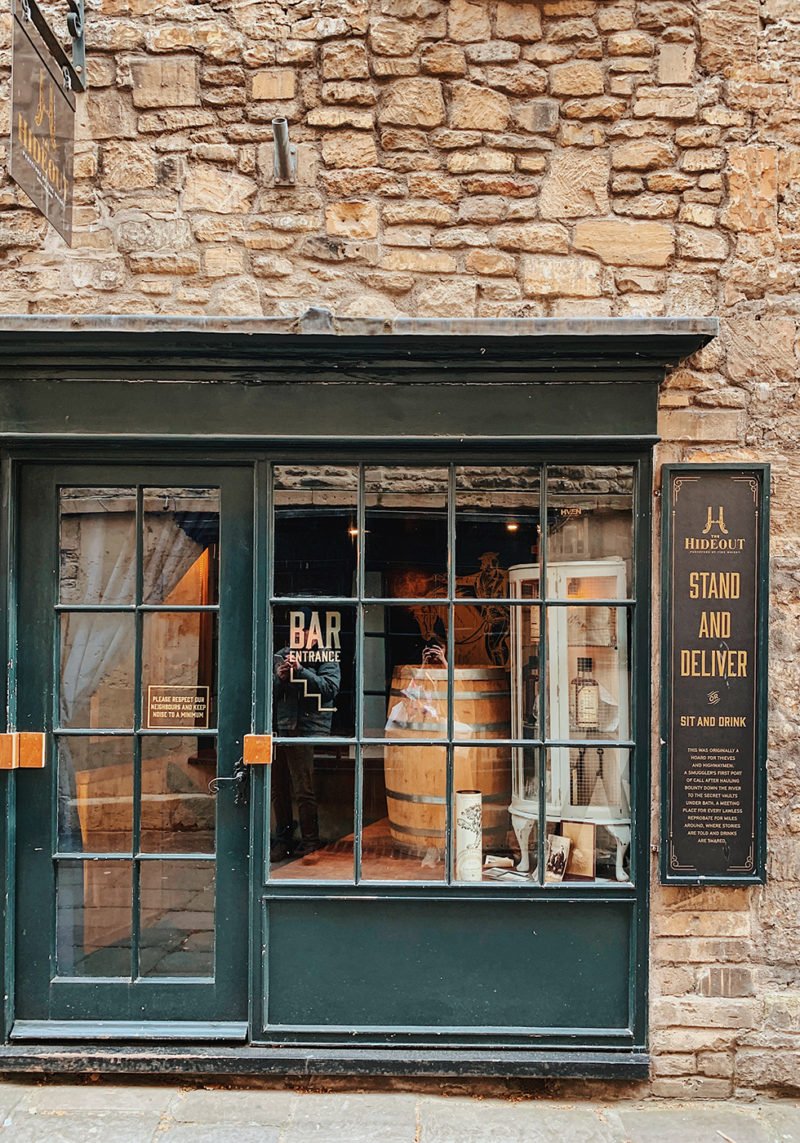
The Hideout: Tucked away in the narrow, quiet streets of Bath, is a true hidden gem that shouldn’t be missed. We happened to stumble upon it by accident or rather, perhaps fate led us here. But trust me when I say this place should be a top destination while in Bath. Founded by Callum and Ross, two Bath natives who are genuinely passionate about whiskey, The Hideout is exactly what the name implies. A hide out from the buzz of the city . . . a place to unwind, rest your feet, discover a new favorite cocktail or to simply just chat with any of the extremely knowledgable and friendly bartenders about, what else, but whiskey. There is so much thought, enthusiasm and love poured into The Hideout – from the custom printed menus that rotate out every few months to the handcrafted cocktails that change from time to time. From the moment you step foot into the old, stone-walled bar, you know you’ll be taken care of and best of all, you’re sure to have a great time.
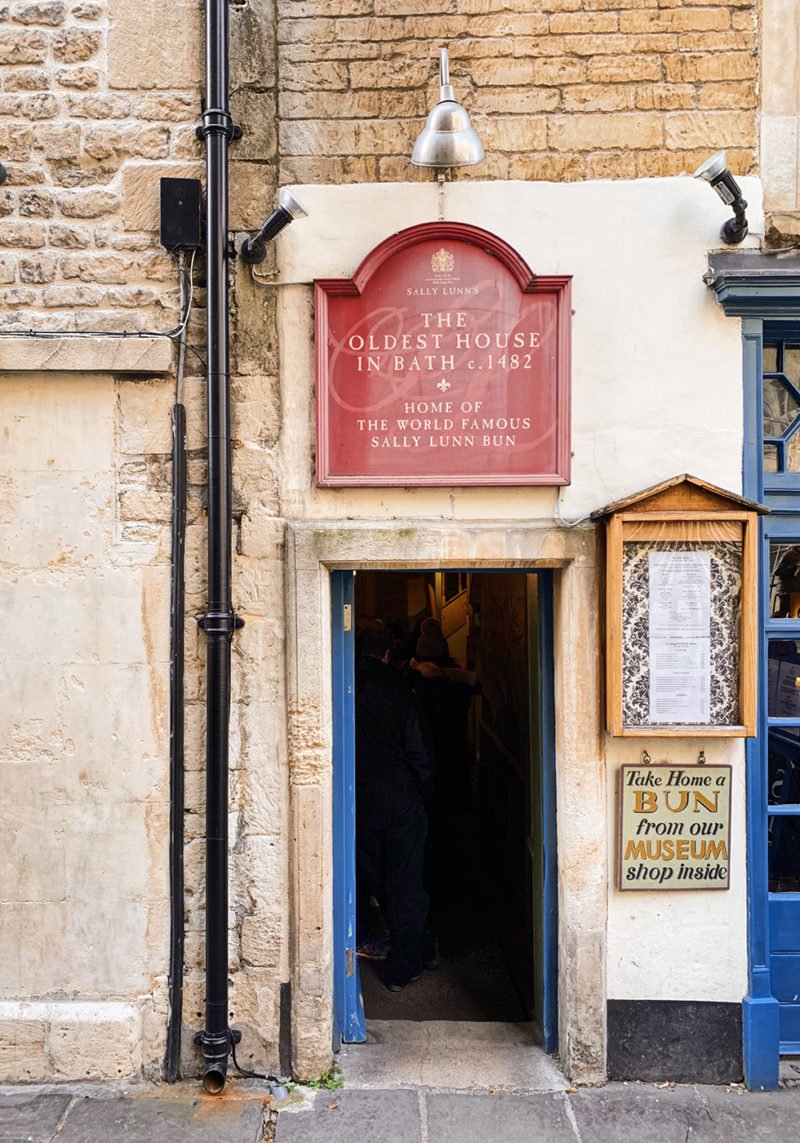
Sally Lunn Bun: Located across from The Hideout is home to the iconic Sally Lunn Bun. Legend has it that Sally Lunn, a French refugee, brought the recipe to Bath in the 1680s. Her famous buns, similar to that of a French brioche, became so loved and popular, Charles Dickens mentioned them in one of his novels. Today, you can visit one of the oldest houses in Bath to enjoy a Sally Lunn Bun with your afternoon tea or lunch – or if you’re short on time, you can visit the museum downstairs and take one home in a beautiful gift box.
Other places to try in Bath:
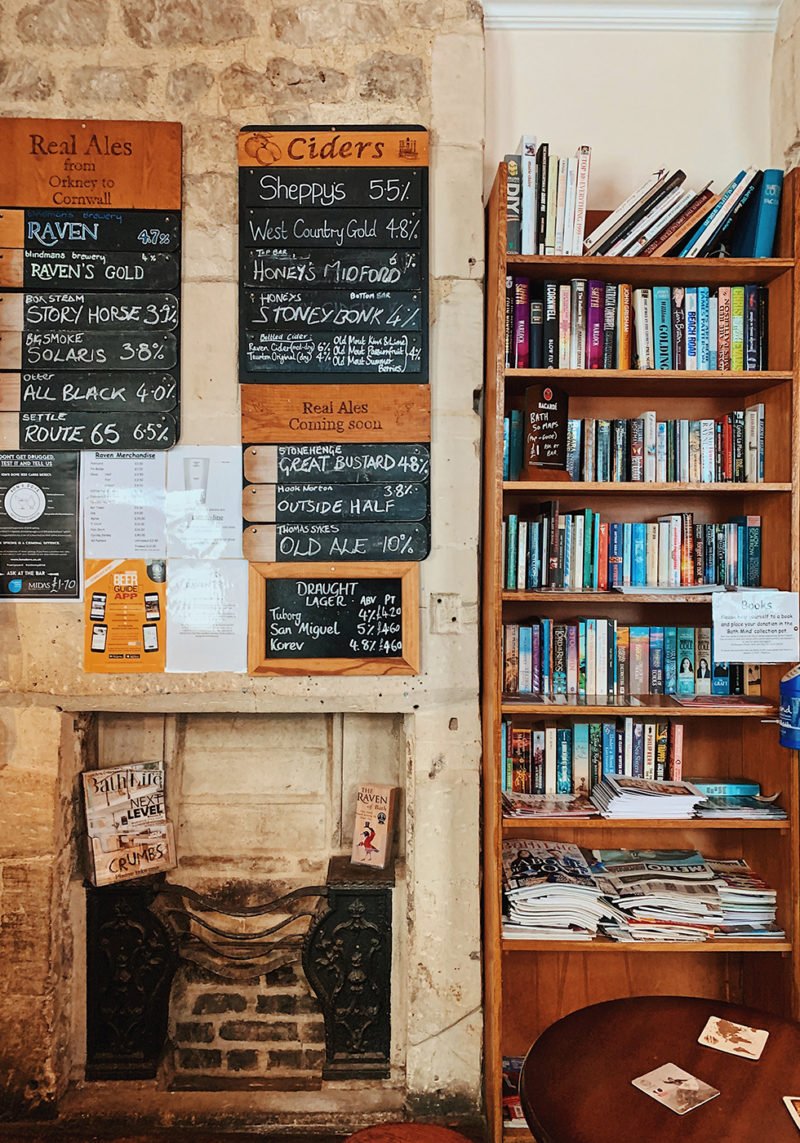
The Raven: Mingle with locals and enjoy a hot, handmade steak pie and a pint of English ale in this original British pub.
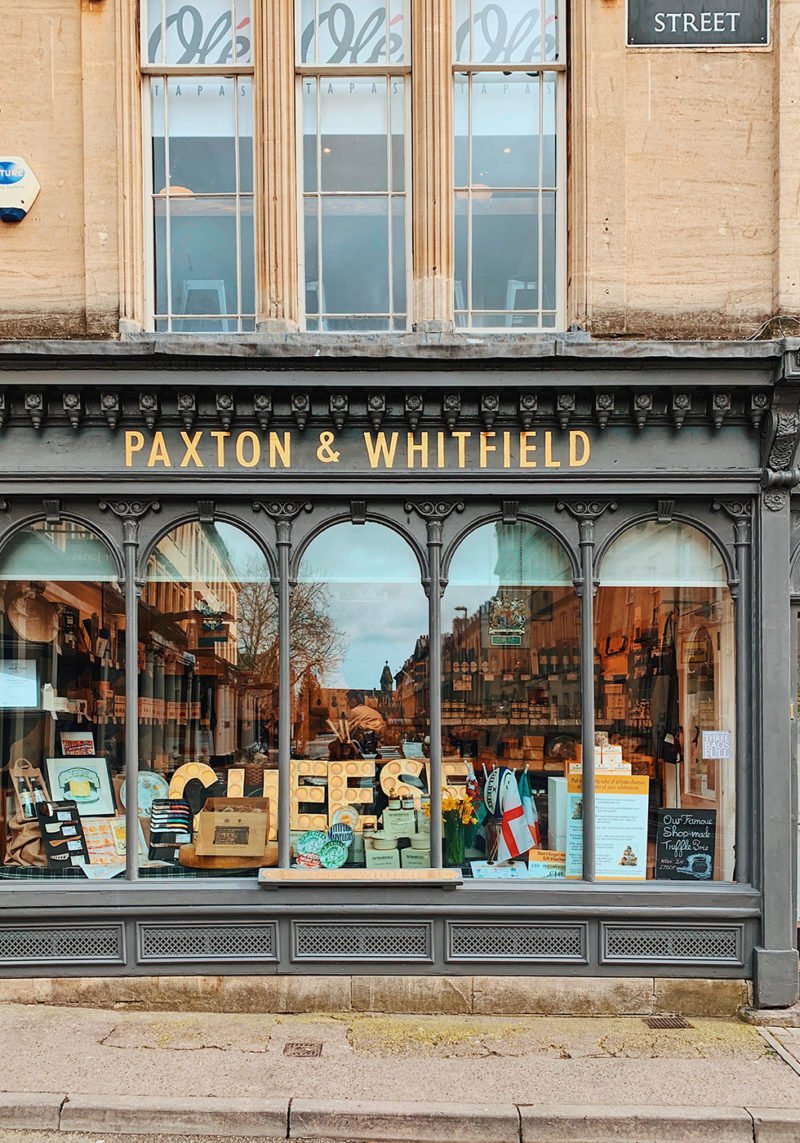
Paxton & Whitfield: One of the oldest cheesemongers in England, Paxon & Whitfield is the place to visit for the finest, artisan cheeses. A perfect stopover before a picnic or to bring back to your hotel for a post dinner snack.
The Acorn: Believers that “plants taste better,” The Acorn serves up beautifully plated, refined vegan dishes in one of Bath’s oldest buildings.
Chaiwalla: This cafe specializing in Indian street food is a local favorite, serving up delicious homemade samosas, daal and plenty of vegan options, as well.
Eight: Eight serves eight, beautifully thought out dishes that change with the season. Fresh, innovative and just an overall impressive experience.
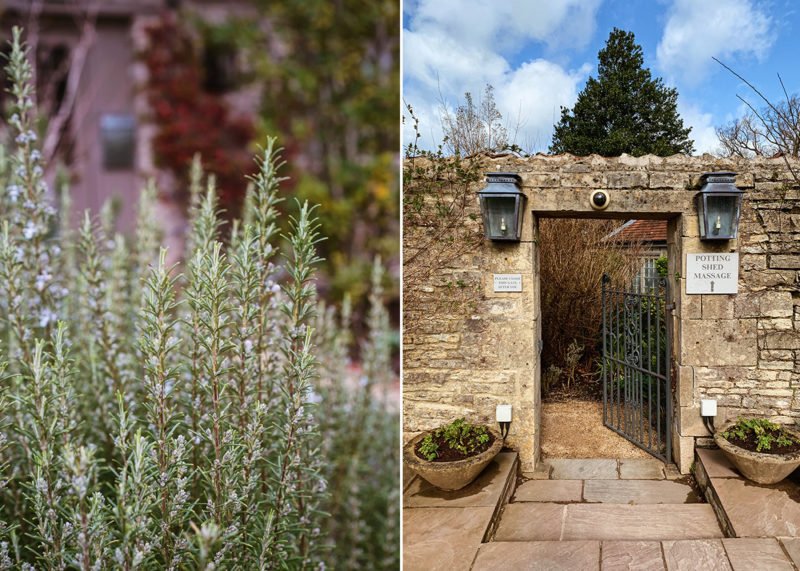
THE PIG NEAR BATH
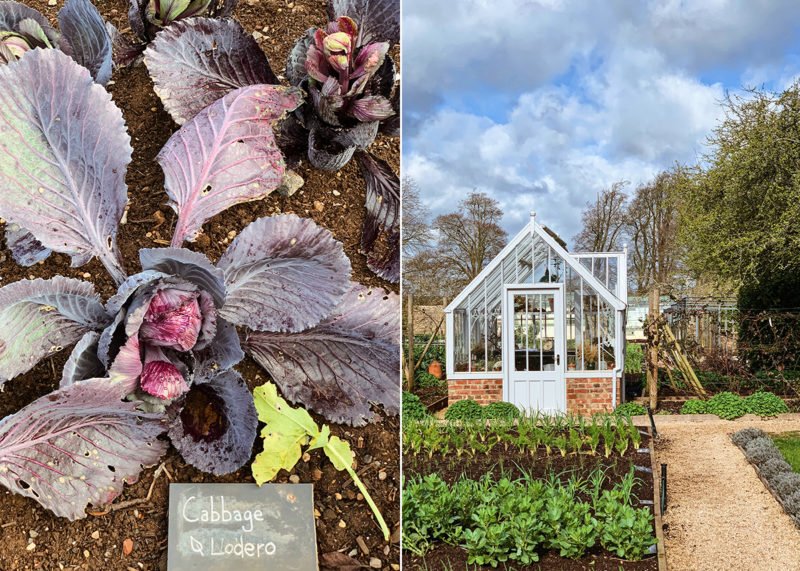
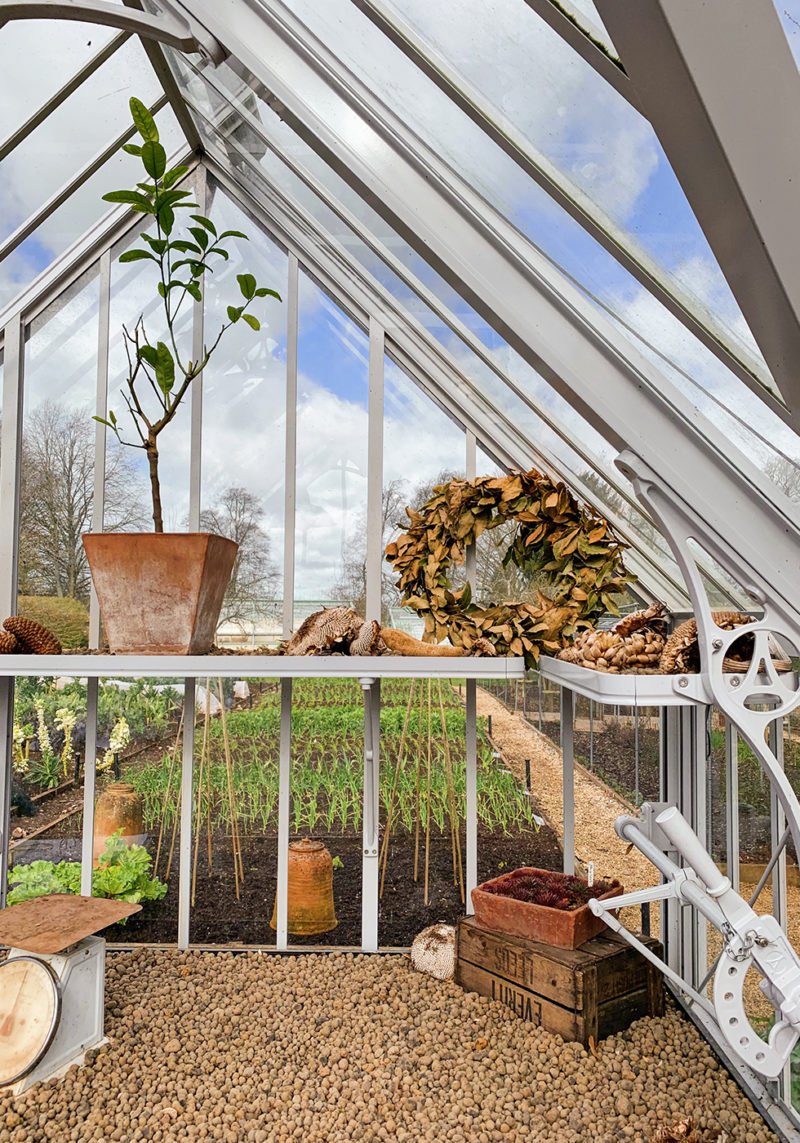
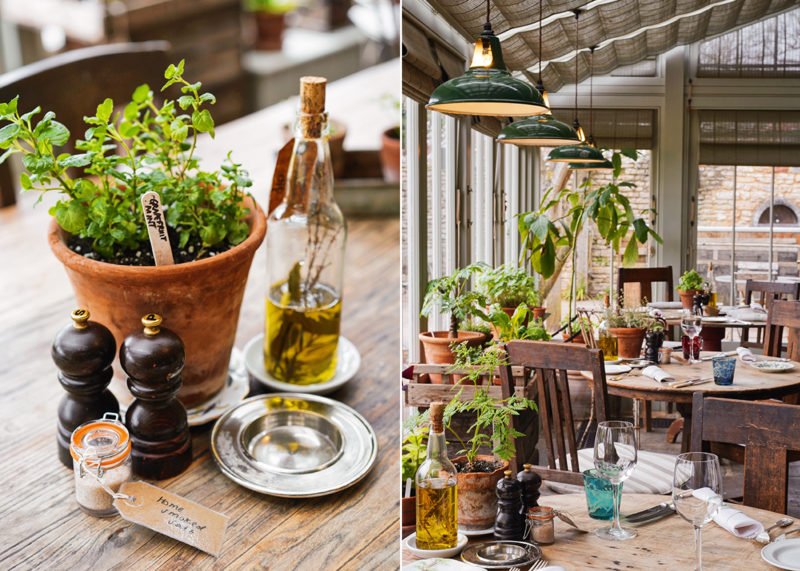
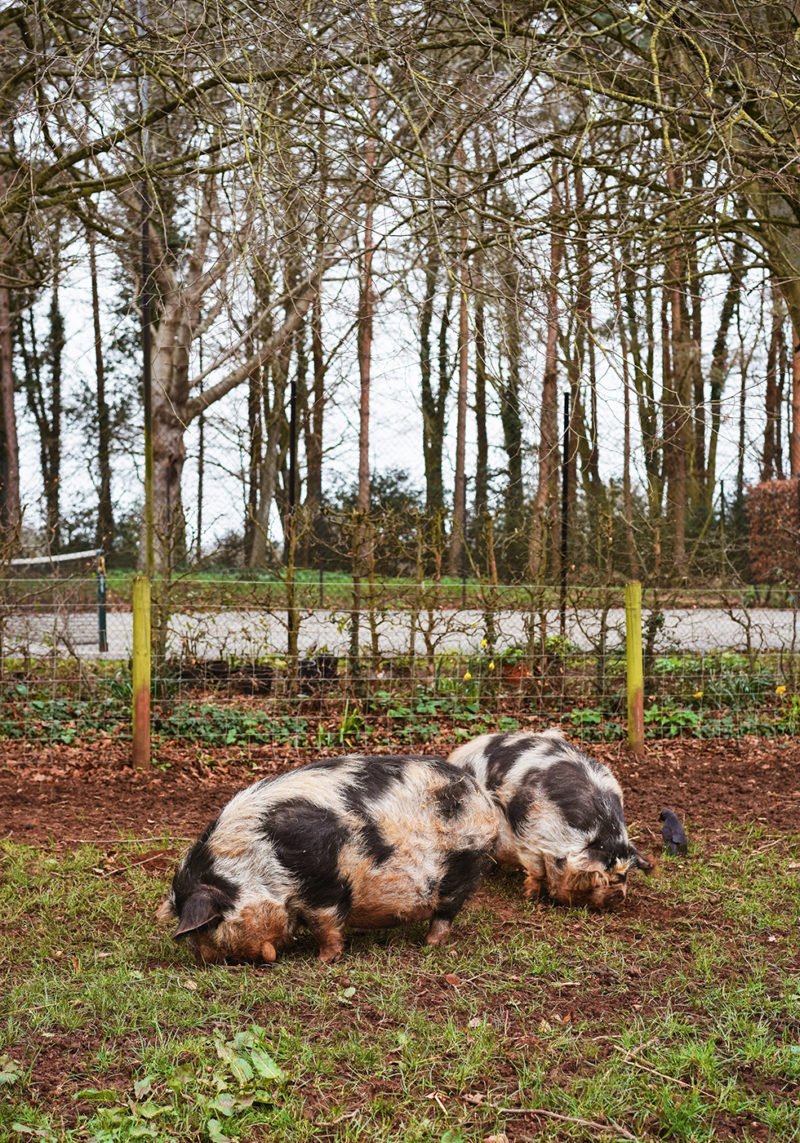
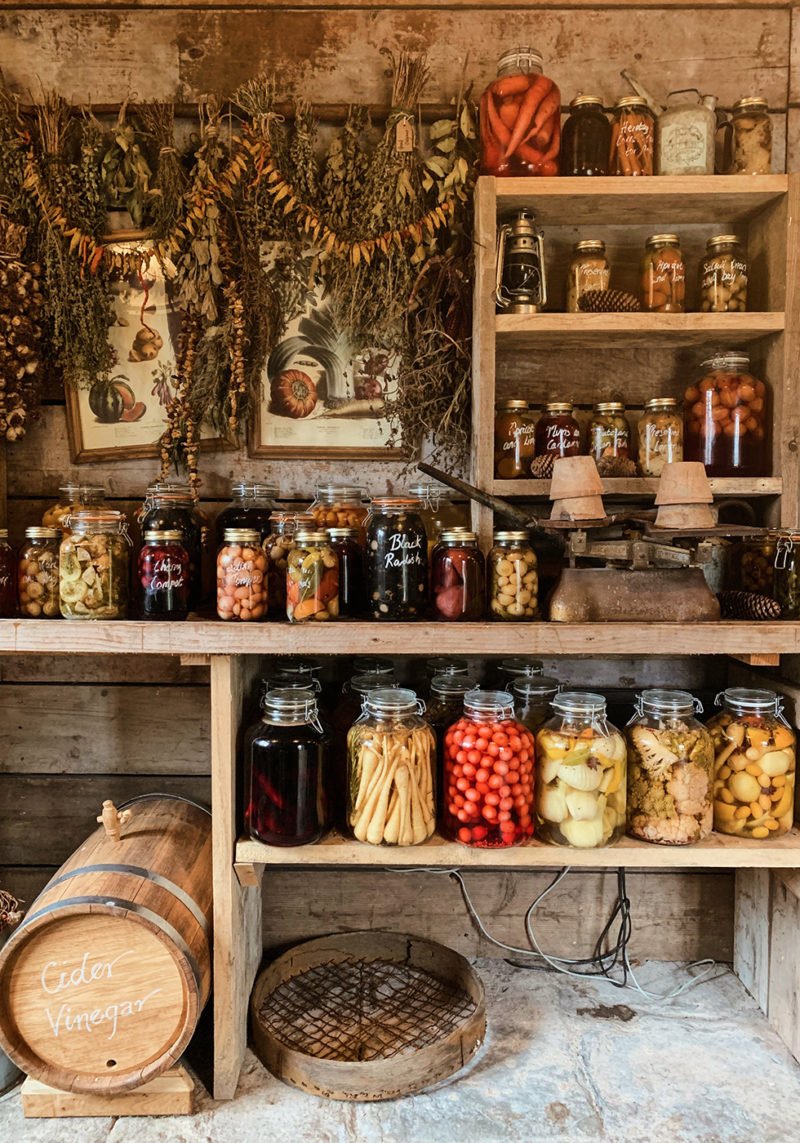
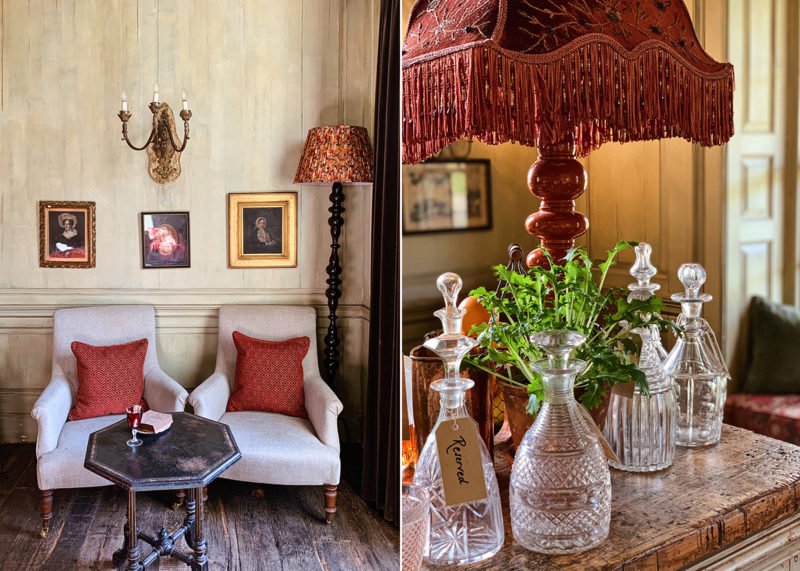
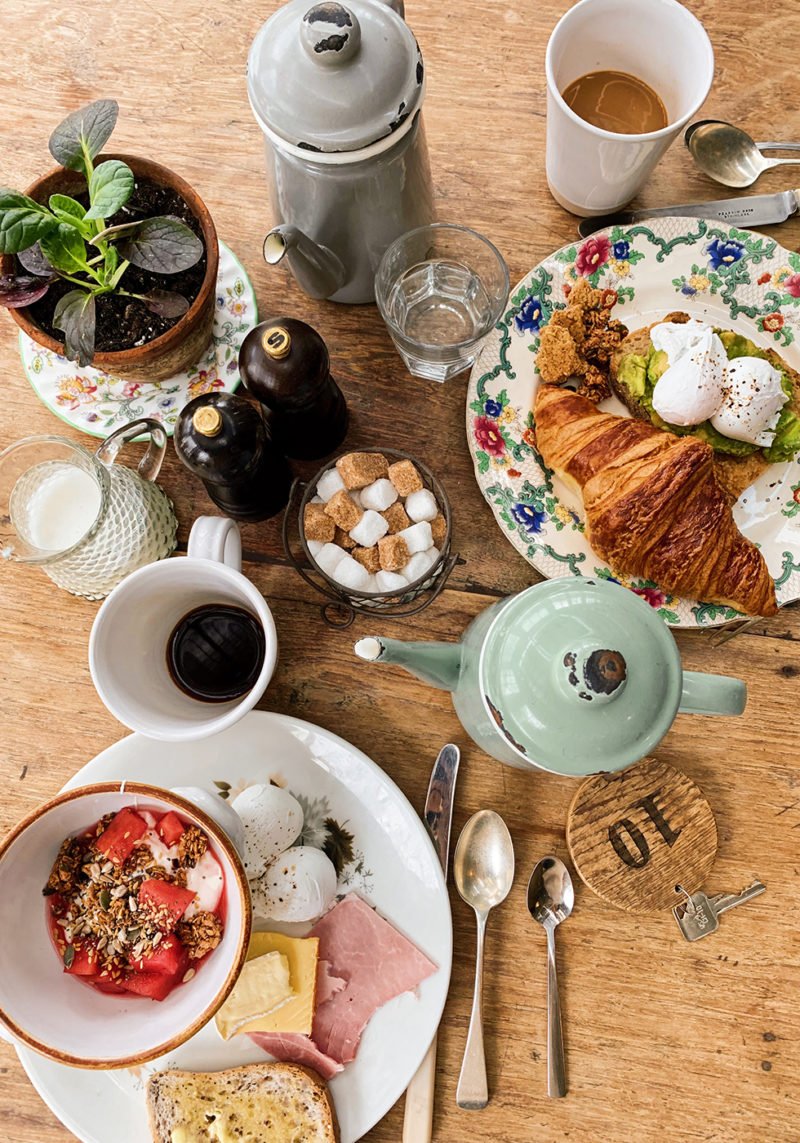
Just 25 minutes from Bath is The Pig near Bath, our home for the evening before we head into the Cotswolds. I couldn’t think of a more perfect jumping point to our English countryside adventure than this beautiful country house retreat nestled in the Mendip Hills of Somerset. As much as The Pig is about hospitality and a most charming and beautifully designed hotel, it is, at it’s core, centered around food. Everything here is driven by the gardeners and foragers of the kitchen garden, the highlight of their 20 acre property. Vegetables, herbs and fruit are grown and foraged in the garden and its polytunnels while pigs and chickens are reared on property for pork and eggs. Vegetables are pickled in the kitchen larder and liquors are infused with fruits and herbs for unique craft cocktails. Expect to wake up to an incredible breakfast spread of homemade granolas, yogurts, poached fruits, fresh eggs and even a shot of apple cider vinegar to help you digest and get on with your day. Enjoy lunch and dinner in the beautiful greenhouse/sunroom, surrounded by potted herbs and plants – and let their beautifully illustrated menu guide your meal selection. A local map will show where all the seasonal ingredients are sourced from, outside from the Pig’s own kitchen garden, of course. The Pig is heaven on earth for us foodies and truthfully, one night was not nearly enough time to spend on at this rustic, shabby-chic Shangri-La.
(Photography by HonestlyYUM. This post is sponsored by Visit Britain. All opinions are our own. Thank you for supporting the brands that keep HonestlyYUM up and running!)